DROPS Sky
DROPS Sky
74% Alpaca, 18% Polyamide, 8% Wool
from 5.40 € /50g
DROPS Kid-Silk
DROPS Kid-Silk
75% Mohair, 25% Silk
from 5.05 € /25g
Get the yarn to make this pattern from 31.35€.

The yarn cost is calculated from the pattern’s smallest size and the yarn’s cheapest product type. Looking for an even better price? You might find it on the DROPS Deals!

DROPS SS24

Feeling Whimsy

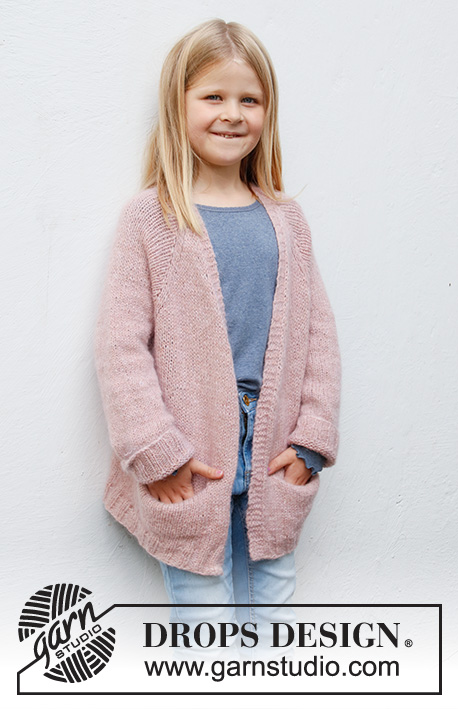
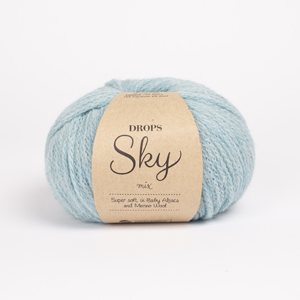
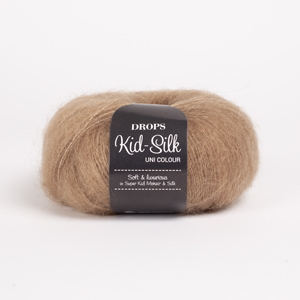
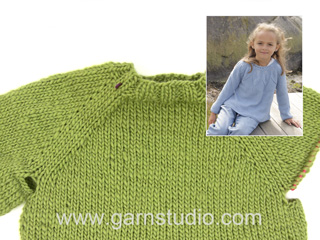
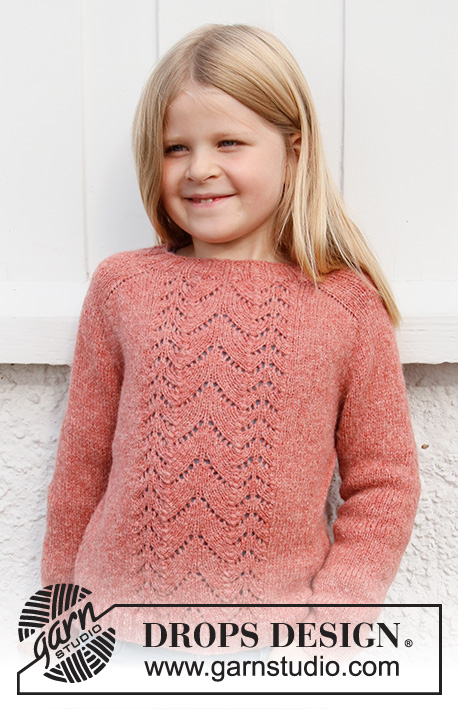
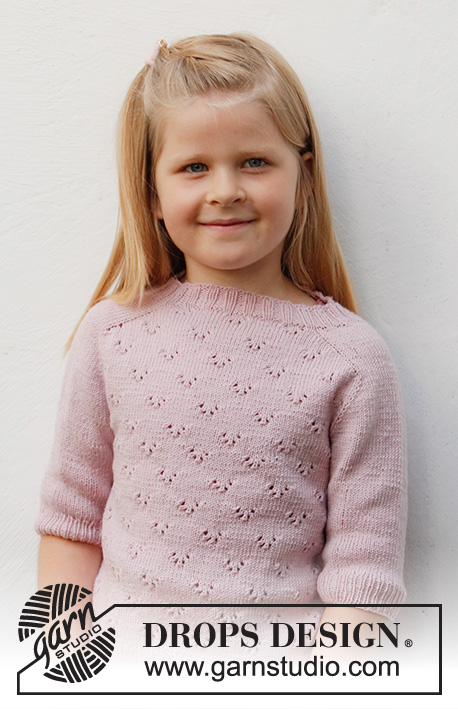
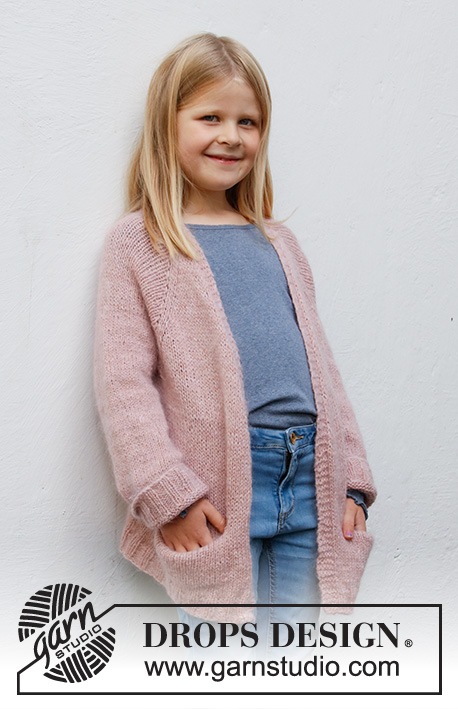
Knitted jacket for children in DROPS Sky and DROPS Kid-Silk. The piece is worked top down, with raglan and pockets. Sizes 3 to 14 years.

DROPS Baby & Children 38-19
DROPS Design: Pattern no sk-016-bn
Yarn group B + A
-----------------------------------------------------------

SIZES:
3/4 - 5/6 - 7/8 - 9/10 - 11/12 - 13/14 years
Equivalent to the child’s height in cm:
98/104 - 110/116 - 122/128 - 134/140 - 146/152 - 158/164

MATERIALS:
DROPS SKY from Garnstudio (belongs to yarn group B)
150-150-200-200-250-300 g colour 14, light lilac
And use:
DROPS KID-SILK from Garnstudio (belongs to yarn group A)
75-75-100-100-125-125 g colour 03, light pink

KNITTING TENSION:
15 stitches in width and 17 rows in height with stocking stitch and 1 strand of each quality = 10 x 10 cm.

NEEDLES:
DROPS DOUBLE POINTED NEEDLES SIZE 5.5 MM.
DROPS CIRCULAR NEEDLE SIZE 5.5 MM: Length 40 cm and 60 cm or 80 cm for stocking stitch.
DROPS DOUBLE POINTED NEEDLES SIZE 4.5 MM.
DROPS CIRCULAR NEEDLE SIZE 4.5 MM: Length 80 cm for rib.
Needle size is only a guide. If you get too many stitches on 10 cm, change to a larger needle size. If you get too few stitches on 10 cm, change to a smaller needle size.

-------------------------------------------------------

Alternative Yarn – See how to change yarns here
Yarn Groups A to F – Use the same pattern and change the yarn here
Yarn usage using an alternative yarn – Use our yarn converter here

-------------------------------------------------------

DROPS Sky
DROPS Sky
74% Alpaca, 18% Polyamide, 8% Wool
from 5.40 € /50g
DROPS Kid-Silk
DROPS Kid-Silk
75% Mohair, 25% Silk
from 5.05 € /25g
Get the yarn to make this pattern from 31.35€.

The yarn cost is calculated from the pattern’s smallest size and the yarn’s cheapest product type. Looking for an even better price? You might find it on the DROPS Deals!

Pattern instructions

-------------------------------------------------------

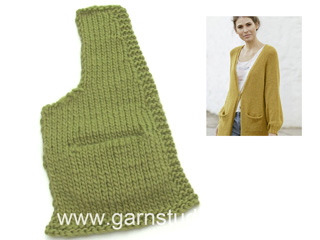
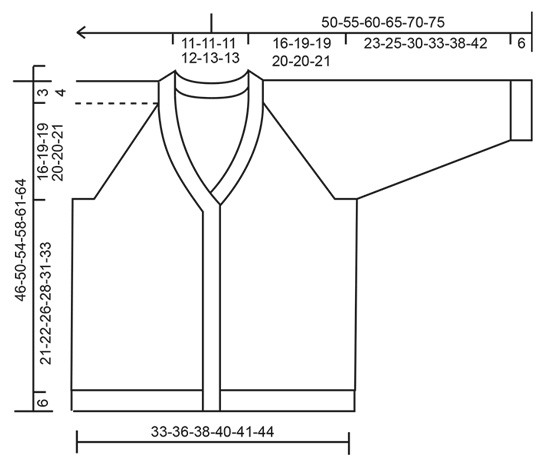
EXPLANATIONS FOR THE PATTERN:

-------------------------------------------------------

RIDGE/GARTER STITCH (worked back and forth):
Knit all rows.
1 ridge in height = Knit 2 rows.

INCREASE TIP (evenly spaced):
To work out how to increase evenly, count the total number of stitches on the needle (e.g. 110 stitches) minus the bands (e.g. 10 stitches) and divide the remaining stitches by the number of increases to be made (e.g. 10) = 10. 
In this example, increase by making 1 yarn over after each 10th stitch. Do not increase on the bands. On the next row (wrong side) purl the yarn overs twisted to avoid holes.

RAGLAN:
All increases are worked from the right side!
Increase to raglan in each transition between body and sleeves as follows: Work until there is 1 stitch left before marker thread, 1 yarn over, knit 2 (marker thread sits between these 2 stitches), 1 yarn over (= 2 stitches increased). On the next row (wrong side) purl the yarn overs twisted to avoid holes. Then work the new stitches in stocking stitch. A total of 8 stitches are increased on each increase-row.

V-NECK:
All increases are worked from the right side!
Make 1 yarn over inside the 5 band stitches and knit 1 (= 1 stitch increased on both sides). On the next row (wrong side) purl the yarn overs twisted to avoid holes. Then work the new stitches in stocking stitch. A total of 2 stitches increased on each increase-row).

DECREASE TIP (for sleeves): 
Decrease 1 stitch on either side of the marker thread as follows: Work until there are 3 stitches left before the marker thread, knit 2 together, knit 2 (marker thread sits between these 2 stitches), slip 1 stitch as if to knit, knit 1 and pass the slipped stitch over the knitted stitch.
CASTING-OFF TIP:
To avoid the cast-off edge being tight you can cast off with a larger size needle. If the edge is still tight, make 1 yarn over after approx. each 6th stitch at the same time as casting off; the yarn overs are cast off as normal stitches.

-------------------------------------------------

START THE PIECE HERE:

-------------------------------------------------------

JACKET – SHORT OVERVIEW OF THE PIECE:
The 2 pockets are worked first and will be worked into the piece later. Then you work 2 collar-pieces, which are then placed on circular needle when casting on stitches for the neck, as described in the text (the collar-pieces are sewn together mid-back and to the back of the neck to finish).
The yoke is continued back and forth with circular needle, from mid front and top down. AT THE SAME TIME stitches are increased for the V-neck and for raglan. The yoke is divided for the body and sleeves and the body continued back and forth with circular needle, then the pockets are continued. The sleeves are worked in the round with double pointed needles/short circular needle, top down.
POCKETS (first half):
Cast on 22-22-24-24-26-26 stitches (including 1 edge stitch on each side) with needle size 5.5 mm and 1 strand Sky and 1 strand Kid-Silk (= 2 strands). Work stocking stitch with 1 edge stitch in GARTER STITCH – read description above, on each side. REMEMBER THE KNITTING TENSION! When the piece measures 8-8-8-10-10-10 cm cast off both edge stitches = 20-20-22-22-24-24 stitches. Place the stitches on 1 thread. Work 1 more pocket in the same way. Lay them to one side. The other half of the pockets are worked and assembled to finish.

COLLAR:
Cast on 5 stitches with needle size 5.5 mm and 1 strand Sky and 1 strand Kid-Silk (= 2 strands) and work garter stitch back and forth (row 1 = right side) for 8-8-8-10-11-11 cm. Cut the strand and lay the collar to one side. Work 1 more collar in the same way.
Place the second collar-piece on circular needle size 5.5 mm without cutting the strand, cast on 36-36-36-46-48-48 stitches and then knit the 5 stitches from the first collar-piece = 46-46-46-56-58-58 stitches.
Purl 1 row from the wrong side over all stitches. Work the yoke as described below.

YOKE:
READ THE WHOLE SECTION BEFORE CONTINUING!
Place 4 markers in the piece without working the stitches as follows: Count 7 stitches (= front piece), insert 1 marker before the next stitch, count 8-8-8-12-12-12 stitches (= sleeve), insert 1 marker before the next stitch, count 16-16-16-18-20-20 stitches (= back piece), insert 1 marker before the next stitch, count 8-8-8-12-12-12 stitches (= sleeve), insert 1 marker before the next stitch. There are 7 stitches left after the last marker in all sizes (= front piece).
Continue with stocking stitch and 5 band stitches in garter stitch on each side towards mid front – AT THE SAME TIME on the first row from the right side, increase to RAGLAN in each transition between body and sleeves – read description above. Increase to raglan every 2nd row (i.e. each row from the right side) a total of 14-16-16-17-17-18 times. AT THE SAME TIME on row 4 (i.e. 2nd row from the right side) increase to V-NECK on each side towards mid front – read description above, as follows: Increase every 4th row a total of 6-6-7-7-8-8 times. After the last increase to raglan and after all increases for neck are worked the piece measures approx. 16-19-19-20-20-21 cm from the cast-on edge and there are 170-186-188-206-210-218 stitches. 

The next row is worked as follows from the wrong side: Work the first 27-29-30-31-32-33 stitches as before (= front piece), place the next 36-40-40-46-46-48 stitches on 1 thread for the sleeve, cast on 6-6-8-8-8-10 stitches (= in side under sleeve), purl 44-48-48-52-54-56 (= back piece), place the next 36-40-40-46-46-48 stitches on 1 thread for the sleeve, cast on 6-6-8-8-8-10 stitches (= in side under sleeve) and work the last 27-29-30-31-32-33 stitches as before (= front piece). Body and sleeves are finished separately. THE PIECE IS NOW MEASURED FROM HERE!

BODY:
= 110-118-124-130-134-142 stitches. Continue with stocking stitch and 5 band stitches in garter stitch on each side. When the piece measures approx. 13-14-18-18-21-23 cm from the division, work the next row from the right side as follows:
Work the first 11-11-11-13-13-13 stitches, place the next 20-20-22-22-24-24 stitches on 1 thread (the other half of the pocket will be worked here later), work the 20-20-22-22-24-24 stitches from the one pocket (make sure you continue on the right side of the pocket), work until there are 31-31-33-35-37-37 stitches left on the row, place the next 20-20-22-22-24-24 stitches on 1 thread, work the 20-20-22-22-24-24 stitches from the other pocket (make sure you continue on the right side of the pocket) and work the last 11-11-11-13-13-13 stitches.
Continue with stocking stitch and 5 band stitches in garter stitch on each side. When the piece measures 21-22-26-28-31-33 cm from the division, knit 1 row from the right side where you increase 10-10-12-14-14-14 stitches evenly spaced – read INCREASE TIP = 120-128-136-144-148-156 stitches. Purl 1 row from the wrong side (bands worked in garter stitch). Change to circular needle size 4.5 mm and work the next row from the right side as follows: 5 band stitches in garter stitch, * knit 2, purl 2 *, work from *-* until there are 7 stitches left, knit 2 and 5 band stitches in garter stitch. Continue this rib for 6 cm. Loosely cast off with garter stitch over garter stitch, knit over knit and purl over purl – read CASTING-OFF TIP! The jacket measures approx. 46-50-54-58-61-64 cm from the shoulder down.

SLEEVES:
Place the 36-40-40-46-46-48 stitches from the thread on the one side of the piece on double pointed needles/short circular needle size 5.5 mm and knit up 1 stitch in each of the 6-6-8-8-8-10 stitches cast on under the sleeve = 42-46-48-54-54-58 stitches. Insert a marker thread in the middle of the new stitches under the sleeve.
Start the round at the marker thread and work stocking stitch in the round.
When the sleeve measures 3 cm from the division, decrease 2 stitches mid-under the sleeve – read DECREASE TIP. Decrease like this every 3-3-3½-3-3½-3½ cm a total of 6-7-7-10-9-10 times = 30-32-34-34-36-38 stitches. Continue working without further increases, until the sleeve measures 23-25-30-33-38-42 cm from the division. There is approx. 6 cm left to finished length; try the jacket on and work to desired length. Knit 1 round where you increase 6-8-6-10-8-10 stitches evenly spaced = 36-40-40-44-44-48 stitches. Change to double pointed needles size 4.5 mm and work rib (knit 2, purl 2) for 4 cm. Cast off with knit over knit and purl over purl – remember CASTING-OFF TIP! The sleeve measures approx. 29-31-36-39-44-48 cm from the division. Work the other sleeve in the same way.

POCKETS:
Worked back and forth.
Place the 20-20-22-22-24-24 stitches from the thread on the right front piece on circular needle size 5.5 mm. On the first row cast on 1 edge stitch on each side = 22-22-24-24-26-26 stitches. Work stocking stitch with 1 edge stitch in garter stitch on each side until the pocket measures 8-8-8-10-10-10 cm, loosely cast off. Work the pocket on the left front piece in the same way.

ASSEMBLY:
Sew the pockets together, inside the 1 edge stitch. Then fasten to the inside of the jacket with small, neat stitches in each of the bottom corners (should not be visible on the right side). Sew the collar together at the back, with the seam on the wrong side. Stretch the collar slightly and sew it to the neckline at the back.

Diagram

diagram measurements

Each of our patterns has specific tutorial videos to help you.

Do you have a question? See a list of frequently asked questions (FAQ)

Knitting tension is what determines the final measurements of your work, and is usually measured per 10 x 10 cm. It is provided like so: number of stitches in width x number of rows in height - eg: 19 stitches x 26 rows = 10 x 10 cm.

The knitting tension is very individual; some people knit/crochet loosely while others work tightly. You adjust the knitting tension with the needle size, which is why the suggested needle size is only meant as a guide! You need to adjust this (up or down) to ensure that YOUR knitting tension matches the knitting tension provided in the pattern. If you work with a different knitting tension than provided you will have a different yarn consumption, and your work will have different measurements than what the pattern suggests.

The knitting tension also determines which yarns can replace each other. As long as you achieve the same knitting tension you can replace one yarn with another.

See DROPS lesson: How to measure your tension/gauge

See DROPS video: How to make a gauge tension swatch

The required amount of yarn is provided in grams, eg: 450 g. To calculate how many balls you’ll need you first need to know how many grams are in 1 ball (25g, 50g or 100g). This information is available if you click on the individual yarn quality on our pages. Divide the amount required with the amount of each ball. For example, if each ball is 50g (the most common amount), the calculation will be as follows: 450 / 50 = 9 balls.

The important thing when changing from one yarn to another is that the knitting/crochet tension remains the same. This is so that the measurements of the finished piece will be the same as on the sketch provided. It is easier to achieve the same knitting tension using yarns from the same yarn group. It is also possible to work with multiple strands of a thinner yarn to achieve the knitting tension of a thicker one. Please try our yarn converter. We recommend you to always work a test swatch.

Please NOTE: when changing yarn the garment might have a different look and feel to the garment in the photo, due to individual properties and qualities of each yarn.

See DROPS lesson: Can I use a different yarn than the one mentioned in the pattern?

All our yarns are categorised into yarn groups (from A to F) according to thickness and knitting tension – group A contains the thinnest yarns and group F the thickest. This makes it easier for you to find alternative yarns to our patterns, should you wish to switch yarn. All yarns within the same group have a similar knitting tension and can easily replace each other. However, different yarn qualities have different structures and properties which will give the finished work a unique look and feel.

Click here for an overview of the yarns in each yarn group

At the top of all our patterns you’ll find a link to our yarn calculator, which is a helpful tool should you wish to use a different yarn than suggested. By filling in the yarn quality you wish to replace, the amount (in your size) and number of strands, the calculator will present good alternative yarns with the same knitting tension. Additionally it will tell you how much you’ll require in the new qualities and whether you’ll need to work with multiple strands. Most skeins are 50g (some are 25g or 100g).

If the pattern is worked with multiple colours, every colour will have to be calculated separately. Similarly, if the pattern is worked with several strands of different yarns (for example 1 strand Alpaca and 1 strand Kid-Silk) you will have to find alternatives for each, individually.

Click here to see our yarn calculator

Since different yarns have different qualities and textures we have chosen to keep the original yarn in our patterns. However, you can easily find options among our available qualities by using our yarn calculator, or simply pick a yarn from the same yarn group.

It is possible that some retailers still have discontinued yarns in stock, or that someone has a few skeins at home that they would like to find patterns for.

The yarn calculator will provide both alternative yarn as well as required amount in the new quality.

If you think it's hard to decide what size to make, it can be a good idea to measure a garment you own already and like the size of. Then you can pick the size by comparing those measures with the ones available in the pattern's size chart.

You'll find the size chart at the bottom of the pattern.

See DROPS lesson: How to read size chart

The needle size provided in the pattern serves only as a guide, the important thing is to follow the knitting tension. And since knitting tension is very individual, you will have to adjust the needle size to ensure that YOUR tension is the same as in the pattern – maybe you’ll have to adjust 1, or even 2 needle sizes, up or down to achieve the correct tension. For this, we recommend that you work test swatches.

Should you work with a different knitting tension than the one provided, the measurements of the finished garment might deviate from the measurement sketch.

See DROPS lesson: How to measure your tension/gauge

See DROPS video: How to make a tension/gauge swatch

Working a garment top-down provides more flexibility and room for personal adjustment. For example it is easier to try the garment on while working, as well as making adjustments to length of yoke and shoulder caps.

The instructions are carefully explaining every step, in the correct order. Diagrams are adjusted to the knitting direction and are worked as usual.

The diagram depicts all rows/rounds, and every stitch seen from the right side. It is read from bottom to top, from right to left. 1 square = 1 stitch.

When working back and forth, every other row is worked from the right side and every other row is worked from the wrong side. When working from the wrong side, the diagram will have to be worked reversed: from left to right, knit stitches are purled, purl stitches are knit etc.

When working in the round every round is worked from the right side and the diagram are worked from right to left on all rounds.

See DROPS lesson: How to read knitting diagrams

The diagram depicts all rows/rounds, and every stitch seen from the right side. It is worked from bottom to top, from right to left.

When working back and forth every other row is worked from the right side: from right to left and every other row is worked from the wrong side: from left to right.

When working in the round, every row in the diagram are worked from the right side, from right to left.

When working a circular diagram you start in the middle and work your way outwards, counter clockwise, row by row.

The rows usually start with a given number of chain stitches (equivalent to the height of the following stitch), this will either be depicted in the diagram or explained in the pattern.

See DROPS lesson: How to read crochet diagrams

Instructions for working several diagrams after each other on the same row/round, will often be written like so: “work A.1, A.2, A.3 a total of 0-0-2-3-4 times". This means you work A.1 once, then A.2 is worked once, and A.3 is repeated (in width) the number of times provided for your size – in this case like so: S = 0 times, M = 0 times, L=2 times, XL= 3 times and XXL = 4 times.

The diagrams are worked as usual: begin with the first row in A.1, then work the first row in A.2 etc.

See DROPS lesson: How to read knitting diagrams

See DROPS lesson: How to read crochet diagrams

The total width of the garment (from wrist-to-wrist) will be larger in the larger sizes, despite the actual sleeves being shorter. The larger sizes have longer sleeve caps and wider shoulders, so there will be a good fit in all sizes.

The measurement sketch/schematic drawing provides information regarding the full length of the garment. If it’s a jumper or a jacket the length is measured from the highest point on the shoulder closest to the neckline, and straight down to the bottom of the garment. It is NOT measured from the tip of shoulder. Similarly, the length of yoke is measured from the highest point on the shoulder and down to where yoke is split into body and sleeves.

On a jacket measures are never taken along bands, unless specifically stated. Always measure inside band stitches when measuring the length.

See DROPS lesson: How to read a schematic drawing

Diagrams are often repeated on the round or in height. 1 repeat is the diagram the way it appears in the pattern. If it says to work 5 repeats of A.1 in the round, then you work A.1 a total of 5 times after/next to each other in the round. If it says to work 2 repeats of A.1 vertically/in height you work the entire diagram once, then begin again at the start and work the entire diagram one more time.

Chain stitches are slightly narrower than other stitches and to avoid working the cast-on edge too tight, we simply chain more stitches to begin with. The stitch count will be adjusted on the following row to fit the pattern and measurement sketch.

The rib edge is more elastic and will contract slightly compared to, for example, stocking stitch. By increasing before the rib edge, you avoid a visible difference in width between the rib edge and the rest of the body.

It’s very easy to cast off too tightly, and by making yarn overs while casting off (and simultaneously casting these off) you avoid a too tight cast off edge.

See DROPS video: How to bind off with yarn overs (yo)

To achieve an even increase (or decrease) you can increase on, for example: every 3rd and 4th row alternately, like so: work 2 rows and increase on the 3rd row, work 3 rows and increase on the 4th. Repeat this until the increase is complete.

See DROPS lesson: Increase or decrease 1 st on every 3rd and 4th row alternately

Should you prefer to work in the round instead of back and forth, you may of course adjust the pattern. You’ll need to add steeks mid-front (usually 5 stitches), and follow the instructions. When you would normally turn and work from the wrong side, simply work across the steek and continue in the round. At the end you’ll cut the piece open, pick up stitches to work bands, and cover the cut edges.

See DROPS video: How to knit steeks and cut open

Should you prefer to work back and forth instead of in the round, you may of course adjust the pattern so you work the pieces separately and then assemble them at the end. Divide the stitches for the body in 2, add 1 edge stitch in each side (for sewing) and work the front and back pieces separately.

See DROPS lesson: Can I adapt a pattern for circular needles into straight needles?

Pattern repeats can vary slightly in the different sizes, in order to get the correct proportions. If you’re not working the exact same size as the garment in the photo, yours might deviate slightly. This has been carefully developed and adjusted so that the complete impression of the garment is the same in all sizes.

Make sure to follow instructions and diagrams for your size!

If you have found a pattern you like which is available in women’s size it’s not very difficult to convert it to men’s size. The biggest difference will be the length of sleeves and body. Start working on the women size that you think would fit across the chest. The additional length will be worked right before you cast off for the armhole/sleeve cap. If the pattern is worked top-down you can add the length right after the armhole or before the first decrease on sleeve.

Regarding additional yarn amount, this will depend on how much length you add, but it is better with a skein too many than too few.

All yarns will have excess fibres (from production) that might come off as lint or shedding. Brushed yarns (ie hairier yarns) have more of these loose, excess fibres, causing more shedding.

Shedding also depends on what is worn under or over the garment, and whether this pulls at the yarn fibres. It’s therefore not possible to guarantee that there will be no shedding

Below are some tips on how to get the best result when working with hairier yarns:

1. When the garment is finished (before you wash it) shake it vigorously so the looser hairs come off. NOTE: do NOT use a lint roller, brush or any method that pulls at the yarn.

2. Place the garment in a plastic bag and put it in your freezer - the temperature will cause the fibres to become less attached to each other, and excess fibres will come off easier.

3. Leave in the freezer for a few hours before taking it out and shaking it again.

4. Wash the garment according to the instructions on the yarn label.

Pilling is a natural process that happens to even the most exclusive of fibers. It's a natural sign of wear and tear that is hard to avoid, and that is most visible in high friction areas of your garment like a sweater's arms and cuffs.

You can make your garment look as new by removing the pilling, using a fabric comb or a pill/lint remover.

Still can't find the answer you need? Then scroll down and leave your question so one of our experts can try to help you. This will be done normally within 5 to 10 working days.
In the meantime, you can read the questions and answers that others have left to this pattern or join the DROPS Workshop on Facebook to get help from fellow knitters/crocheters!

You might also like...

Post a comment to pattern DROPS Baby & Children 38-19

We would love to hear what you have to say about this pattern!

If you want to leave a question, please make sure you select the correct category in the form below, to speed up the answering process. Required fields are marked *.

Comments / Questions (37)

country flag Manoa wrote:

Bonsoir, Merci pour ce joli modèle, que je viens de commencer. Je procède peu à peu aux augmentations raglan et de l'encolure, mais le col tricoté au début ressemble à deux petites pattes étranges sur les côtés dont je ne vois guère, malgré les explications finales, comment elles pourraient devenir un col... Merci beaucoup !

12.11.2022 - 21:41

DROPS Design answered:

Bonjour Manoa, les deux parties du col tricotées au tout début seront ensuite assemblées entre elles le long de leur rang de montage puis cousues le long de l'encolure dos (sous ASSEMBLAGE). Bon tricot!

14.11.2022 - 10:41

country flag Annika wrote:

Jag förstår inte hur jag ska få ihop fickorna med själva koftan.

05.10.2022 - 18:09

DROPS Design answered:

Hei Annika. Ta en titt på denne videoen: Hur man stickar en lös ficka på insidan av ett plagg mvh DROPS Design

10.10.2022 - 11:20

country flag Laura wrote:

Hallo liebes Drops-Team, mit welcher Nadelstärke wurde die Maschenprobe gestrickt? Danke und VG

18.08.2022 - 12:52

DROPS Design answered:

Liebe Laura, benutzen Sie die grösseren Nadeln, dh di Rundnadel Nr 5,5 für die Maschenprobe für das Glattrechte Teil. Viel Spaß beim stricken!

18.08.2022 - 15:05

country flag Katharina wrote:

Gibt es eine Anleitung der Jacke für Erwachsene oder eine entsprechende Tabelle, wie ich es selber ausrechnen könnte? Lieben Dank für die Antwort.

14.07.2022 - 14:09

DROPS Design answered:

Liebe Katharina, eine Tabelle zum Umrechnen können wir Ihnen leider nicht bieten. Schauen Sie doch einfach mal bei den Damen-Anleitungen für DROPS Sky, ob Sie dort eine Jacke finden, die Ihnen ebenso gut (oder sogar noch besser? ;-)) gefällt. Viel Spaß beim Stöbern!

18.07.2022 - 13:30

country flag Doris Scharnetzki wrote:

Hallo Drops Team Eine Frage zum Rumpfteil nach dem Raglan: Warum werden die Maschen für den Rücken links gestrickt?

08.03.2022 - 20:15

DROPS Design answered:

Liebe Frau Scharnetzki, meinen Sie bei der Verteilung? Diese Reihe ist eine Rückreihe, so werden alle Maschen links gestrickt (nur die Blenden-Maschen werden bei der Rückreihen rechts gestrickt). Viel Spaß beim stricken!

08.03.2022 - 22:18

country flag Ingrid Pedersen wrote:

Hvordan færdiggør man forkant og nakke?

01.02.2022 - 16:15

DROPS Design answered:

Hej Ingrid, du starter med halskanterne... hvis du skriver mere nøjagtig hvor er du i opskriften og hvilken størrelse du strikker, så kan vi prøve at hjælpe dig :)

03.02.2022 - 15:53

country flag Annika Nordin wrote:

Hej, Jag har problem med stickfastheten. Har nu gjort oket som ska blir i storlek 7-8 år 19 cm och mitt ok är 13 cm. Såg att det var fler som haft samma problem. Kan jag bara fortsätta och sticka tills det blir 19 cm eller blir det fel när jag inte gör några ökningar? Tack, Annika

09.01.2022 - 08:39

country flag Heike wrote:

Mir ist nicht klar, wie die Taschen funktionieren. Bilden die angestrickten Teile zusammen eine Tasche, die unten zusammen genäht wird und dann quasi innen frei schwingt und an den Ecken fixiert wird? D.h. die im Rumpfteil angestrickte Taschenhälfte wird eingeklappt und bildet die Vorderseite der innen hängenden Tasche und der Teil, der an die stillgelegten 20 M gestrickt wird, bildet den hinteren Teil der innen liegenden Tasche? Oder ganz anders?

27.12.2021 - 23:11

DROPS Design answered:

Liebe Heike, dieses Video zeigt, wie man solche Taschen strickt. Hoffentlich kann es Ihnen helfen. Viel Spaß beim stricken!

03.01.2022 - 09:19

country flag Anneke Schutte wrote:

Goedemorgen, ik ben dit leuke vest aan het breien in maat 9/10 jaar. Echter, naar mijn idee klopt op de tekening het aantal centimeters niet. Onderaan is de afstand 40 cm. Helft is 20 cm. Bovenaan wordt aangegeven, vanaf middenachter: 6 (helft opzet) +20+33+6=65 cm. Tot zover klopt het. Als ik echter de mouwlengte (33+6=) 39 cm eraf trek houd ik geen 20 (is helft onderbreedte), maar 26 cm over. Waar komt die extra 6 cm vandaan? Alvast bedankt voor de reactie, vriendelijke groet, Anneke Schutte

22.12.2021 - 09:40

DROPS Design answered:

Dag Anneke,

De mouw schuift a.h.w. een stukje in de oksel, ik denk dat hier het verschil van 6 cm vandaan komt.

13.02.2022 - 10:04

country flag Gilbert Veronique wrote:

Point fantaisie 1j 2mes mon travaille par de biae

15.11.2021 - 11:45

DROPS Design answered:

Bonjour Mme Gilbert, je suis désolée, je ne comprends pas votre question, pourriez-vous reformuler s'il vous plaît? Merci d'avance!

15.11.2021 - 13:02