
Popular categories
Looking for a yarn?


|
||||||||||
Sweet Gleam |
||||||||||
 |
 |
|||||||||
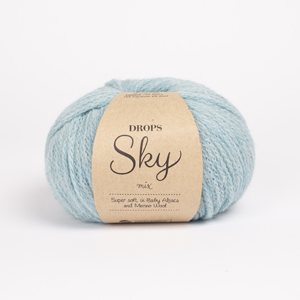
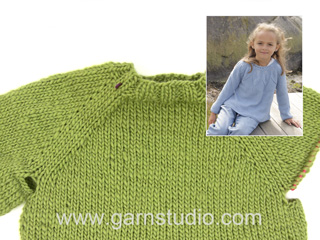
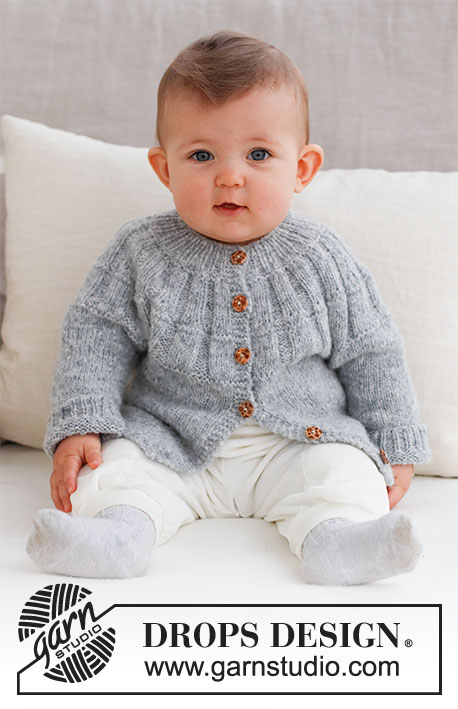
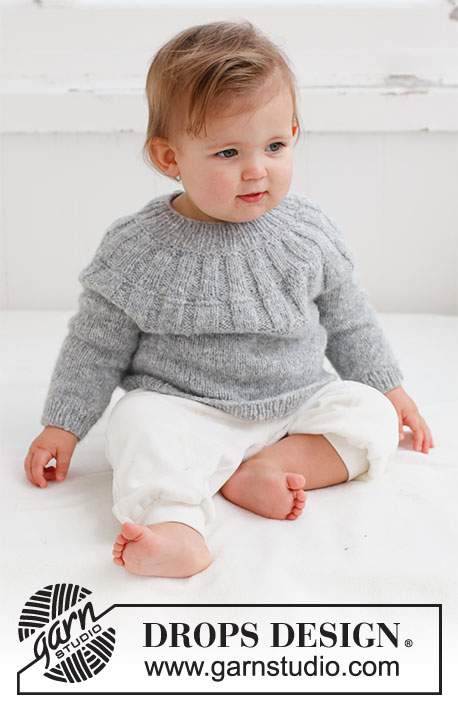
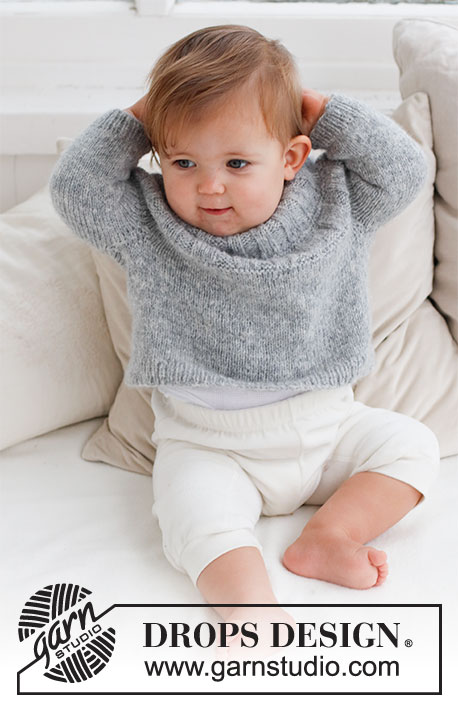
Knitted sweater for baby in DROPS Sky. The piece is worked top down, with round yoke and ribbing on the yoke. Sizes: Premature to 2 years.
DROPS Baby 43-5 |
||||||||||
|
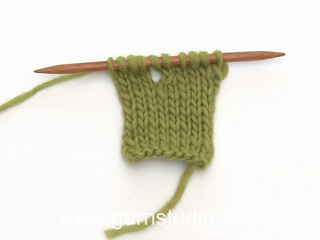
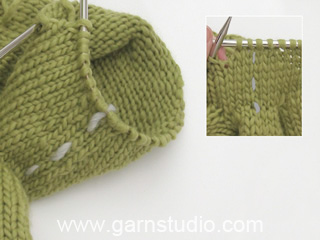
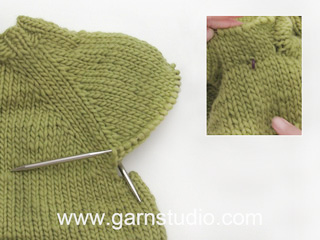
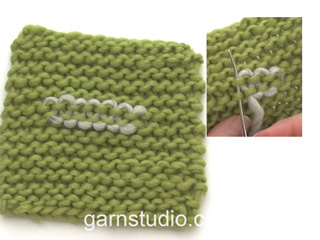
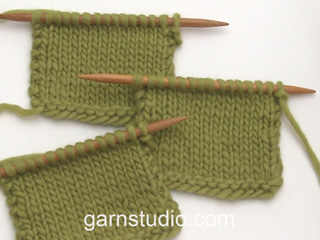
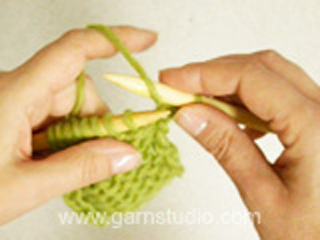
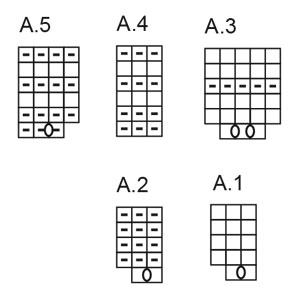
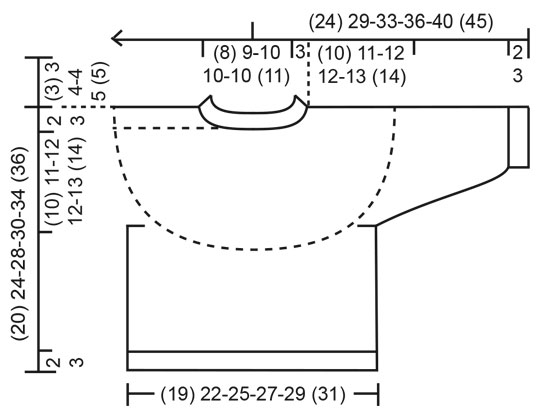
------------------------------------------------------- EXPLANATIONS FOR THE PATTERN: ------------------------------------------------------- RIDGE/GARTER STITCH (worked in the round): 1 ridge in height = 2 rounds; Knit 1 round and purl 1 round. RIDGE/GARTER STITCH (worked back and forth): Knit all rows. 1 ridge = knit 2 rows. PATTERN: See diagrams A.1 to A.5. The diagrams show all rows in the pattern from the right side. DECREASE TIP (for sleeves): Start 3 stitches left before the marker, knit 2 together, knit 2 (marker sits between these 2 stitches), slip 1 stitch as if to knit, knit 1 and pass the slipped stitch over the knitted stitch. BUTTONHOLES: (if you work a split mid-back). Work the buttonholes at the beginning of the row from the right side as follows: Knit 2 make 1 yarn over and knit the next 2 stitches together. On the next row (wrong side) knit the yarn over to leave a hole. The first buttonhole is worked when the neck measures 1½ cm = ½", the other 2 buttonholes are worked with (2½) 2½-3-3-4 (4) cm = (1") 1"-1⅛"-1⅛"-1½" (1½") between each one. ------------------------------------------------------- START THE PIECE HERE: ------------------------------------------------------- SWEATER – SHORT OVERVIEW OF THE PIECE: The neck and yoke are worked in the round with circular needle, from mid back and top down. If you work a split mid-back, you start the piece working back and forth before it is joined and continued in the round. The yoke is divided for body and sleeves and the body is continued in the round with circular needle. The sleeves are worked with double pointed needles. SWEATER WITHOUT SPLIT MID-BACK: Cast on (52) 56-60-64-68 (72) stitches with short circular needle size 3 MM = US 2.5 and DROPS Sky. Knit 1 round. Then work rib (knit 1, purl 1) for (2) 2-3-3-4 (4) cm = (3/4") ¾"-1⅛"-1⅛"-1½" (1½"). On the next round increase every other purl-1 to purl-2 by making 1 yarn over (on the next round purl the yarn overs twisted to avoid holes) = (13) 14-15-16-17 (18) increased stitches and (65) 70-75-80-85 (90) stitches. Continue the new rib until the neck measures (3) 3-4-4-5 (5) cm = (1⅛") 1⅛"-1½"-1½"-2" (2"). Insert 1 marker at the beginning of the round; the yoke is measured from this marker. Change to circular needle size 4 MM = US 6. Work 1 RIDGE over all stitches – read description above. AT THE SAME TIME on the first round adjust the number of stitches to (64) 68-76-80-84 (88) stitches. After the ridge work the next round as follows: * A.1, A.2 *, work from *-* to the end of the round = (96) 102-114-120-126 (132) stitches. Complete A.1 and A.2, then continue with knit 3 / purl 3 until the yoke measures (4) 5-5-5-6 (6) cm = (1½") 2"-2"-2"-2⅜" (2⅜") from the marker on the neck. Work the next round as follows: SIZE (<0): * A.3, A.4 *, work from *-* to the end of the round. SIZES 0/1 – 1/3 – 6/9 – 12/18 months (2 years): * A.3, A.5 *, work from *-* to the end of the round. After the first round, there are (128) 153-171-180-189 (198) stitches. Complete A.3 and A.4/A.5, then continue with knit 5 / purl 3 in size (<0) and knit 5 / purl 4 in the other sizes and until the yoke measures (8) 10-10-10-12 (12) cm = (3⅛") 4"-4"-4"-4¾" (4¾") from the marker. Continue from SWEATER below. SWEATER WITH SPLIT MID-BACK: Cast on (57) 61-65-69-73 (77) stitches with short circular needle size 3 MM = US 2.5 and DROPS Sky. Purl 1 row from the wrong side. Then work the next row as follows (from mid-back): 4 stitches in GARTER STITCH – read description above, * knit 1, purl 1 *, work from *-* until there are 5 stitches left, knit 1 and 4 stitches in garter stitch. Continue this rib for (2) 2-3-3-4 (4) cm = (3/4") ¾"-1⅛"-1⅛"-1½" (1½") – remember the BUTTONHOLES on the band – read description above. On the next row from the right side increase every other purl-1 to purl 2 by making 1 yarn over (on the next row knit the yarn overs twisted to avoid holes) = (12) 13-14-15-16 (17) stitches increased and (69) 74-79-84-89 (94) stitches. Continue the new rib until the neck measures (3) 3-4-4-5 (5) cm = (1⅛") 1⅛"-1½"-1½"-2" (2"). Insert 1 marker after the band; the yoke is measured from this marker! Change to circular needle size 4 MM = US 6. Work 1 ridge over all stitches – AT THE SAME TIME on the first row increase (1) 0-3-2-1 (0) stitches evenly spaced = (70) 74-82-86-90 (94) stitches. After the ridge, work the next row as follows from the right side: 4 stitches in garter stitch, * A.1, A.2 *, work from *-* until there are 6 stitches left, A.1 and 4 stitches in garter stitch = (101) 107-119-125-131 (137) stitches. Complete A.1 and A.2, then continue with knit 3 /purl 3 until the yoke measures (4) 5-5-5-6 (6) cm = (1½") 2"-2"-2"-2⅜" (2⅜") from the marker on the neck. Now join the piece as follows: Lay the button-band at the beginning of the row on top of the 4 last stitches, so that the band with the buttonholes are on the top. Knit the stitches from both bands together 2 and 2 (= 4 stitches decreased) = (97) 103-115-121-127 (133) stitches. Then continue the rest of the round as follows (after the 4 band stitches): SIZE (<0): * A.3, A.4 *, work from *-* until there are 3 stitches left before the band, work A.3, purl 2 (the first 2 stitches on band). SIZES 0/1 – 1/3 – 6/9 – 12/18 months (2 years): * A.3, A.5 *, work from *-* until there are 3 stitches left before the band, work A.3, purl 2 (the first 2 stitches on band). The round now begins in the middle of the 4 band stitches and after the first round, there are (129) 153-171-180-189 (198) stitches. Complete A.3 and A.4/A.5 (the 4 band stitches are now worked as shown in A.4), then continue with knit 5 / purl 3 over the other stitches in size (<0) and knit 5 / purl 4 in the other sizes and until the yoke measures (8) 10-10-10-12 (12) cm = (3⅛") 4"-4"-4"-4¾" (4¾") from the marker. Continue from SWEATER below. SWEATER: Knit 1 round and adjust the number of stitches to (132) 152-164-180-184 (200) stitches. Purl 1 round. Continue with stockinette stitch until the yoke measures (10) 11-12-12-13 (14) cm = (4") 4⅜"-4¾"-4¾"-5⅛" (5½") from the marker. On the next round divide for the body and sleeves as follows from mid-back: Work the first (18) 21-23-25-26 (29) stitches, place the next (30) 34-36-40-40 (42) stitches on a thread for the sleeve, cast on (4) 4-6-6-8 (8) stitches (in side under sleeve), work (36) 42-46-50-52 (58) stitches, place the next (30) 34-36-40-40 (42) stitches on a thread for the sleeve, cast on (4) 4-6-6-8 (8) stitches (in side under sleeve), work the last (18) 21-23-25-26 (29) stitches. The body and sleeves are finished separately. The piece is now measured from here! BODY: = (80) 92-104-112-120 (132) stitches. Continue with stockinette stitch in the round for a further (6) 9-12-12-15 (16) cm = (2⅜") 3½"-4¾"-4¾"-6" (6¼"). Knit 1 round where you increase (12) 14-16-16-18 (20) stitches evenly spaced = (92) 106-120-128-138 (152) stitches. Change to circular needle size 3 MM = US 2.5. Work rib (knit 1, purl 1) for (2) 2-2-3-3 (3) cm = (3/4") ¾"-¾"-1⅛"-1⅛" (1⅛"). Bind off a little loosely. The sweater measures approx. (20) 24-28-30-34 (36) cm = (8") 9½"-11"-11¾"-13⅜" (14¼") from the shoulder down SLEEVES: Place the (30) 34-36-40-40 (42) stitches from the thread on the one side of the piece on double pointed needles size 4 MM = US 6 and knit up 1 stitch in each of the (4) 4-6-6-8 (8) stitches cast on under the sleeve = (34) 38-42-46-48 (50) stitches. Insert a marker in the middle of the (4) 4-6-6-8 (8) stitches under the sleeve. Start at the marker and work stockinette stitch in the round for 1 cm = ⅜". Now decrease 2 stitches under the sleeve (does not apply to sizes <0 and 0/1 month) – read DECREASE TIP. Decrease like this every 4th round a total of (0) 0-1-1-1 (2) times = (34) 38-40-44-46 (46) stitches. Continue working until the sleeve measures (5) 8-10-13-15 (19) cm = (2") 3⅛"-4"-5⅛"-6" (7½") from the division. There is approx. (2) 2-2-3-3 (3) cm = (3/4") ¾"-¾"-1⅛"-1⅛" (1⅛") to finished length; try the sweater on and work to desired length. Knit 1 round where you decrease (0) 0-0-4-4 (2) stitches evenly spaced = (34) 38-40-40-42 (44) stitches. Change to double pointed needles size 3 MM = US 2.5 and work rib (knit 1, purl 1) for (2) 2-2-3-3 (3) cm = (3/4") ¾"-¾"-1⅛"-1⅛" (1⅛"). Bind off a little loosely The sleeve measures approx. (7) 10-12-16-18 (22) cm = (2¾") 4"-4¾"-6¼"-7" (8¾") from the division. Work the other sleeve in the same way. ASSEMBLY: If you have worked a split mid-back, sew the buttons onto the band without the buttonholes. |
||||||||||
Diagram explanations |
||||||||||
|
||||||||||
|
||||||||||
|
||||||||||
|
Have you made this or any other of our designs? Tag your pictures in social media with #dropsdesign so we can see them! Do you need help with this pattern?You'll find tutorial videos, a Comments/Questions area and more by visiting the pattern on garnstudio.com. © 1982-2024 DROPS Design A/S. We reserve all rights. This document, including all its sub-sections, has copyrights. Read more about what you can do with our patterns at the bottom of each pattern on our site. |
||||||||||


With over 40 years in knitting and crochet design, DROPS Design offers one of the most extensive collections of free patterns on the internet - translated to 17 languages. As of today we count 304 catalogs and 11422 patterns - 11417 of which are translated into English (US/in).
We work hard to bring you the best knitting and crochet have to offer, inspiration and advice as well as great quality yarns at incredible prices! Would you like to use our patterns for other than personal use? You can read what you are allowed to do in the Copyright text at the bottom of all our patterns. Happy crafting!
Comments / Questions (33)
Forstår ikke helt udtagninger ved bluse med slids. Jeg strikker str. 9/12 og får 190 m. Efter udt. I diagram A.3,A.5. Der står 180 i opskrten, efter 121 m. Før???
01.11.2023 - 15:17DROPS Design answered:
Hei June. Jo, husk at de 4 rillemaskene i hver side, altså 8 masker er strikket sammen 2 og 2 = 4 masker. Det var 125 masker, men nå er det 121 masker. Så strikkes A.3 og A.5 til det gjenstår 3 masker før knappestolpen, strikk deretter A.3 og så 2 vrang (de 2 første maskene fra knappestolpen). Når du strikker A.3 og A.5 øker du samtidig masker. mvh DROPS Design
06.11.2023 - 12:00Hallo,vielen Dank für die schönen Anleitungen!Beim Stricken der Diagramme werden ja in der ersten Reihe viele Umschläge gestrickt. Dort steht:in der nächsten Reihe den Umschlag wie im Diagramm gezeigt verschränkt stricken (um ein Loch zu vermeiden) . Stricke ich also in der nachfolgenden Rückreihe die Umschläge je nachdem Rechts verschränkt, bzw. Links verschränkt ab, oder immer nur rechts verschränkt(wie im entspr. Video)? Vielen Dank für eine kurze Antwort und einen schönen Tag!
26.10.2023 - 10:36DROPS Design answered:
Liebe Micki, die Umschläge werden entweder rechts (in A.1 z.B.) oder links (in A.2 z.B.) verschränkt gestrickt, dh genauso wie die anderen Maschen von der gleichen Runde. Viel Spaß beim stricken!
27.10.2023 - 09:45Hei, Må jeg justere pinnestørrelse om jeg skifter garn til Drops Merino Extra Fine? Vil helst strikke i et garn som er superwash
12.10.2023 - 12:48DROPS Design answered:
Hei Christina, Begge garnene tilhører samme garn gruppen B. Så da kan du bruke Drops Merino Extra Fine til denne oppskriften. Vi anbefaler alltid at du strikker en prøvelapp før du begynner, og justerer pinnestørrelsen hvis nødvendig, for å få riktig strikkefasthet. God fornøyelse!
13.10.2023 - 10:07Knoflíkové dírky vyplétáme v lemu průkrčníku na začátku lícové řady, takto: 2 oka upleteme hladce, 1x nahodíme a následující 2 oka upleteme hladce. Nemá tam byť následující 2 oka spleteme hladce
08.06.2023 - 09:45DROPS Design answered:
Dobrý den, Darino, díky za upozornění - opraveno! Hezký den, Hana
08.06.2023 - 10:27Wat betekent: Meerder op de volgende naald om de averecht-1 naar averecht-2 door 1 omslag te maken? En die meerderingen moeten die verspreid gebeuren?
10.03.2023 - 19:32DROPS Design answered:
Dag Lieve,
In het boordsteekpatroon brei je steeds 1 recht, 1 averecht. Op het moment dat je gaat meerderen wordt het 1 recht, 1 averecht, 1 recht, 2 averecht, enzovoort. Dus bij de ene averecht meerder je wel en bij de andere averecht meerder je niet.
12.03.2023 - 11:53Hej, I mönstret står: ”Efter rätstickningen stickas nästa varv så här: * A.1, A.2 *, sticka *-* varvet runt = (96) 102-114-120-126 (132) maskor på varvet. ” Betyder detta att jag stickar hela bilden, 4 varv räta och aviga och gör ökningarna på varv 5? Efter står det: ” Sticka A.1 och A.2 färdigt,” vad menas med det om jag ökat på sista varvet som bilderna visar? Mvh Åsa
19.02.2023 - 10:19DROPS Design answered:
Hei Åsa Du strikker A.1 + A.2 og dette gjentar du til det er 6 masker igjen på pinnen (altså: strikk A.1+A.2 + A.1+A.2 + A.1+A.2 + A.1+A.2 + A.1+A.2osv osv til det er 6 masker igjen, da strikker du A.1 og 4 masker rettstrikk). Du øker på 1. omgang med 1 kast hver gang du strikker A.1 og du øker på 1. omgang med 1 kast hver gang du strikker A.2. Når du har strikket A.1 og A.2 1 gang i høyden, har du 3 rett - 3 vrang hele pinnen ut. Deretter fortsettes det med 3 rett / 3 vrang til arbeidet måler (4) 5-5-5-6 (6) cm fra merket ved halsen. mvh DROPS Design
27.02.2023 - 14:21Hola! Cómo puedo ver las instrucciones en español ? Mil gracias 😊
13.02.2023 - 00:00Hola. He terminado A1, A2 y tengo 120 puntos haciendo la talla 6/9. El problema lo tengo cuando empiezo A3,A4,A5 ya que obtengo 161 puntos y no los 180 puntos que pone en el patrón. ¿Qué estoy haciendo mal? Muchas gracias!
17.01.2023 - 17:31Sprgm. til baby 43-5. Diagram. Strikker i Puna. Bluse med slids. Ved skift til rundpind 4 og 2 pinde retstrik med udtagning til 82 masker (str 1-3 mdr). \r\nHerefter A1 og A 2 diagram til 119 masker på pinden. Jeg får ikke 119 masker men mangler 28. Så jeg kan ikke forstå diagram og maskeantal. Dernæst strik A1 og A2 færdig!!! Håber i kan hjælpe. Vh Lene
24.11.2022 - 17:00DROPS Design answered:
Hei Lene. Har du fått med deg økningene når du strikker A.1 og A.2? Du starter med 65 masker (str. 1/3 mnd), og når vrangborden måler 3 cm økes annenhver 1 vrang til 2 vrang ved å lage 1 kast om pinnen = 79 masker. Fortsett vrangborden til arbeidet måler 4 cm. Bytt til rundpinne 4. Strikk 1 rille frem og tilbake over alle maskene samtidig som det på første omgang justeres maskeantallet til 82 masker. På neste pinne fra retten strikkes det 4 riller og så gjentas A.1, A.2 (18 ganger og 36 økte masker) til det gjenstår 6 masker på pinnen. Strikk A.1 og 4 masker i riller = 119 masker. mvh DROPS Design
28.11.2022 - 14:09Hola de nuevo quiero saber que tengo que hacer para unir la cenefa pero no la explicación de el primero con el cuarto etc sino que tengo que hacer para unirlas o sea empiezo la vuelta de derecho o reves la acabo o antes de terminar la uno como? Gracias
23.11.2022 - 20:33DROPS Design answered:
Hola Loly, al inicio de la fila colocas los puntos de una cenefa sobre la otra cenefa y se trabajan estos puntos juntos de derecho (como se explicó en la respuesta anterior). Después de estos 4 puntos continuar con los diagramas A.3/ A.4 o A.3/ A.5 según la talla.
27.11.2022 - 13:25