
Popular categories
Looking for a yarn?


|
|
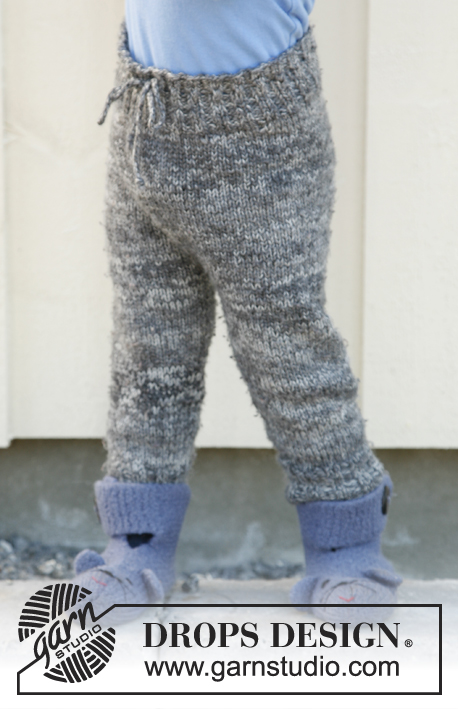
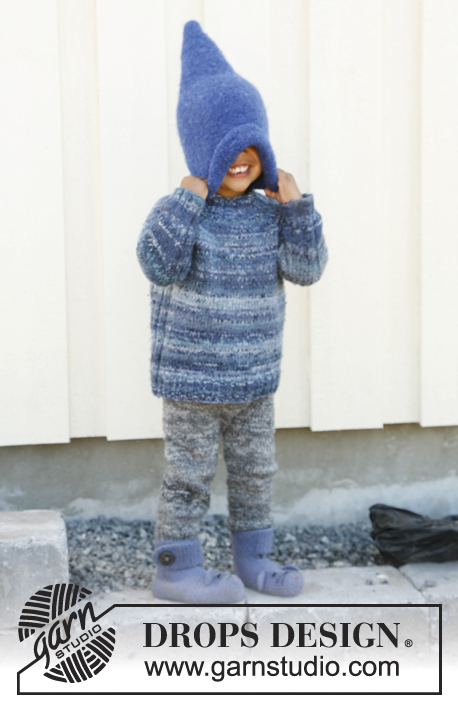
Little Wizard |
|
 |
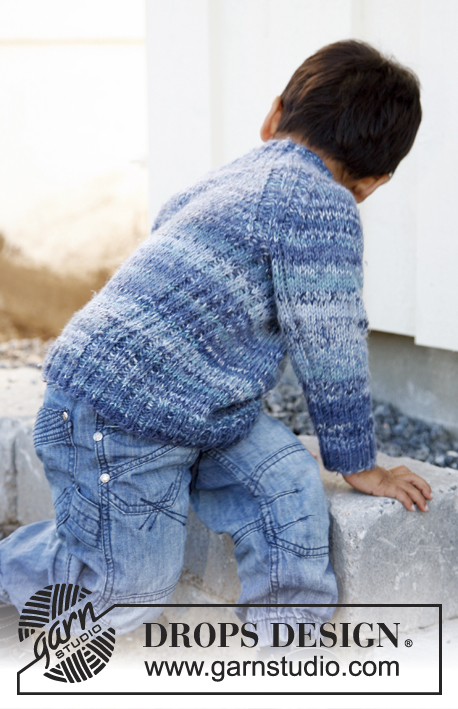 |
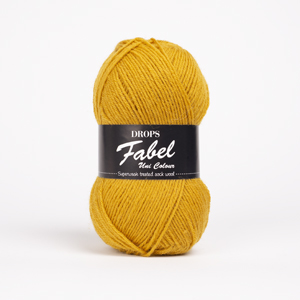
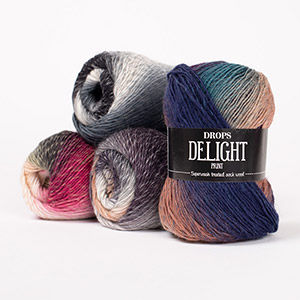
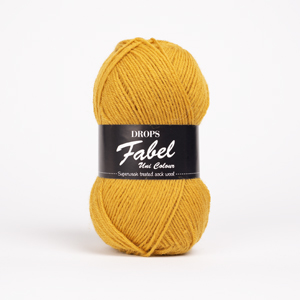
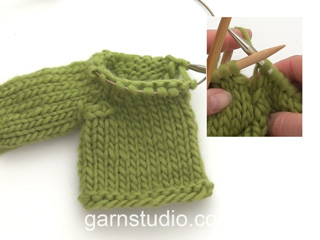
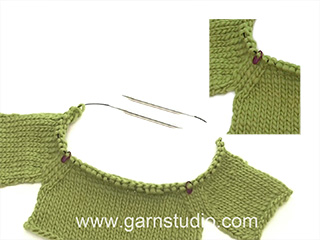
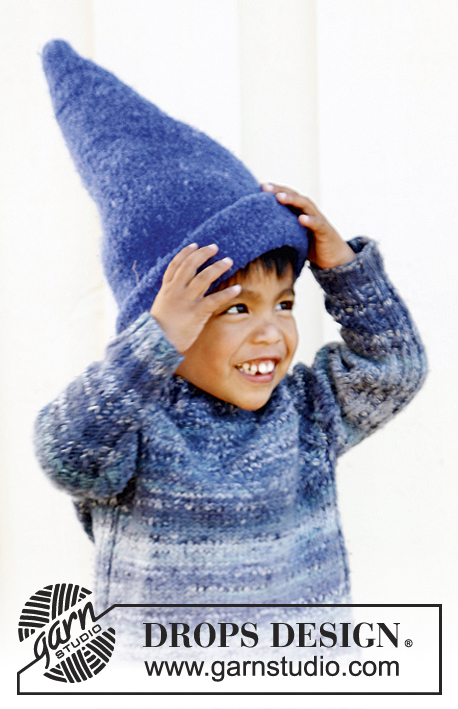
Knitted DROPS jumper with raglan in ”Fabel” and ”Delight”. Size 3 - 12 years.
DROPS Children 22-34 |
|
|
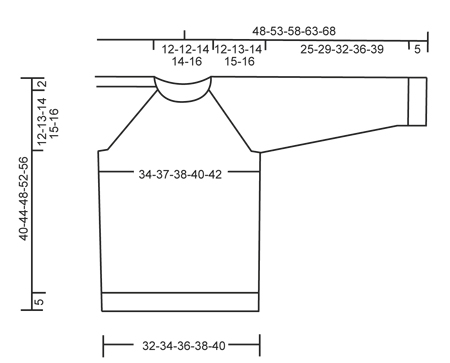
RAGLAN: Dec 1 st on each side of P 2, K 2, P 2 (= 6 sts) in all transitions between body and sleeves, i.e. 8 dec per round. Dec as follows (from RS): Work until 5 sts remain before marker, K 2 tog, P 2, K 2 (marker is between these 2 sts), P 2, slip 1 st as if to K, K 1, psso. --------------------------------------------------------- BODY: Worked in the round on circular needle. Cast on 128-136-144-152-160 sts on circular needle size 3.5 mm / US 4 with 1 strand Fabel and 1 strand Delight. Work rib = K 2/P 2 for 5 cm / 2". Switch to circular needle size 4.5 mm / US 7. Work next round as follows: Work the first 50-54-58-62-66 sts in stockinette st while AT THE SAME TIME dec 6-6-8-8-8 sts evenly (= 44-48-50-54-58 sts in stockinette st), work the next 14 sts in rib as before, then work 50-54-58-62-66 sts in stockinette st while AT THE SAME TIME dec 6-6-8-8-8 sts evenly (= 44-48-50-54-58 sts in stockinette st), work the last 14 sts in rib as before. There are now 116-124-128-136-144 sts on needle. Continue to work in stockinette st and rib in the sides. When piece measures 10-11-12-13-14 cm / 4"-4⅜"-4¾"-5⅛"-5½", inc 1 st on each side of the 14 rib sts in each side (= 4 sts inc), work these sts in stockinette st. Repeat inc when piece measures 18-20-22-24-26 cm / 7"-8"-8¾"-9½"-10¼" = 124-132-136-144-152 sts. REMEMBER THE GAUGE! When piece measures 26-29-32-35-38 cm / 10¼"-11⅜"-12½"-13¾"-15", bind off the middle 8 rib sts in each side for armholes (= K 1, P 2, K 2, P 2, K 1) = 108-116-120-128-136 sts remain on needle. Put piece aside and knit the sleeves. SLEEVE: Worked in the round on double pointed needles. Cast on 32-36-36-40-40 sts on double pointed needles size 3.5 mm / US 4 with 1 strand Fabel and 1 strand Delight. Work rib = K 2/P 2 for 5 cm / 2". Switch to double pointed needles size 4.5 mm / US 7. Continue to work as follows: 18-22-22-26-26 sts in stockinette st and work the last 14 sts in rib as before. AT THE SAME TIME when piece measures 10 cm / 4", inc 1 st on each side of rib sts, work the inc sts in stockinette st. Repeat inc every 3-3½-3-3½-3 cm / 1⅛"-1¼"-1⅛"-1¼"-1⅛" a total of 7-7-9-9-11 times = 46-50-54-58-62 sts. When piece measures 30-34-37-41-44 cm / 11¾"-13⅜"-14½"-16⅛"-17¼", bind off the middle 8 rib sts under sleeve (i.e. K 1, P 2, K 2, P 2, K 1) = 38-42-46-50-54 sts remain on needle. Put piece aside and knit another sleeve. YOKE: Slip sleeves on to same circular needle as body where armholes were bound off = 184-200-212-228-244 sts. Insert a marker in all transitions between sleeves and body = 4 markers. Continue with P 2, K 2, P 2 in all transitions between body and sleeves, work the other sts in stockinette st. AT THE SAME TIME on 4th-2nd-2nd-2nd-2nd round dec for RAGLAN – see explanation above. Repeat dec every other round a total of 13-15-16-18-19 times. AT THE SAME TIME when piece measures 36-39-42-45-48 cm / 14¼"-15¼"-16½"-17¾"-19" mid front, slip the middle 14-14-14-14-16 sts on a stitch holder for neck. Then continue back and forth on needle – at the same time bind off 1 st at beg of every row 2 times each side. After all dec for raglan and bind offs for neck, 62-62-66-66-72 sts remain on needle. NECK: Switch to double pointed needles size 3.5 mm / US 4. Pick up approx. 20 to 22 sts at the front of neck (including sts on stitch holder) = 82 to 94 sts. Work 1 round with K over K and rib over rib – at the same time adjust no of sts so that there are 6 sts in stockinette st over each sleeve, 26-26-30-30-34 sts over front piece and 18-18-22-22-26 sts over back piece and 6 raglan sts as before in all transitions between body and sleeves. There are now 80-80-88-88-96 sts on needle. Continue with rib = K 2/P 2 over all sts – continue raglan sts in P 2, K 2, P 2, the other sts should now fit the rib. When neck measures approx. 5-6-7-8-9 cm / 2"-2⅜"-2¾"-3⅛"-3½", bind off with K over K and P over P. ASSEMBLY: Sew the openings under the sleeves tog. |
|
|
|
|
Have you made this or any other of our designs? Tag your pictures in social media with #dropsdesign so we can see them! Do you need help with this pattern?You'll find tutorial videos, a Comments/Questions area and more by visiting the pattern on garnstudio.com. © 1982-2024 DROPS Design A/S. We reserve all rights. This document, including all its sub-sections, has copyrights. Read more about what you can do with our patterns at the bottom of each pattern on our site. |
|


With over 40 years in knitting and crochet design, DROPS Design offers one of the most extensive collections of free patterns on the internet - translated to 17 languages. As of today we count 304 catalogs and 11422 patterns - 11417 of which are translated into English (US/in).
We work hard to bring you the best knitting and crochet have to offer, inspiration and advice as well as great quality yarns at incredible prices! Would you like to use our patterns for other than personal use? You can read what you are allowed to do in the Copyright text at the bottom of all our patterns. Happy crafting!
Comments / Questions (11)
Modell FA-001-bn\\r\\nJag vill sticka den i Fabel Havsblå 162 men blir fundersam på att det står dels Fabel och dels Delight angivet men jag ser inte i beskrivningen hur de olika garnerna kommer in. Om jag vill sticka den i havsblå stl110/116 räcker det med 200 g till hela tröjan??\\r\\nTacksam för\r\n svar Hur lång leveranstid har ni efter jag beställt ?
23.05.2024 - 14:45DROPS Design answered:
Hej Kerstin, du behøver 200 g af hver kvalitet. DROPS Delight er desværre udgået, men du kan bruge 2 tråde DROPS Fabel istället :)
23.05.2024 - 14:56Olá, Tenho um projeto iniciado e não sei como dar prosseguimento. Como devo calcular os aumentos para as mangas. Tenho 40 pontos de canelado para o punho e preciso aumentar para chegar a 80 pontos e ficar com (30 de circunferência) e 35cm para a parte de baixo da manga para iniciar a manga raglan. Agradeço antecipadamente. Márcia
16.08.2021 - 03:10DROPS Design answered:
Bom dia, Os aumentos para as mangas são feitos de cada lado do canelado a cada 3 centímetros num total de 7 aumentos para ter 62 pontos. Se quer ter 80 pontos deve diminuir o espaço entre os aumentos. Por exemplo, fazer aumentos a cada 2 centímetros (mas é só uma sugestão) num total de 10 vezes. Dica: confira a altura para obter os 35 cm antes de iniciar a manga raglan. Bons tricôs!
16.08.2021 - 10:59Det står i oppskriften at 3 /4 år skal være mellom 98 og 104 cm. Kan det være riktig. Virker veldig stort. Jeg har strikket med rett strikkefasthet og får bare ca. 65 cm
29.06.2021 - 14:29DROPS Design answered:
Hej Jorunn, det er barnets størrelse (som det står i købekläder). Du finde målene i måttskissen nederst i mønsteret :)
30.06.2021 - 14:47Bonjour, En taille 5-6 ans, je suis à l'étape de l'encolure et je me pose une question. Arrivé à 39cm de hauteur, j'ai 120m. J'ai mis 14m en attente pour le col et je continue en aller retour. Il me reste à cette étape encore 10 rangs à faire pour terminer les diminutions du raglan. Est-ce que je dois bien rabattre 2 mailles au début de chaque rang ? Si oui, ces diminutions vont "empiéter" sur le raglan, est-ce normal ? Merci pour votre aide ! Eloïse
04.06.2020 - 22:56DROPS Design answered:
Bonjour Eloïse, dans ce modèle, on met (en taille 5/6 ans) les 14 m centrales en attente puis on continue en allers et retours, les augmentations du raglan continuent comme avant sur l'endroit, mais en même temps, vous rabattrez 2 fois 1 maille de chaque côté pour l'encolure, ce qui va donc prendre 2 rangs (1 sur l'endroit et 1 sur l'envers). Bon tricot!
05.06.2020 - 07:34Jag har köpt Drops garn enligt beskrivning för att sticka denna tröja men färgen stämmer inte alls med bilderna. Min tröja blir väldigt mörk blå med lite ljusa meleringar. På bilden är tröjan ljusblå/himmelsblå. Jag är jättebesviken! Har det blivit fel i beskrivningen??? Om jag vetat detta skulle jag köpt en annan färg på Delight-garnet. Vad ska jag göra?
16.02.2020 - 10:49DROPS Design answered:
Hej Carin, jo det er de farver som er brugt i blusen. Meleringerne kan variere efter hvilke farver som strikkes sammen. Men hvis du hellere vil have en lysere bluse, så er jeg sikker på at du kan bytte farverne ud. God fornøjelse!
18.02.2020 - 10:39Prachtig truitje, jammer dat alles is beschreven voor een rondbrei naald . Ik ga het proberen , hoop dat het gaat lukken deze manier van breien. Dank u voor het patroon.
12.11.2017 - 16:17Is het mogelijk om de patronen ook leesbaar te maken voor mensen die niet rondbreinaalden willen gebruiken? Nu moet ik steeds het hele patroon proberen te doorgronden en herschrijven voor gewone naalden. Waarschijnlijk is dat voor jullie gesneden koek...
06.01.2017 - 21:58DROPS Design answered:
Hoi Marion. Wij hebben niet de ressources om patronen te herschrijven naar individuele wensen. Wil je één van onze gratis patroon aanpassen, dan kan je het zelf doen. Je kan eventueel deze les gebruiken ter ondersteuning
09.01.2017 - 15:05In de beschrijving voor het lijf komen de aangegeven cm. voor het afkanten van de armsgaten niet overeen met de maten verderop bij het (tel)patroon.
29.05.2015 - 14:18Fantastisk opskrift (obs. brugte kun 8 ngl. til st.12 år) Hvad skal jeg øge med, hvis jeg vil strikke blusen i st small ??? Findes der evt. en opskrift magen til til voksne ? Mvh.: Birthe
18.11.2013 - 10:03DROPS Design answered:
Hej Birthe. Tak for det. Vi kan desvaerre ikke hjaelpe med at lave opskriften större (du kan pröve med strikkefastheden og faa evt hjaelp i din butik). Men vi har ogsaa flere modeller i voksenstörrelse med raglan. Du kan söge paa et lignende mönster og saa evt tilpasse mönstret fra dette mönster i det andet. God fornöjelse.
18.11.2013 - 18:06Hej, jeg prøver at strikke den i str 5år. Har nu trævlet op 3gange da den bliver for lille. Er gået en pind str op. Og med 192 masker. Jeg strikker ikke stramt, markerne glider fint på pinden. Hvad kan jeg have gjort forkert?
06.03.2012 - 11:37DROPS Design answered:
Hvis du begynder med at strikke en lille strikkeprøve og får 18m på 10 cm, så får du nøjagtig de mål som står nederst i måleskitsen. Se hvilke mål/størrelse som passer dit barn. God fornøjelse!
08.03.2012 - 10:32