
Popular categories
Looking for a yarn?


|
||||||||||||||||||||||
White Heat |
||||||||||||||||||||||
 |
 |
|||||||||||||||||||||
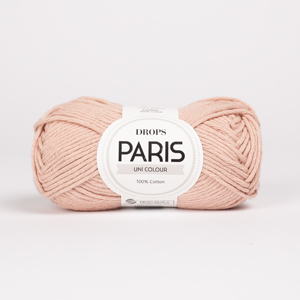
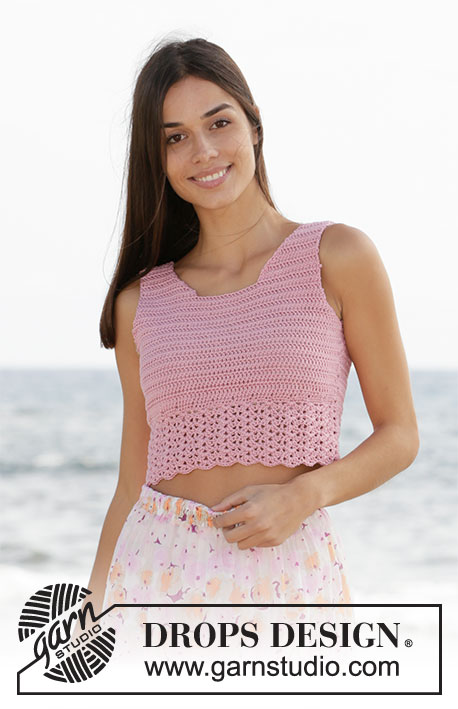
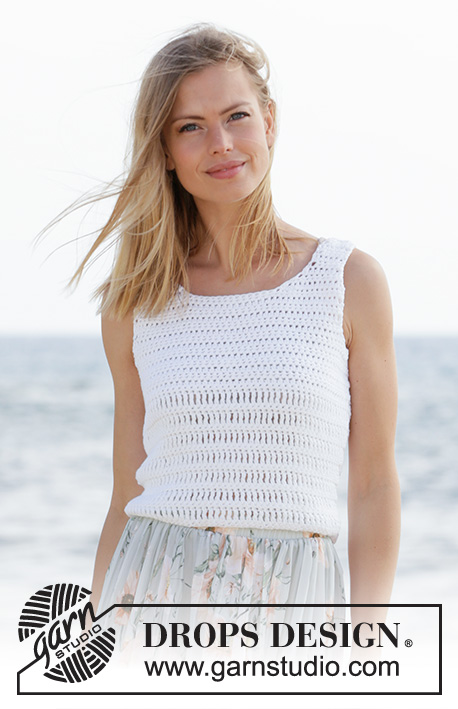
Crocheted top in DROPS Paris. Size: S - XXXL
DROPS 211-6 |
||||||||||||||||||||||
|
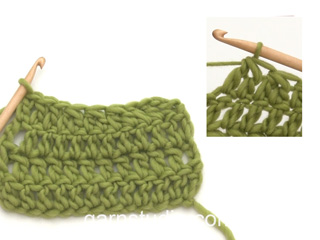
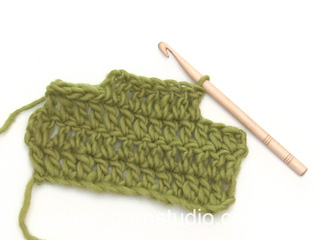
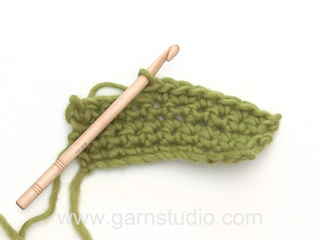
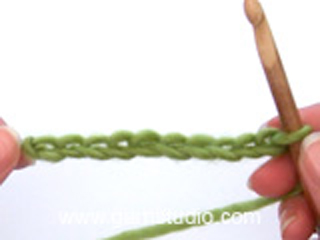
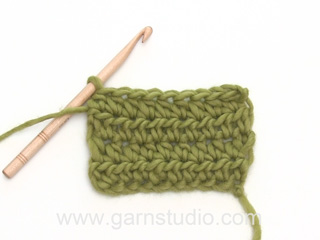
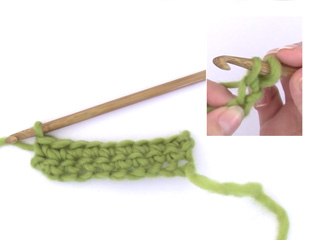
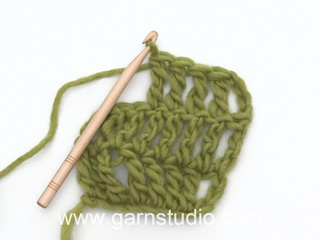
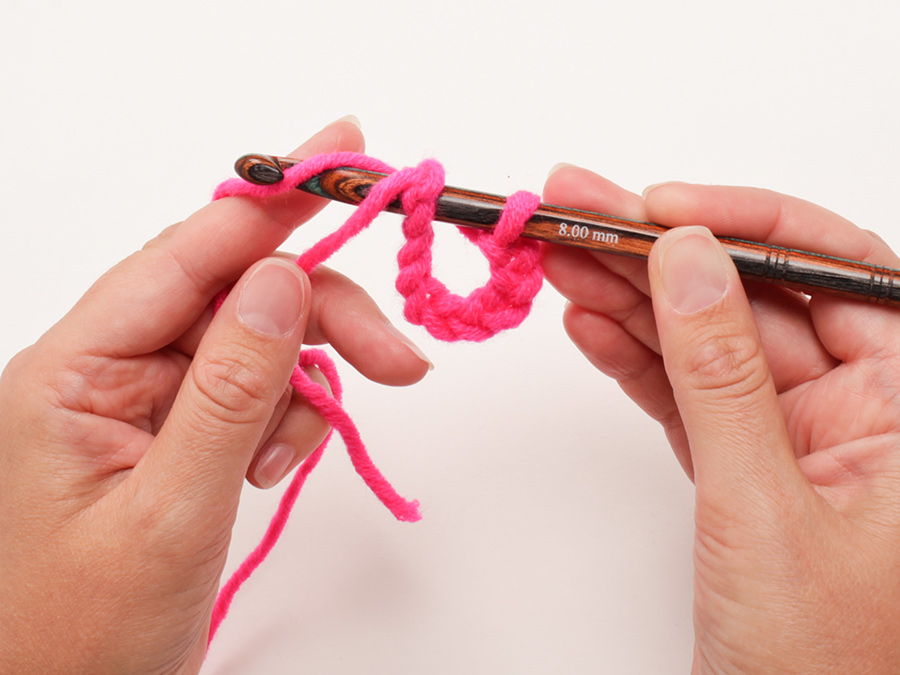
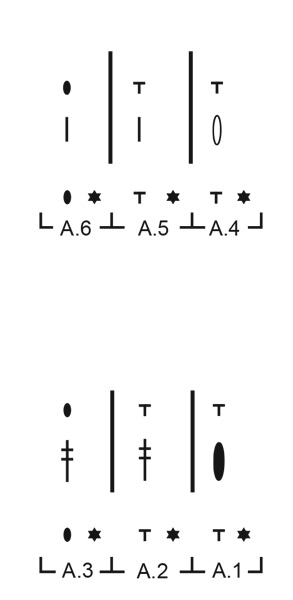
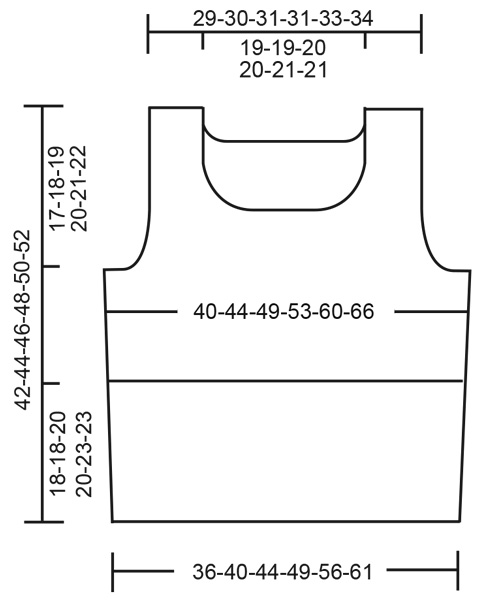
---------------------------------------------------------- EXPLANATION FOR THE PATTERN: ---------------------------------------------------------- CROCHET TIP FOR CHAIN STITCH: If you work at the end of crochet hook the chain stitch will often be too tight. 1 chain stitch should be just as long as 1 single crochet/treble crochet/half double crochet is wide. PATTERN. See diagrams A.1 to A.6. CROCHET INFORMATION (applies to A.1, A.3, A.4 and A.6): At the beginning of every row with single crochets, replace first single crochet with 1 chain stitch. At beginning of every row with treble crochets replace first treble crochet with 4 chain stitches. At the beginning of every row with half double crochet replace first half double crochet with 2 chain stitches. INCREASE TIP (applies to sides on back piece and front piece): Increase 1 stitch by working 2 stitches in same stitch. DECREASE TIP-1 (applies to armholes): At the beginning of row: Replace number of stitches to decrease with 1 slip stitch. At end of row: Do not work over stitches to be decreased. DECREASE TIP-2 (applies to neck at the back): Decrease 1 stitch by working the 2 outermost stitches towards the neck together as follows: Make 1 yarn over, insert hook in next stitch, get the yarn, make 1 yarn over, insert hook in next stitch, get the yarn, make 1 yarn over and pull yarn through all 5 loops on hook (= 1 half double crochet decreased). DECREASE TIP-3 (applies to neck at the front): Decrease 2 stitches by working the 3 outermost stitches towards the neck together as follows: * Make 1 yarn over, insert hook in next stitch, get the yarn *, work from *-* 3 times in total, make 1 yarn over, and pull strand through all 7 loops on hook (= 2 half double crochets decreased). ---------------------------------------------------------- START THE PIECE HERE: ---------------------------------------------------------- TOP - SHORT OVERVIEW OF THE PIECE: Work back piece and front piece back and forth separately, bottom up. Then sew piece together on the shoulder and in the sides. BACK PIECE: Read CROCHET TIP FOR CHAIN STITCH and work 58-65-72-79-91-100 chain stitches on hook size 5 mm = US H/8 with Paris. Turn and work 1 single crochet in 3rd chain stitch from hook (equals 2 single crochets), work 1 single crochet in each of the next 6-6-6-6-4-6 chain stitches, * skip 1 chain stitch, work 1 single crochet in each of the next 6 chain stitches *, work from *-* the entire row = 50-56-62-68-78-86 single crochets on row. Read CROCHET INFORMATION and work in the A.1 to A.3 as follows: Work A.1 over the first stitch, work A.2 until 1 stitch remains on row, finish with A.3 over the last stitch. Continue pattern back and forth like this. REMEMBER THE CROCHET TENSION! When piece measures 8 cm = 3⅛", increase 1 stitch each side - read INCREASE TIP. Increase like this every 7-7-8-8-9-9 cm = 2¾"-2¾"-3⅛"-3⅛"-3½"-3½" 3 times in total in each side = 56-62-68-74-84-92 stitches. AT THE SAME TIME when piece measures 18-18-20-20-23-23 cm = 7"-7"-8"-8"-9"-9", work A.4 to A.6 as follows: Work A.4 over the first stitch, work A.5 until 1 stitch remains on row, finish with A.6 over last stitch. Continue pattern back and forth like this. Fasten off when piece measures 25-26-27-28-29-30 cm = 9¾"-10¼"-10⅝"-11"-11⅜"-11¾". Now bind off for armholes as explained below. Work A.4 to A.6 as before over the middle 50-56-60-66-74-80 stitches = 3-3-4-4-5-6 stitches in each side for armholes that are not worked. Read DECREASE TIP-1 and bind off for armholes in each side on every row as follows: Bind off 3 stitches 1 time, 2 stitches 1-1-2-3-4-5 times and 1 stitch 0-2-1-2-3-3 times = 40-42-44-44-46-48 stitches remain. Continue to work until piece measures 38-40-42-44-46-48 cm = 15"-15¾"-16½"-17¼"-18"-19". Now work the shoulder over the first 8-9-9-9-9-10 stitches on row (the next 24-24-26-26-28-28 stitches are for neck, and the last 8-9-9-9-9-10 stitches are for shoulder in the other side). Read DECREASE TIP-2 and decrease 1 stitch for neck on next row with half double crochets = 7-8-8-8-8-9 stitches remain for shoulder. Continue to work as before over these 7-8-8-8-8-9 stitches until piece measures 42-44-46-48-50-52 cm = 16½"-17¼"-18"-19"-19¾"-20½" . Cut and fasten the yarn. Work the other shoulder the same way. FRONT PIECE: Begin the same way as on back piece, and work the same way as on back piece until piece measures 31-33-34-36-37-39 cm = 12¼"-13"-13⅜"-14¼"-14½"-15¼". Now work the shoulder over the first 13-14-14-14-14-15 stitches (the next 14-14-16-16-18-18 stitches are for neck, and the last 13-14-14-14-14-15 stitches are for shoulder in the other side). Read DECREASE TIP-2 and decrease 2 stitches for neck on next row with half double crochets. Decrease like this every row with half double crochets 3 times in total vertically = 7-8-8-8-8-9 half double crochets remain for shoulder strap. Continue to work as before over these 7-8-8-8-8-9 stitches until piece measures 42-44-46-48-50-52 cm = 16½"-17¼"-18"-19"-19¾"-20½". Cut and fasten the yarn. Work the other shoulder the same way. ASSEMBLY: Sew the shoulder seams edge to edge with neat little stitches. Sew side seams the same way. |
||||||||||||||||||||||
Diagram explanations |
||||||||||||||||||||||
|
||||||||||||||||||||||
|
||||||||||||||||||||||
|
||||||||||||||||||||||
|
Have you made this or any other of our designs? Tag your pictures in social media with #dropsdesign so we can see them! Do you need help with this pattern?You'll find tutorial videos, a Comments/Questions area and more by visiting the pattern on garnstudio.com. © 1982-2024 DROPS Design A/S. We reserve all rights. This document, including all its sub-sections, has copyrights. Read more about what you can do with our patterns at the bottom of each pattern on our site. |
||||||||||||||||||||||


With over 40 years in knitting and crochet design, DROPS Design offers one of the most extensive collections of free patterns on the internet - translated to 17 languages. As of today we count 304 catalogs and 11422 patterns - 11417 of which are translated into English (US/in).
We work hard to bring you the best knitting and crochet have to offer, inspiration and advice as well as great quality yarns at incredible prices! Would you like to use our patterns for other than personal use? You can read what you are allowed to do in the Copyright text at the bottom of all our patterns. Happy crafting!
Comments / Questions (21)
Olá! Tenho a mesma dúvida que Silvia! Na parte em que faço os gráficos A4-A6, mesmo colocando marcadores para me certificar dos inícios de carreiras, o trabalho fica inviesado. O problema fica mais visível nas cavas. Como devo fazer para evitar esse problema?
31.12.2023 - 13:21Pourquoi la plateforme Etsy vend ce modèle?
14.05.2023 - 16:24DROPS Design answered:
Bonjour Madame Salain, merci pour votre retour; n'hésitez pas à le signaler à la plateforme Etsy, ce modèle est disponible gratuitement sur notre site. Bon crochet!
16.05.2023 - 14:09I don't understand what I need to do in A3 and A6
02.03.2023 - 13:32DROPS Design answered:
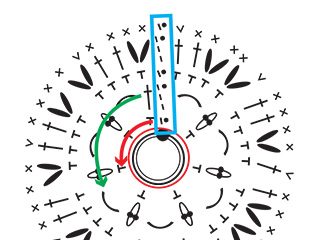
Dear Giuliana, A.3 and A.6 shows how to work the end of the row from RS (1st row) and the beg of row from WS (2nd row), ie in A.3 finish row 1 with 1 double treble crochet in the last stitch and start row 2 with 1 chain stitch; in A.6 finish 1st row with 1 half treble crochet in last stitch and start row 2 with 1 chain stitch (all UK-English terminology here). Happy crocheting!
02.03.2023 - 14:59Tengo problemas con los bordes en el momento que aparece el diagrama de A.4 a A.6. Estoy atenta al momento de virar e iniciar la siguiente vuelta, i creo que lo hago bien. Pero invariablemente el lado donde inicio el p.m.a. me queda como si aumentara, i en el lado del p.b. como si disminuyera. En cambio no me pasa con el diagrama anterior, que alterna una hilera de p.d.a. con el p.b. Hay algún truco para evitar que me quede deformada la labor? Gracias.
09.07.2022 - 14:18DROPS Design answered:
Hola Silvia, al trabajar A.4 a A.6, se trabaja igual que A.1-A.3, solo que se cambia los p.a.d por p.m.a. Si el p.de cad (que equivale a 1 p.b) queda demasiado pequeño, puedes trabajar 1 p.b adicional al lado del p.de cad (en ese caso el p.de cad dejaría de contar como 1 pt). Las deformaciones indicadas parecen deberse a variaciones en la tensión de tejido; asegurate de no trabajar demasiado tenso o demasiado flojo los puntos. También puedes marcar los extremos con marcapuntos para asegurarte de no trabajar puntos extras en los extremos.
09.07.2022 - 19:33Do not understand A1,A2, etc. \r\nCould you please explain?\r\nKind regards\r\nAllie
30.03.2022 - 14:50DROPS Design answered:
Dear Allie, A.1, A.2 and A.3 are the name of the patterns in the diagrams - read more about diagrams here. Start with A.1 from RS, repeat A.2 and end with A.3; start with A.3 from RS, repeat A.2 and end with A.1. Happy crocheting!
30.03.2022 - 14:58Sto cercando di fare il modello White Heat. Grazie. E
29.07.2021 - 20:45DROPS Design answered:
Buonasera Monica, deve seguire il SUGGERIMENTO PER LE DIMINUZIONI-1 per gli scalfi. Buon lavoro!
30.07.2021 - 16:38Buongiorno, non riesco a capire come procedere per gli scalfi. Cosa si intende "intrecciare le catenelle"? E soprattutto come si fa? Grazie.
29.07.2021 - 20:38DROPS Design answered:
Buonasera Monica, deve seguire il SUGGERIMENTO PER LE DIMINUZIONI-1 per gli scalfi. Buon lavoro!
30.07.2021 - 16:38Jai crocheté le modèle avec qq finitions en ms: l'encolure,emmanchure,et Le bas... Je le trouvais un peu court donc j'ai ajouté qq rangs.
09.07.2021 - 18:16Förstår inte alls hur man virkar mönstret, önskar beskrivning varv1, varv 2 osv. Har virkat mycket tidigare men ej sett denna beskrivning av mönstret!!
05.06.2021 - 00:07DROPS Design answered:
Hei Anita. Hva spesielt er det du ikke skjønner? Vi har dessverre ikke muligheten til å beskrive hver rad i oppskriften, men mener det er tydelig beskrevet slik det står og med henvisning til diagrammene, husk å lese forklaringene til diagramsymbolene. Det er også lagt til hjelpevideoer som viser de ulike hekle teknikkene. mvh DROPS design
07.06.2021 - 09:31Merci Madame, je vais commencer dès aujourd'hui. J'ai un peu de mal avec les diagrammes du site Drops
12.08.2020 - 16:04DROPS Design answered:
Bonjour Mme Jung, cette leçon explique comment lire un diagramme crochet et pourra vous permettre de mieux les comprendre. Bonne continuation!
13.08.2020 - 09:46