
Popular categories
Looking for a yarn?


|
||||||||||||||||
Augusta |
||||||||||||||||
 |
 |
|||||||||||||||
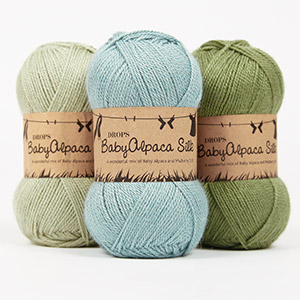
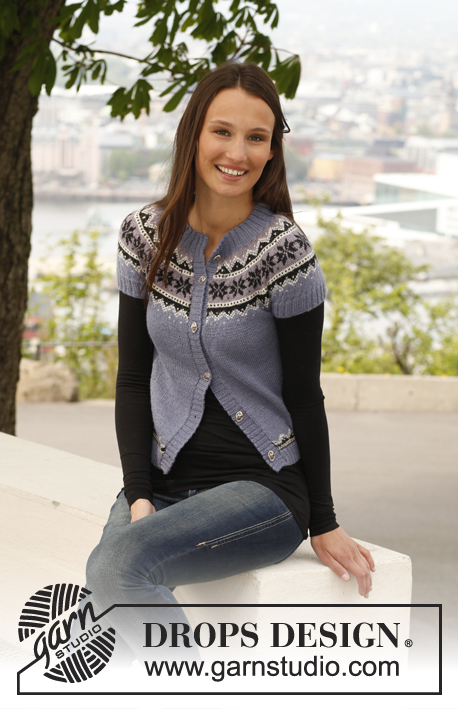
Knitted DROPS jacket with short sleeves and Norwegian pattern in BabyAlpaca Silk or Flora. Size: S - XXXL.
DROPS 142-18 |
||||||||||||||||
|
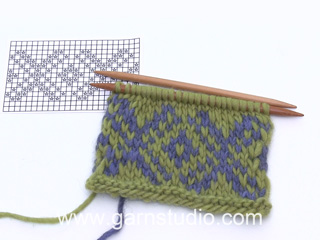
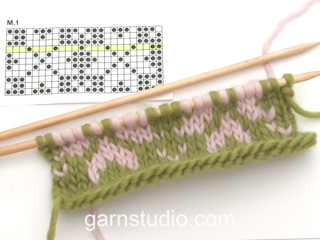
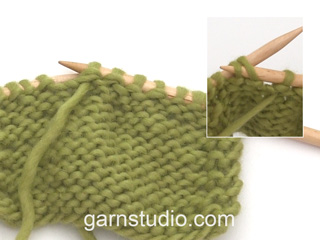
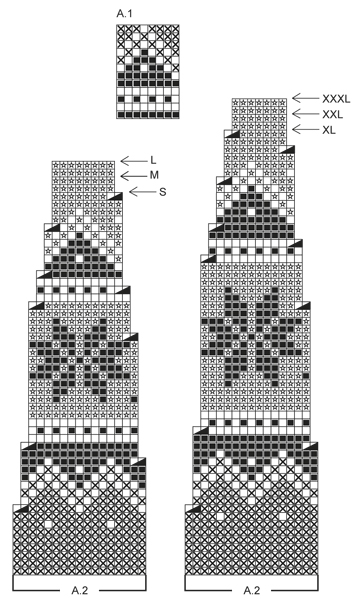
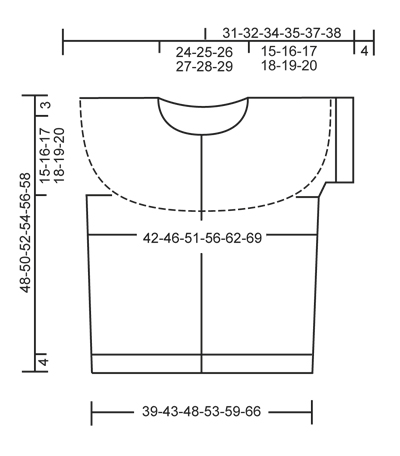
GARTER ST (back and forth on needle): K all rows. 1 ridge = 2 rows K. PATTERN: See diagrams A.1 and A.2. Work entire pattern in stocking st. KNITTING TIP 1: When A.2 is worked, there will be 1 st at the end of row that do not fit the pattern. This st is worked in the pattern as first st in next repetition so that the pattern beg and ends the same way in each side towards mid front. NOTE: Do not dec in this st. KNITTING TIP 2: To avoid the garment loosing its elasticity when working pattern it is important that the threads are not too tight on the back of piece. If needed go up in needle size when working pattern if the pattern looks somewhat tight. ---------------------------------------------------------- BODY: Worked back and forth on circular needle from mid front. Cast on 252-280-312-344-384-428 sts on circular needle size 2 mm with blue purple or denin blue. P 1 row from WS, work next row as follows from RS: 1 edge st in GARTER ST - see explanation above - * K 2, P 2 *, repeat from *-* until 3 sts remain and finish with K 2 and 1 edge st in GARTER ST. Continue rib like this for 4 cm – adjust so that next row is worked from RS. Switch to circular needle size 2.5 mm and K 1 row from RS while AT THE SAME TIME dec 49-53-61-69-77-81 sts evenly = 203-227-251-275-307-347 sts. Work next row as follows from WS: 1 edge st in garter st, work diagram A.1 until 2 sts remain, finish with 1st st in A.1 (so that pattern beg and ends the same way in each side towards mid front) and 1 edge st in garter st. Continue the pattern like this. When A.1 has been worked 1 time vertically, continue in stocking st with blue purple or denim blue. Insert 2 markers in the piece; 51-57-63-69-77-87 sts in from each side (= 101-113-125-137-153-173 sts between markers on back piece). REMEMBER THE KNITTING TENSION! When piece measures 8 cm, inc 1 st on each side of both markers (= 4 sts inc). Repeat inc every 6-6-6-7-7-7 cm 3 more times = 219-243-267-291-323-363 sts. When piece measures 30-31-32-33-34-35 cm, cast off 8 sts in each side for armholes (i.e. 4 sts on each side of both markers) = 51-57-63-69-77-87 sts on each front piece and 101-113-125-137-153-173 sts on back piece. Put piece aside and work the sleeve edges. SLEEVE EDGE: Worked in the round on double pointed needles. Cast on 84-88-96-100-104-112 sts on double pointed needles size 2 mm with blue purple or denim blue. K 1 round, then work rib (= K 2/P 2) for 4 cm. Work next round as follows: Cast off 4 sts at beg of round, K until 4 sts remain and cast off these 4 sts = 76-80-88-92-96-104 sts. Put piece aside and knit another sleeve edge. YOKE: Slip sleeves on to same circular needle as body where armholes were cast off = 355-387-427-459-499-555 sts. Work 2-2-4-4-4-6 rows in stocking st with blue purple or denim blue (1st row = RS), AT THE SAME TIME dec 29-27-33-31-37-42 sts evenly on last row (= from WS) = 326-360-394-428-462-513 sts. READ KNITTING TIP 1 and 2 and work as follows: 1 edge st in garter st, work pattern according to diagram A.2 (choose diagram for correct size) until 2 sts remain, finish with 1st st in A.2 and 1 edge st in garter st. Continue with pattern and dec until A.2 has been worked vertically (work until arrow for correct size) = 155-171-187-178-192-213 sts. LEFT BAND: Knit up from RS approx. 120 to 150 sts along left front piece on circular needle size 2 mm with blue purple or denim blue. P 1 row from WS while AT THE SAME TIME inc evenly to 149-157-161-169-173-181 sts. Then work rib as follows (seen from RS): 1 edge st in garter st, * K 2, P 2 *, repeat from *-* until 4 sts remain, finish with K 2 and 2 edge sts in garter st at the bottom of body. When rib measures 3 cm, loosely cast off with K over K and P over P. RIGHT BAND: Work as left band but when band measures approx. 1 cm, cast off for 5-5-5-6-6-6 button holes evenly. The top and bottom button hole should be approx. 4 cm from edge. 1 button hole = work 2 sts tog and make 1 YO (casting off in 2 P sts will look more pretty seen from RS). NECK EDGE: Slip sts from yoke on circular needle size 2 mm and knit in addition up 8 new sts over each band (knit up from RS inside 1 edge st) = 171-187-203-194-208-229 sts. P 1 row from WS while AT THE SAME TIME dec 23-31-43-26-32-49 sts evenly = 148-156-160-168-176-180 sts. Continue to work rib from RS as follows: 1 edge st in garter st, * K 2, P 2 *, repeat from *-* until 3 sts remain, finish with K 2 and 1 edge st in garter st. AT THE SAME TIME after 2 rows rib, work an elevation (in rib) at the back of neck as follows: Work until 17-19-21-23-25-27 sts remain on needle, turn, tighten thread and work until 17-19-21-23-25-27 sts remain in the other side, turn, tighten thread and work until 35-39-41-45-49-53 sts remain, turn, tighten thread and work until 35-39-41-45-49-53 sts remain in the other side, turn, tighten thread and work until 53-59-61-67-73-79 sts remain, turn, tighten thread and work until 53-59-61-67-73-79 sts remain in the other side, turn. Then continue with rib as before over all sts. AT THE SAME TIME when neck edge measures approx. 1½ cm at the front, cast off for 1 button hole over the others on right band. When neck edge measures 4 cm at the front, loosely cast off with K over K and P over P. ASSEMBLY: Sew the openings under the sleeves. Sew on buttons. ---------------------------------------------------------- Wrist warmers and hat – see design: 142-16 ---------------------------------------------------------- |
||||||||||||||||
Diagram explanations |
||||||||||||||||
|
||||||||||||||||
|
||||||||||||||||
|
||||||||||||||||
|
Have you made this or any other of our designs? Tag your pictures in social media with #dropsdesign so we can see them! Do you need help with this pattern?You'll find tutorial videos, a Comments/Questions area and more by visiting the pattern on garnstudio.com. © 1982-2024 DROPS Design A/S. We reserve all rights. This document, including all its sub-sections, has copyrights. Read more about what you can do with our patterns at the bottom of each pattern on our site. |
||||||||||||||||


With over 40 years in knitting and crochet design, DROPS Design offers one of the most extensive collections of free patterns on the internet - translated to 17 languages. As of today we count 304 catalogues and 11422 patterns - 11422 of which are translated into English (UK/cm).
We work hard to bring you the best knitting and crochet have to offer, inspiration and advice as well as great quality yarns at incredible prices! Would you like to use our patterns for other than personal use? You can read what you are allowed to do in the Copyright text at the bottom of all our patterns. Happy crafting!
Comments / Questions (28)
"baby alpaca silk" :50 gr=167 m "drops lace"50 gr= 400 m.dit is bijna 3x meer. 200gr b.a.s.= hoeveel gr "drops lace?
08.05.2014 - 15:44DROPS Design answered:
Drops Lace is een dun kantgaren, bedoeld voor fijn en licht doorzichtig werk. We adviseren dit garen niet voor Noors breiwerk zoals dit vestje.
09.05.2014 - 08:41Det står : Fortsett med mønster og fellinger til A.2 er strikket ferdig i høyden . Fellingen?! skal det fyllast etter at ein har begynne med mønster då?
28.01.2014 - 21:31DROPS Design answered:
Hej Ellen. Fellingerne kommer automatisk i diagrammet. F.eks. A.3 i str S/M/L i pind 10, 16, 18 osv. Se for din str/diagram.
29.01.2014 - 10:31Julie Hobson wrote:
Is it easy to make the sleeves longer in order to have a regular cardigan?
15.01.2014 - 11:16DROPS Design answered:
Dear Mrs Hobson, you can calculate for long sleeves with the help of a similar pattern. Do not hesitate to request help from the store where you bought your yarn, or any knitting forum. Happy knitting!
15.01.2014 - 14:23Hej, Det verkar vara fel på diagrammet i strl s/m/l. Det gäller minskningen mitt i "prickraden" ovanför stjärnan. Om man minskar så som diagrammet visar så får man inte varannan maska i olika färger utan det blir två maskor i natur, sedan prickar. Jag vet inte om det är meningen att det ska vara så, men det blir inte så på de större storlekarna och jag tycker mig inte se det på modellen heller. Mvh/Lotta
07.10.2013 - 13:51DROPS Design answered:
Hej, Tror du har ret, skal høre med design. Hvis du ikke kan vente så kan du tage ind på næste pind/varv istedet!
09.10.2013 - 09:48Ich hab das Modell gestrickt. Aber leider ist an der Passe zu eng, sodaß ich die oberen Knöpfe nicht schließen kann, bzw es spannt...schade
21.03.2013 - 18:54142:16
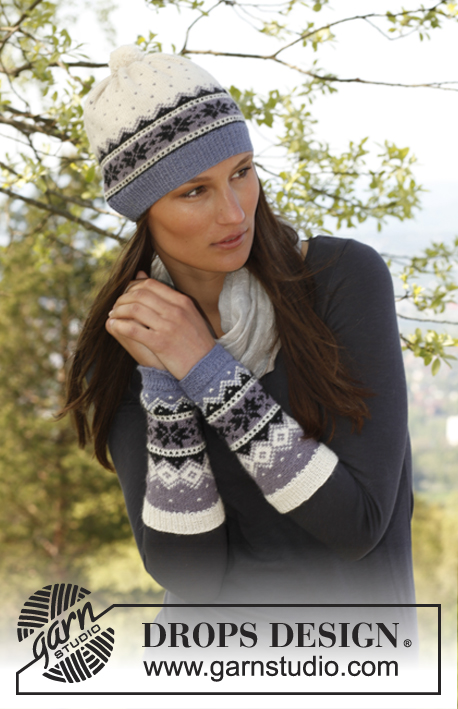
23.01.2013 - 08:52Good evening, Where yould I find the tutorial (manual)and diagram for gaiters which are on the second picture? Thx in advance ZuK
22.01.2013 - 22:14DROPS Design answered:
Dear Zuzana, you will find pattern for wrist warmers under DROPS no 142-16 - see link at the end of this pattern. Happy knitting!
23.01.2013 - 09:54Josée wrote:
Cute! Lovely bit of colour-work and nice clean details. I like this one very much.
08.07.2012 - 05:21Helene wrote:
This is adorable. It is a lovely use of color and Norwegian stars. Having it with short sleeves makes it wearable before the weather turns really cold. I'm looking forward to the pattern's publication in English.
17.06.2012 - 00:26Tästä tulee syksyn suosikki neule siitä olen varma. Ostoslista valmiina maanantaina aloitetaan ;)
16.06.2012 - 13:51