
Popular categories
Looking for a yarn?


|
||||||||||||||||||||||
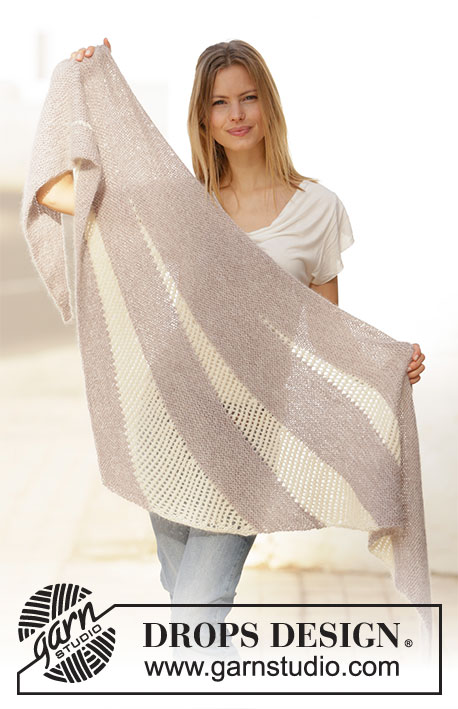
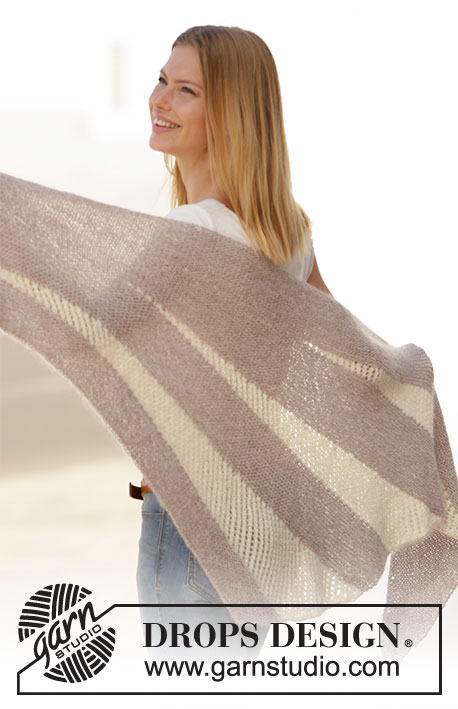
Morning Rays |
||||||||||||||||||||||
 |
 |
|||||||||||||||||||||
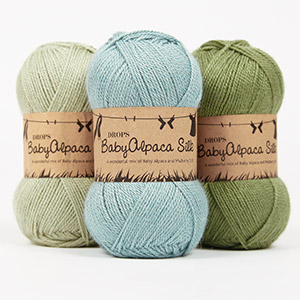
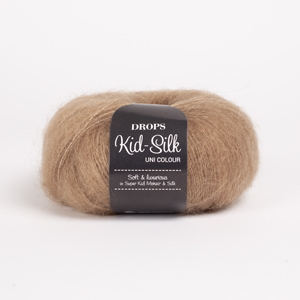
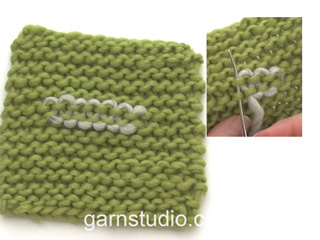
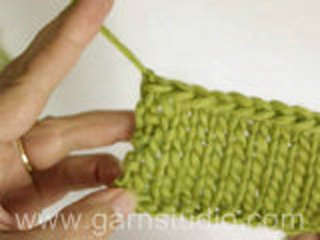
Knitted shawl with garter stitch and lace pattern in DROPS BabyAlpaca Silk and DROPS Kid-Silk. Work piece back and forth with short rows.
DROPS 210-38 |
||||||||||||||||||||||
|
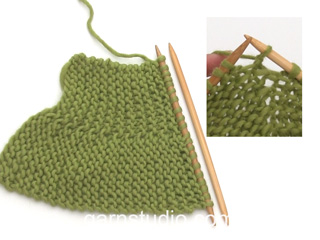
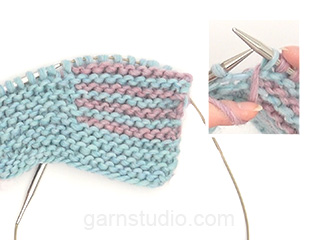
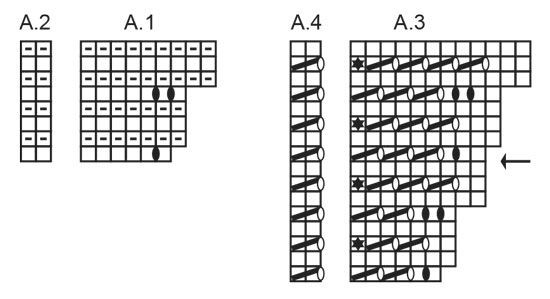
---------------------------------------------------------- EXPLANATION FOR THE PATTERN: ---------------------------------------------------------- GARTER STITCH (back and forth): Knit all rows. 1 ridge vertically = knit 2 rows. PATTERN: See diagrams A.1 to A.4. Diagrams show all rows in pattern seen from the right side. ---------------------------------------------------------- START THE PIECE HERE: ---------------------------------------------------------- SHAWL - SHORT OVERVIEW OF THE PIECE: Work piece back and forth on circular needle. Work according to diagrams to increase in one side of piece, AT THE SAME TIME work short rows. SHAWL: Cast on 192 stitches on circular needle size 5.5 mm with 1 strand off white Kid-Silk and 1 strand light grey purple BabyAlpaca Silk. Knit 1 row (= wrong side). Then work 4 parts with short rows as follows: PART 1: Work according to diagrams A.1 and A.2 as follows: From right side: Work diagram A.1 over 6 stitches, work according to diagram A.2 until 6 stitches remain on needle. Tighten yarn and turn piece. From wrong side: Work diagram A.2 until 7 stitches remain, work A.1 over 7 stitches (remember to work the black yarn over from previous row twisted to avoid holes). Turn piece. Continue to work diagrams like this but on every row from right side, turn piece 6 stitches earlier than last time. When the diagrams have been worked 1 time vertically, 3 stitches have been increased and there are 4 ridges in total (in addition to cast-on edge) = 195 stitches. Continue to work diagrams with short rows until diagrams have been worked 3 times vertically. There are 201 stitches on row, and 12 ridges have been worked (in addition to cast-on edge). Switch to off white Kid-Silk and off white BabyAlpaca Silk. Work according to diagrams A.3 and A.4 as follows: From right side: Work diagram A.3 over 6 stitches, work A.4 until 6 stitches earlier than on previous turn. Turn piece. From wrong side: Work diagram A.4 until 7 stitches remain, work A.3 over 7 stitches (remember that the black yarn over in diagram is purled twisted to avoid holes). Continue to work like this until diagrams have been worked 1 time vertically. 6 stitches have been increased, and there are 8 eyelet rows in total = 207 stitches. Continue the same way by working short rows over 6 stitches less every time until diagrams have been worked 2.5 times vertically (see arrow in diagram that shows where diagram should end in the middle of a repetition). 216 stitches on row and 40 rows have been worked with lace pattern. Switch to 1 strand Kid-Silk in off white and 1 strand BabyAlpaca Silk in light grey purple. Knit 1 row over all stitches on row, make sure to tighten where piece is turned, so avoid large holes. Turn and knit 1 row from wrong side. PART 2: Work after same principle as 1st part, but work diagrams and short rows in a different way. READ ALL OF THE FOLLOWING SECTION BEFORE CONTINUING! Diagrams A.1 and A.2 are worked 4 times vertically with Kid-Silk in off white and BabyAlpaca Silk in light grey purple, then work diagram A.3 and A.4 with Kid-Silk in off white and BabyAlpaca Silk in off white 2 times vertically - AT THE SAME TIME turn piece first time when 7 stitches remain on needle, continue to turn 7 stitches earlier each time a total of 24 times (including the first turn), then turn 6 stitches earlier a total of 8 times. There are 240 stitches on needle. Switch to 1 strand Kid-Silk in off white and 1 strand BabyAlpaca Silk in light grey purple. Now work over all stitches on needle as follows: Work over all stitches on row, make sure to tighten where piece is turned, so avoid large holes. Turn and knit 1 row from wrong side. PART 3: Work after same principle as 1st and 2nd part, but work according to diagrams and short rows in a different way. READ ALL OF THE FOLLOWING SECTION BEFORE CONTINUING! Diagrams A.1 and A.2 are worked 5 times vertically with Kid-Silk in off white and BabyAlpaca Silk in light grey purple, then work diagrams A.3 and A.4 with Kid-Silk in off white and BabyAlpaca Silk in off white 1.5 times vertically (see arrow in diagram to show where diagram ends in the middle of a repetition) - AT THE SAME TIME turn piece first time when 8 stitches remain on needle, continue to turn 8 stitches earlier each time a total of 16 times (including the first turn), then turn 7 stitches earlier a total of 16 times. There are 264 stitches on needle. Switch to 1 strand Kid-Silk in off white and 1 strand BabyAlpaca Silk in light grey purple. Now work over all stitches on needle as follows: Work over all stitches on row, make sure to tighten where piece is turned so avoid large holes. Turn and knit 1 row from wrong side. PART 4: Work after same principle as 1st, 2nd and 3rd part, but work diagrams and short rows in a different way. READ ALL OF THE FOLLOWING SECTION BEFORE CONTINUING! Diagrams A.1 and A.2 are worked 8 times vertically with Kid-Silk in off white and BabyAlpaca Silk in light grey purple, - AT THE SAME TIME turn piece first time when 9 stitches remain on needle, continue to turn 9 stitches earlier each time a total of 8 times (including the first turn), then turn 8 stitches earlier a total of 24 times. There are 288 stitches on needle. Now work over all stitches on needle as follows: Work over all stitches on row, make sure to tighten where piece is turned, so avoid large holes. Turn and knit 1 row from wrong side. Loosely cast off by knitting on next row from right side. |
||||||||||||||||||||||
Diagram explanations |
||||||||||||||||||||||
|
||||||||||||||||||||||
|
||||||||||||||||||||||
|
Have you made this or any other of our designs? Tag your pictures in social media with #dropsdesign so we can see them! Do you need help with this pattern?You'll find tutorial videos, a Comments/Questions area and more by visiting the pattern on garnstudio.com. © 1982-2024 DROPS Design A/S. We reserve all rights. This document, including all its sub-sections, has copyrights. Read more about what you can do with our patterns at the bottom of each pattern on our site. |
||||||||||||||||||||||


With over 40 years in knitting and crochet design, DROPS Design offers one of the most extensive collections of free patterns on the internet - translated to 17 languages. As of today we count 304 catalogues and 11422 patterns - 11422 of which are translated into English (UK/cm).
We work hard to bring you the best knitting and crochet have to offer, inspiration and advice as well as great quality yarns at incredible prices! Would you like to use our patterns for other than personal use? You can read what you are allowed to do in the Copyright text at the bottom of all our patterns. Happy crafting!
Comments / Questions (25)
Je vous remercie pour votre réponse. J'ai, à présent, un problème pour comprendre les instructions pour les rangs raccourcis en coloris naturel. Le patron indique de tourner l'ouvrage 7 mailles plus tôt "à chaque fois" et 24 fois au total. Cela signifie-t-il qu'il faut faire des rangs raccourcis à l'endroit ET à l'envers ? J'avoue que spontanément je n'en aurais fait que sur les rangs envers ...
16.04.2021 - 22:52DROPS Design answered:
Bonjour Amélie, la première fois que vous tricotez les rangs raccourcis, vous tricotez jusqu'à ce qu'il reste 7 m sur l'aiguille, puis vous tournez; la fois suivante, vous tournerez 7 fois plus tôt = il restera 14 m, puis la fois suivante 14+7=21 m, puis 21+7= 28 m et ainsi de suite jusqu'à ce que vous ayez tourné 24 fois au total, puis vous laisserez 6 mailles en plus non tricotées à chaque rang raccourcis encore 8 fois. Bon tricot!
19.04.2021 - 07:49Bonjour, je suis actuellement en train de tricoter ce châle et je m'interroge sur la deuxième partie. Doit on commencer les rangs raccourcis et s'arrêter 7 mailles plus tot déjà en tricotant en gris ou doit on seulement commencer ces rangs raccourcis au moment de tricoter en blanc ? (je me pose la question parce que le "en meme temps" figure dans le paragraphe sur la laine blanche)
07.04.2021 - 22:19DROPS Design answered:
Bonjour Amélie, les rangs raccourcis ne se tricotent que sur la partie tricotée en naturel et au point ajouré. Bon tricot!
08.04.2021 - 07:44No se entiende el patrón .Porque no explicar paso paso
02.02.2021 - 20:28Bonjour je souhaite tricoter le chale, mais n'arrive pas à voir à quel endroit il faut insérer la laine naturelle au montage des mailles. merci pour votre réponse
30.10.2020 - 14:07DROPS Design answered:
Bonjour Mme Dechand, la première partie se triote avec 1 fil Kid-Silk Naturel + 1 fil BabyAlpaca Silk gris mauve clair jusqu'à ce que vous ayez 201 m sur l'aiguille (et 12 côtes mousse). Vous continuez alors avec 1 fil naturel de chaque qualité - cf 2ème paragraphe de la 1ère partie. Bon tricot!
30.10.2020 - 15:18Hur gör jag eller hittar jag mönster till större storlek
18.05.2020 - 12:13DROPS Design answered:
Hei Lena. Denne er kun skrevet i den oppgitt størrelsen (høyde: 60 cm, Bredde:180 cm). mvh DROPS design
25.05.2020 - 11:01Jeres opskrift passer ikke med det der står i den.. Hvorfor gør den ikke det?
30.04.2020 - 15:19DROPS Design answered:
Hei Kristine. Det er ganske vanskelig for oss å hjelpe deg med hva du mener er feil, når du ikke skriver hva du mener ikke stemmer. Gi oss en bedre forklaring , så skal vi hjelpe deg så godt vi kan. mvh DROPS design
04.05.2020 - 08:36Bonjour, J’aimerais beaucoup faire ce châle et je ne comprend pas pourquoi nous augmentons un côté et que si je comprend bien le diagramme, il y aurait 6 mailles de l’autre côté qui ne seraient jamais tricotées? Merci de m’eclairer
18.04.2020 - 02:11DROPS Design answered:
Bonjour Jacqueline, le châle se tricote en biais, on va donc augmenter d'un côté de l'ouvrage seulement, vous tricotez des rangs raccourcis pour donner la forme souhaitée. Suivez bien les indications rang après rang, quand on a les mailles sur les aiguilles c'est souvent bien plus simple. Bon tricot!
20.04.2020 - 09:254.del, skal den strikkes 8 ganger? Får 288 m etter 6 ganger i høyden.
28.03.2020 - 01:19DROPS Design answered:
Hej Inger, om du har 264 masker og øger 3 masker hver gang du strikker A.1 i højden 8 gange, så får du 288 masker. God fornøjelse!
31.03.2020 - 11:28Jeg forstår ikke hvad det betyder i 2. del af opskriften på sjalet, at der samtidig skal vendes efter 7 masker 24 gange??
15.02.2020 - 23:06DROPS Design answered:
Hej Evy, nu har vi formuleret vendingerne tydeligere, så skriv opskriften ud en gang til. God fornøjelse! :)
19.02.2020 - 08:12Summer / holiday feeling !
30.12.2019 - 19:42