
Popular categories
Looking for a yarn?


|
||||
Boston Vest |
||||
 |
 |
|||
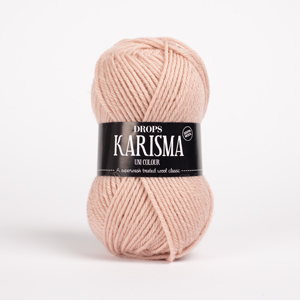
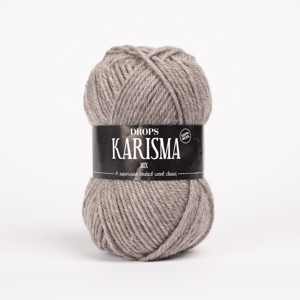
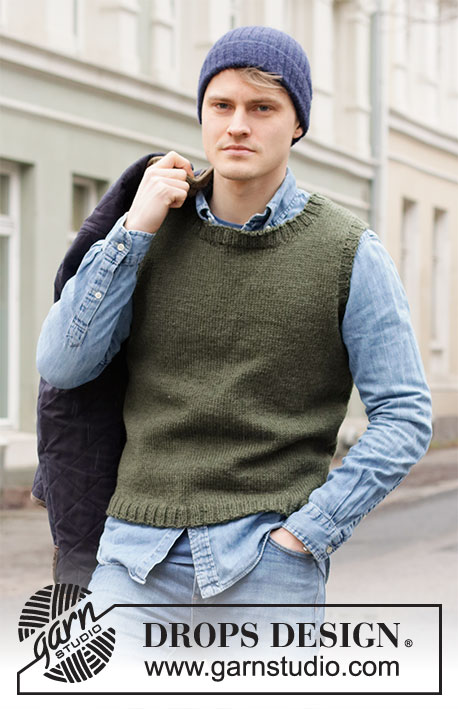
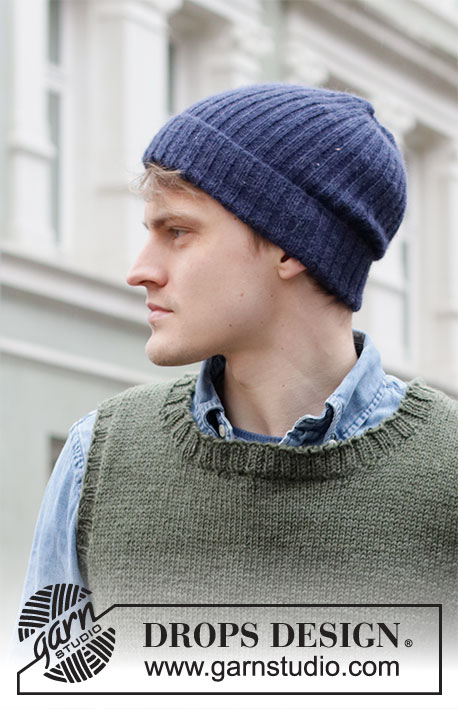
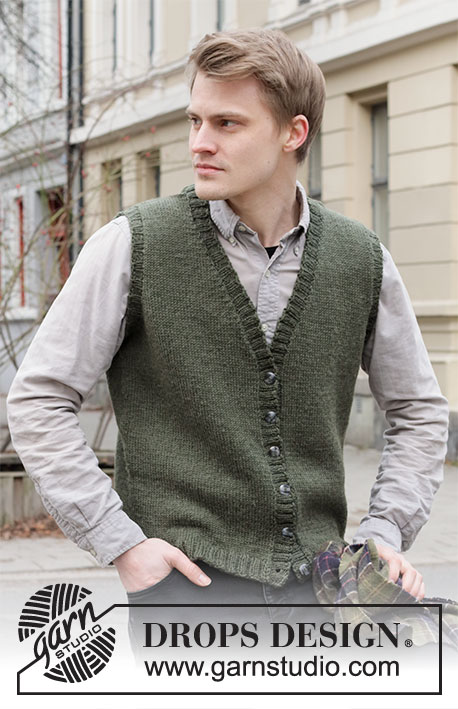
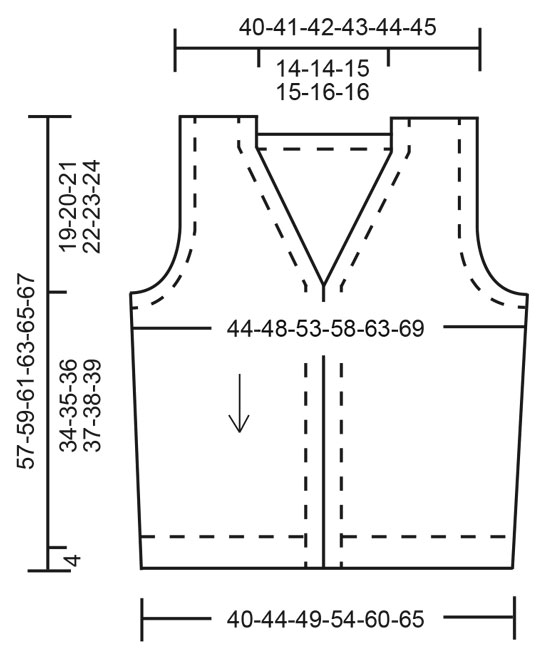
Knitted vest for men in DROPS Karisma or DROPS Soft Tweed. The piece is worked top down with V-neck and ribbed edges. Sizes S - XXXL.
DROPS 219-3 |
||||
|
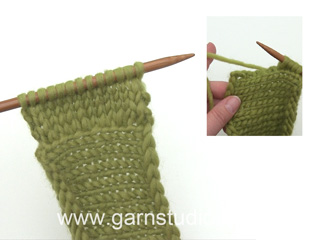
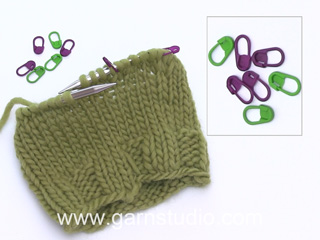
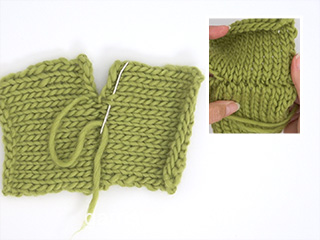
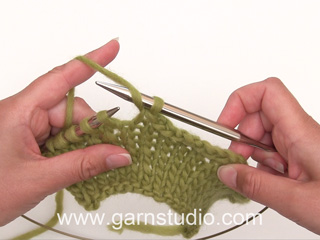
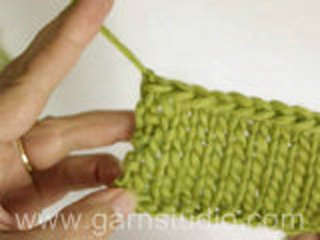
------------------------------------------------------- EXPLANATIONS FOR THE PATTERN: ------------------------------------------------------- RIDGE/GARTER STITCH (worked back and forth): Knit all rows. 1 ridge in height = Knit 2 rows. INCREASE TIP (for V-neck): Make 1 yarn over between 2 stitches. On the next row, work the yarn over twisted to avoid a hole. DECREASE TIP (for sides of body): Decrease 1 stitch on each side of the stitch with the marker thread as follows: Work until there are 3 stitches left before the stitch with the marker thread, knit 2 together, knit 2, slip 1 stitch as if to knit, knit 1 and pass the slipped stitch over the knitted stitch. BUTTONHOLES: Work buttonholes from the right side and on the right band. The bottom buttonhole is worked approx. 2 cm from the bottom edge, the top buttonhole approx.1 cm from the beginning of the v-neck (approx. 32-33-34-35-36-37 cm measured from the bottom of the vest). Work a total of 6 buttonholes with approx. 6-6-6½-6½-7-7 cm between each one. Position them in the purled sections (seen from the right side). 1 buttonhole = purl 2 together, 1 yarn over. On the next row (wrong side) knit the yarn to leave a hole. CASTING-OFF TIP: To avoid the cast-off edge being tight you can cast off with a larger size needle. If the edge is still tight, make 1 yarn over after approx. each 4th stitch at the same time as casting off; the yarn overs are cast off as normal stitches. ------------------------------------------------------- START THE PIECE HERE: ------------------------------------------------------- VEST – SHORT OVERVIEW OF THE PIECE: The vest is worked top down. Each shoulder is worked separately, back and forth, and stitches are increased/cast on for the V-neck and armholes. Then all pieces are joined together and the body finished working back and forth. Stiches are picked up for the neck, sleeve edges and bands, which are worked in rib to finish. FRONT PIECES: Right front piece: Cast on 20-21-21-22-22-23 stitches (including 1 edge stitch on each side) using circular needle size 4 mm and Karisma or Soft Tweed. Work 1 edge stitch in GARTER STITCH – read description above, work stocking stitch until there is 1 stitch left on the row and then 1 edge stitch in garter stitch. Continue like this back and forth. When the piece measures 4-5-5-6-6-7 cm, start to increase for the V-neck and when the piece measures 18-18-18-17-17-16 cm, increase for the armholes, read description below: V-neck: Increase 1 stitch inside the last 2 stitches on the next row from the right side – read INCREASE TIP. Increase like this alternately every 2nd and 4th row a total of 19-19-20-20-21-21 times (increases for the V-neck are not finished when the armhole is finished, but are continued on the body). REMEMBER THE KNITTING TENSION! Armhole: Increase 1 stitch inside the first 2 stitches on every row from the right side 2-1-1-3-4-4 times, then cast on new stitches at the end of every row from the wrong side as follows: Cast on 2 stitches 0-2-2-3-3-4 times and 3 stitches 0-0-1-1-2-3 times (= a total of 2-5-8-12-16-21 stitches increased). Lay the piece to one side and work the left front piece. Left front piece: Cast on 20-21-21-22-22-23 stitches (including 1 edge stitch on each side) using circular needle size 4 mm and Karisma or Soft Tweed. Work 1 edge stitch in garter stitch, stocking stitch until there is 1 stitch left on the row and then 1 edge stitch in garter stitch. Continue like this back and forth. When the piece measures 4-5-5-6-6-7 cm, start to increase for the V-neck and when the piece measures 18-18-18-17-17-16 cm, increase for the armholes, read description below: V-neck: Increase 1 stitch inside the first 2 stitches on the next row from the right side – remember INCREASE TIP. Increase like this alternately every 2nd and 4th row a total of 19-19-20-20-21-21 times. Armhole: Increase 1 stitch inside the last 2 stitches on each row from the right side 2-1-1-3-4-4 times, then cast on new stitches at the end of every row from the right side as follows: Cast on 2 stitches 0-2-2-3-3-4 times and 3 stitches 0-0-1-1-2-3 times (= a total of 2-5-8-12-16-21 stitches increased). Lay the piece to one side and work the back piece. BACK PIECE: Each shoulder is worked separately before being joined together. Right shoulder: Cast on 20-21-21-22-22-23 stitches (including 1 edge stitch on each side) using circular needle size 4 mm and Karisma or Soft Tweed. Work 1 edge stitch in garter stitch, stocking stitch until there is 1 stitch left on the row and then 1 edge stitch in garter stitch. Continue like this back and forth. When the piece measures 4 cm increase 1 stitch inside the first 2 stitches on the next row from the right side = 21-22-22-23-23-24 stitches. Work 1 row back from the wrong side. Lay the piece to one side and work the left shoulder. Left shoulder: Cast on 20-21-21-22-22-23 stitches (including 1 edge stitch on each side) using circular needle size 4 mm and Karisma or Soft Tweed. Work 1 edge stitch in garter stitch, stocking stitch until there is 1 stitch left on the row and then 1 edge stitch in garter stitch. Continue like this back and forth. When the piece measures 4 cm increase 1 stitch inside the last 2 stitches on the next row from the right side = 21-22-22-23-23-24 stitches. Work 1 row back from the wrong side. Now work the 2 shoulders together as follows: Work the 21-22-22-23-23-24 stitches from the left shoulder as before, cast on 36-36-38-38-40-40 stitches (= neck) work the 21-22-22-23-23-24 stitches from the right shoulder as before = 78-80-82-84-86-88 stitches. Work stocking stitch back and forth with 1 stitch in garter stitch on each side. When the piece measures 18-18-18-17-17-16 cm, increase/cast on stitches on each side of the piece for the armholes, in the same way as on the front pieces (= a total of 2-5-8-12-16-21 stitches increased for each armhole) = 82-90-98-108-118-130 stitches. When all the increases are finished, work the body. THE PIECE IS NOW MEASURED FROM HERE! BODY: Now join all the pieces together from the right side as follows: Starting with the left front piece, work 1 edge stitch in garter stitch and stocking stitch as before, then cast on 11-11-13-13-15-15 new stitches (= in side under sleeve), stocking stitch over the 82-90-98-108-118-130 stitches on the back piece, cast on 11-11-13-13-15-15 new stitches (= in side under sleeve), stocking stitch over the right front piece until there is 1 stitch left and finish with 1 edge stitch in garter stitch. The number of stitches on the needle is dependent on how many increases still remain for the V-neck. Insert 1 marker in the middle stitch of the 11-11-13-13-15-15 new stitches in each side. Allow the markers to follow your work onwards; stitches will later be decreased on each side of both markers. When all the increases for the V-neck are finished there are = 186-202-222-242-266-290 stitches on the needle. When the piece measures 5 cm, decrease on both sides of each marker – read DECREASE TIP (= 4 stitches decreased). Decrease like this every 9-9-10-10-10-11 cm a total of 4 times = 170-186-206-226-250-274 stitches. When the piece measures 34-35-36-37-38-39 cm increase 26-26-30-34-38-42 stitches evenly spaced = 196-212-236-260-288-316 stitches. Change to circular needle size 3 mm and work rib, starting from the right side (= knit 2 / purl 2) with 1 edge stitch in garter stitch on each side until the rib measures 4 cm. Cast off with knit over knit and purl over purl – read CASTING-OFF TIP. The vest measures approx.57-59-61-63-65-67 cm from the shoulder down. ASSEMBLY: Sew the shoulder seams with grafting stitches. ARMHOLE EDGE: Knit up 88-132 stitches inside the 1 edge stitch around the armhole with short circular needle size 3 mm and Karisma or Soft Tweed; adjust so the number of stitches is divisible by 4. Work rib in the round (= knit 2 / purl 2) for 2 cm. Cast off with knit over knit and purl over purl – remember CASTING-OFF TIP! Work the other sleeve edge in the same way. RIGHT BAND AND NECK: Starting from the right side at the bottom of the right front piece, knit up 144-172 stitches with short circular needle size 3 mm and Karisma or Soft Tweed, inside the 1 edge stitch, and as far as mid-back of the neck. Adjust so the number of stitches is divisible by 4. Purl 1 row from the wrong side and increase using yarn overs just where the V-neck finishes (i.e. the point, approx. 33-34-35-36-37-38 cm from the cast-off edge upwards), * purl 1, 1 yarn over *, work from *-* a total of 4 times (= 4 stitches increased). On the next row from the right side work as follows: 2 edge stitches in garter stitch, then rib (= knit 2 / purl 2) to end of row (yarn overs worked twisted to avoid holes). Make sure the band is neither too tight nor too loose for the length of the front piece; knit up more/less stitches if necessary. When the band measures 1 cm work the BUTTONHOLES – read description above. When the band/neck measures 2½ cm, Cast off with knit over knit and purl over purl – remember CASTING-OFF TIP. LEFT BAND AND NECK: Starting mid-back of neck with circular needle size 3 mm and Karisma or Soft Tweed and working from the right side, knit up the same number of stitches as on the right band and neck inside the 1 edge stitch down the left front piece. Purl 1 row from the wrong side and increase with yarn overs just where the V-neck finishes (i.e. the point, approx. 33-34-35-36-37-38 cm from the cast-off edge upwards), * purl 1, 1 yarn over *, work from *-* a total of 4 times (= 4 stitches increased). On the next row from the right side work as follows: Work rib (= knit 2 / purl 2) until there are 2 stitches left and finish with 2 stitches in garter stitch (yarn overs worked twisted to avoid holes). When the band/neck measures 2½ cm, Cast off with knit over knit and purl over purl – remember CASTING-OFF TIP. ASSEMBLY: Sew buttons onto the left band. |
||||
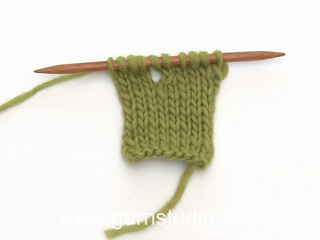
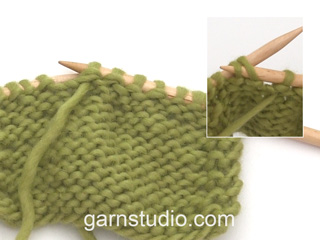
Diagram explanations |
||||
|
||||
|
||||
|
Have you made this or any other of our designs? Tag your pictures in social media with #dropsdesign so we can see them! Do you need help with this pattern?You'll find tutorial videos, a Comments/Questions area and more by visiting the pattern on garnstudio.com. © 1982-2024 DROPS Design A/S. We reserve all rights. This document, including all its sub-sections, has copyrights. Read more about what you can do with our patterns at the bottom of each pattern on our site. |
||||


With over 40 years in knitting and crochet design, DROPS Design offers one of the most extensive collections of free patterns on the internet - translated to 17 languages. As of today we count 304 catalogues and 11422 patterns - 11422 of which are translated into English (UK/cm).
We work hard to bring you the best knitting and crochet have to offer, inspiration and advice as well as great quality yarns at incredible prices! Would you like to use our patterns for other than personal use? You can read what you are allowed to do in the Copyright text at the bottom of all our patterns. Happy crafting!
Comments / Questions (60)
The english translation of this pattern is very confusing. It is very difficult to follow.
12.12.2020 - 22:41Hola, al aumentar para el escote en V se aumenta un punto cuando quedan dos, o en cada uno de los dos últimos puntos? Y para la sisa en el tamaño S se aumenta solo del lado en que se estaba aumentando para el escote en V? Muchas gracias
01.12.2020 - 22:11DROPS Design answered:
Hola Manuela! Hola, Frente derecho: para el escote en V se aumenta un punto cuando quedan dos (hacer 1 lazada entre 2 puntos, es decir tercer y secundo punto) al final de hilera. Para la sisa en el tamaño S tienes que aumentar un punto después de 2 primeros puntos en cada hilera por el lado derecho 2 veces. Buen trabajo!
02.12.2020 - 10:30The directions are confusing and make no sense. In working v neck the number of increase doesn't equate. What is Increase on every 2nd and 4th row? No totals. Very vague and inaccurate.
26.11.2020 - 07:30DROPS Design answered:
Dear Joan, to increase alternately on every other row and every 4th row work as follows: work 1 row with increase, 1 row without increase, 1 row with increase, 3 rows without increase and repeat these 6 rows until the number of stitches for the size have been worked. Happy knitting!
26.11.2020 - 10:27Om ökningen på framstycket hals det står vartannat varv och var fjärde varv Förstår inte det för mig är det en ökning vartannat varv Hälsningar Noomi
18.11.2020 - 22:01DROPS Design answered:
Hej Noomi. Du ökar växelvis på vartannat och vart fjärde varv, dvs först ökar du på vartannat varv, nästa gång på vart fjärde varv, nästa gång på vartannat varv osv. Mvh DROPS Design
19.11.2020 - 08:42Bonjour Avez ous des modèles de tricot gilet homme aux aiguilles droite. Merci
15.10.2020 - 17:35DROPS Design answered:
Bonjour Mme Baneux, fort probablement, mais nombreux sont les modèles tricotés en allers et retours sur aiguille circulaire, juste pour avoir suffisamment de place pour loger toutes les mailles - vous trouverez ici comment adapter un modèle sur aiguilles droites. Bon tricot!
16.10.2020 - 08:34Hej! Jeg er lidt i tvivl om hvor ofte man skal tage ud til v-hals. Skal det forstås således: 1. Pind: omslag 2. Pind: udtagning 3. Pind: omslag 4. Pind: udtagning 1.-4. Pind efter: normal Og således efterfølgende! Eller skal der hele tiden foretages omslag og udtagninger uden de 4 sidste pinde jeg skrev? Håber det giver mening! Sofie
04.10.2020 - 14:08Hola queria saber cómo se une el escote de la espalda gracias
20.09.2020 - 18:56DROPS Design answered:
Hola Loly. Aquí tienes un vídeo sobre cómo montar los puntos adicionales para unir dos hombros: https://youtu.be/Y90wCdJQJW4
27.09.2020 - 19:43Excusez moi pour mon dernier message ! Je n’avais pas bien lu l’explication C’est donc à la fin des augmentation pour les emmanchures que l’on réunit dosent devant tout en continuant les diminutions d’encolure. Bien cordialement Nicole
20.09.2020 - 11:23Bonjour Merci de me préciser si avant de mettre toutes les parties sur la même aiguille, il faut faire le même nombre de rangs pour le dos et les devants. Cordialement Nicole
20.09.2020 - 10:19DROPS Design answered:
Bonjour Mme Cointeaux, tout à fait, dans la mesure où vous reprenez les devants et le dos sur la même aiguille quand toutes les augmentations des emmanchures sont faites, vous devez avoir tricoté le même nombre de rangs. Bon tricot!
21.09.2020 - 13:47Hola es una prenda muy Bonita y la haré para mi marido gracias por tantos patrones gratis y también explicados
02.09.2020 - 20:32