
Popular categories
Looking for a yarn?


|
|
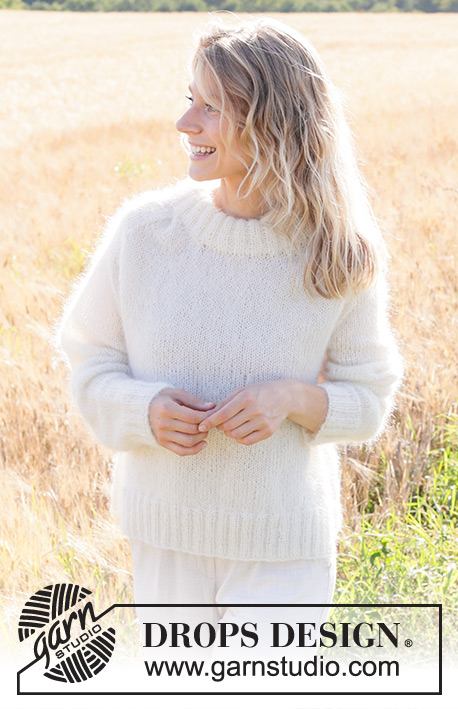
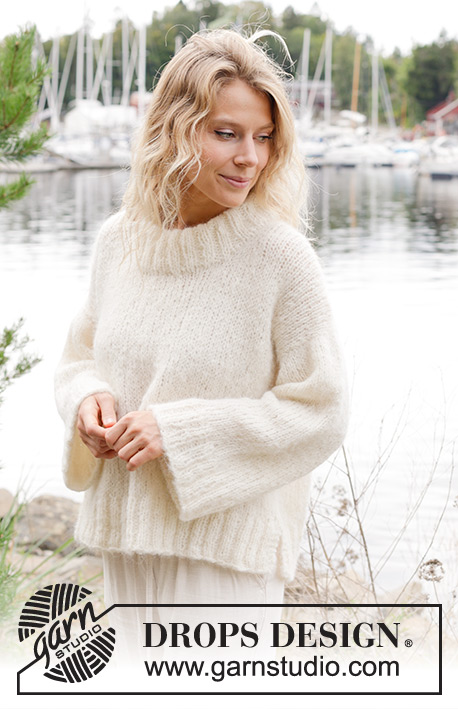
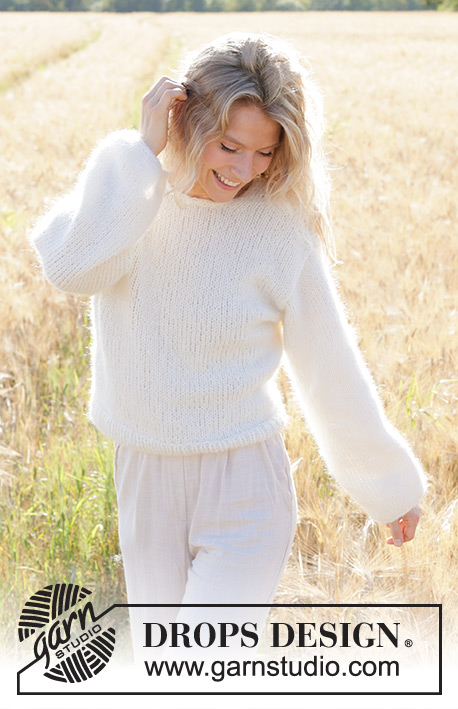
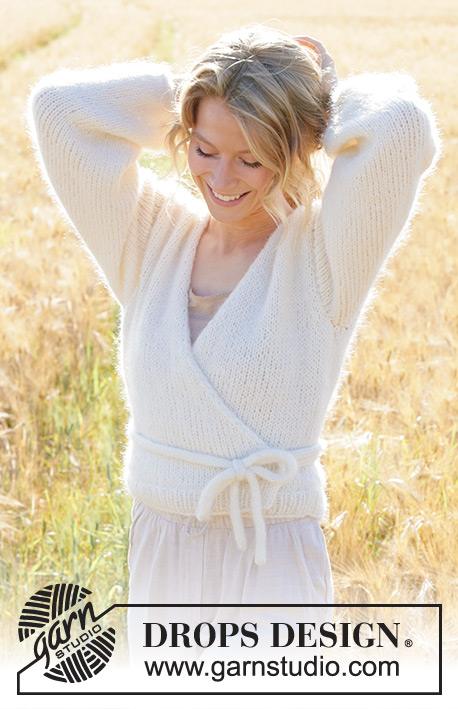
Moonrise Cardigan |
|
 |
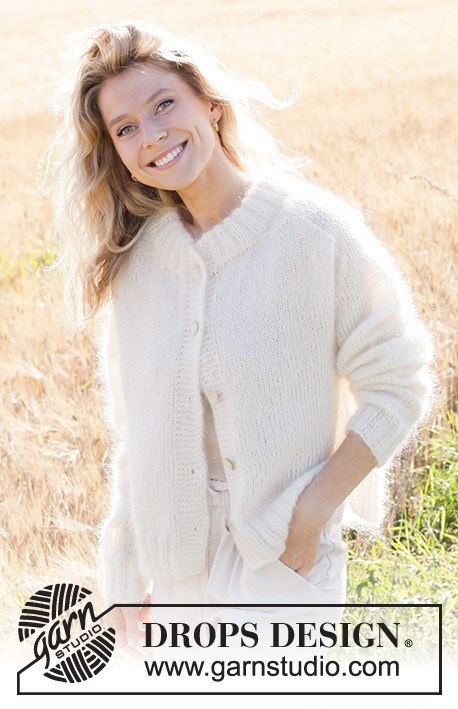 |
Knitted jacket in 3 strands DROPS Kid-Silk. The piece is worked bottom up with saddle shoulders, double neck, split in sides and I-cord. Sizes XS - XXL.
DROPS 249-30 |
|
|
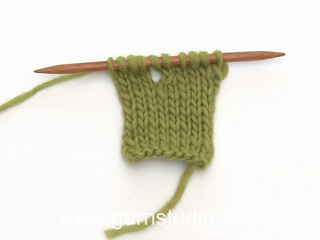
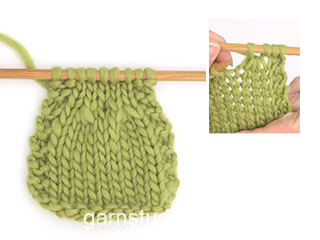
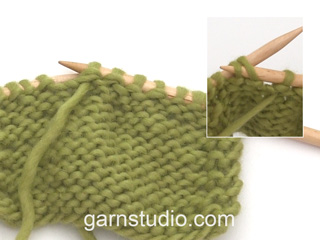
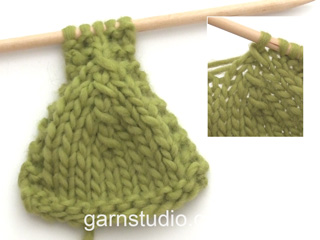
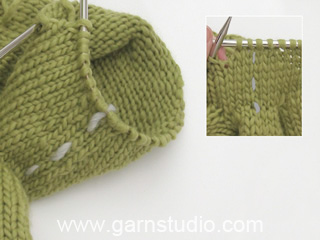
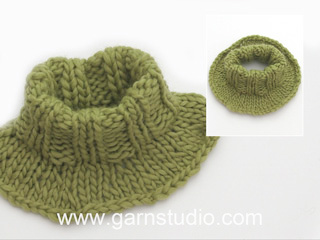
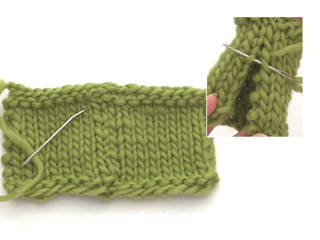
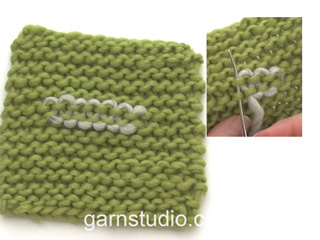
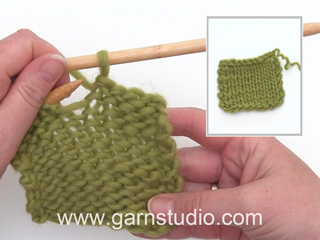
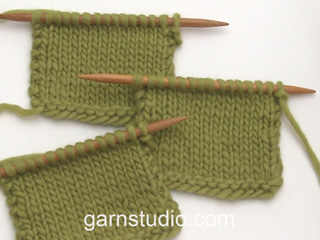
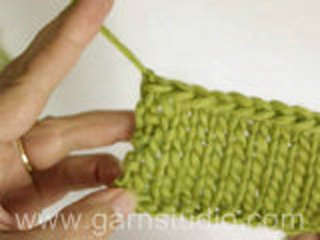
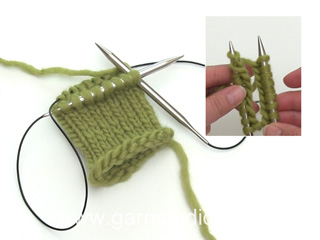
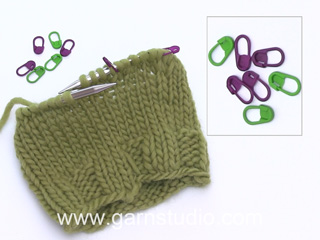
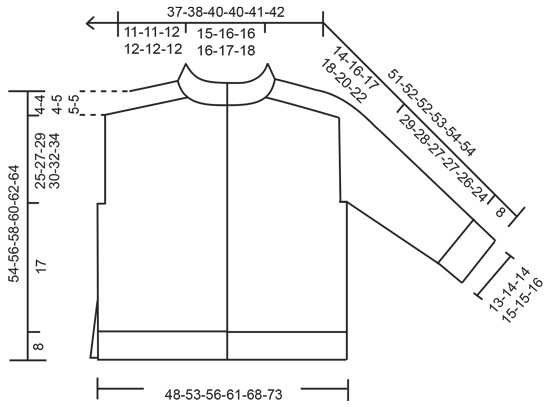
------------------------------------------------------- EXPLANATIONS FOR THE PATTERN: ------------------------------------------------------- GARTER STITCH (worked back and forth): Knit all rows, from both the right and wrong side. 1 ridge in height = knit 2 rows. RIGHT BAND WITH I-CORD: RIGHT SIDE: Slip 1 stitch purl-wise with yarn in front, knit 1, work 6 garter stitches. WRONG SIDE: Work 6 garter stitches, slip 1 stitch purl-wise with yarn in front, knit 1. LEFT BAND WITH I-CORD: RIGHT SIDE: Work 6 garter stitches, slip 1 stitch purl-wise with yarn in front, knit 1. WRONG SIDE: Slip 1 stitch purl-wise with yarn in front, knit 1, work 6 garter stitches BUTTONHOLES: Work the buttonholes on the right band from the right side (band = 8 stitches). ROW 1: Work the first 3 band stitches as before, knit together the 4th and 5th stitch, make 1 yarn over and finish the band as before. ROW 2: Knit the yarn over to leave a hole. The first buttonhole is worked when the band measures 9-9-10-8-10-9½ cm. The other buttonholes when the piece measures: XS: 17½-26-34½-43 cm. S: 18-27-36-45 cm. M: 18½-28-37½-47 cm. L: 16-24-32-40-48 cm. XL: 18-26-34-42-50 cm. XXL: 18-26½-35-43½-52 cm. (= last buttonhole is worked on the first row on the neck). DECREASE TIP-1 (for saddle shoulders): All decreases are worked from the right side! BEFORE MARKER: Work until there are 3 stitches left before the marker, knit 3 together (= 2 stitches decreased). AFTER MARKER: Slip 1 stitch knit-wise, knit 2 together, pass slipped stitch over knitted-together stitches (= 2 stitches decreased). DECREASE TIP-2 (for sleeves): All decreases are worked from the right side! BEFORE MARKER: Work until there are 2 stitches left before the marker, knit 2 together (= 1 stitch decreased). AFTER MARKER: Slip 1 stitch knit-wise, knit 1, pass slipped stitch over knitted stitch (= 1 stitch decreased). INCREASE TIP (for sleeves): Start 1 stitch before the marker-thread, make 1 yarn over, knit 2 (marker-thread sits between these 2 stitches), 1 yarn over. On the next round knit the yarn overs twisted to avoid holes (2 increased stitches). Then work the new stitches in stocking stitch. ------------------------------------------------------- START THE PIECE HERE: ------------------------------------------------------- JACKET – SHORT OVERVIEW OF THE PIECE: The pattern uses both long and short needles; start with the length which fits the number of stitches and change when necessary. The piece is worked bottom up. The front and back pieces are worked separately as far as the armhole. The sleeves are worked bottom up as far as the armholes, then placed on the same circular needle as the front and back pieces. The yoke is continued back and forth, decreasing for the saddle shoulders and sleeves. The double neck is worked in rib. The side seams are sewn together to finish. RIGHT FRONT PIECE: Cast on 62-66-70-78-82-86 stitches with circular needle size 3.5 mm and 3 strands DROPS Kid-Silk. Purl 1 row from the wrong side. Then work as follows from the right side: Work RIGHT BAND WITH I-CORD – read description above, * knit 2, purl 2 *, work from *-* until there are 6 stitches left, knit 2 and work 4 edge stitches in GARTER STITCHES - read description above. Continue this rib back and forth for 8 cm – remember the BUTTONHOLES - read description above. Change to circular needle size 5.5 mm. Purl 1 row from the wrong side and decrease 17-17-18-22-21-21 stitches evenly spaced – do not decrease over the band or edge stitches = 45-49-52-56-61-65 stitches. Continue with stocking stitch, 4 edge stitches on the side and 8 band stitches mid-front. REMEMBER THE KNITTING TENSION! Work until the piece measures 25 cm. On the next row from the wrong side cast off the first 3-3-4-4-5-5 stitches for the armhole = 42-46-48-52-56-60 stitches. Work to end of row. Cut the strand. Lay the piece to one side. LEFT FRONT PIECE: Cast on 62-66-70-78-82-86 stitches with circular needle size 3.5 mm and 3 strands DROPS Kid-Silk. Purl 1 row from the wrong side. Then work as follows from the right side: 4 edge stitches in garter stitch, * knit 2, purl 2 *, work from *-* until there are 10 stitches left, knit 2 and LEFT BAND WITH I-CORD – read description above. Continue this rib back and forth for 8 cm. Change to circular needle size 5.5 mm. Purl 1 row from the wrong side and decrease 17-17-18-22-21-21 stitches evenly spaced – do not decrease over the band or edge stitches = 45-49-52-56-61-65 stitches. Continue with stocking stitch, 4 edge stitches on the side and 8 band stitches mid-front. Work until the piece measures 25 cm. On the next row from the wrong side cast off the last 3-3-4-4-5-5 stitches for the armhole = 42-46-48-52-56-60 stitches. Cut the strand. Lay the piece to one side. BACK PIECE: Cast on 106-118-126-134-150-162 stitches with circular needle size 3.5 mm and 3 strands DROPS Kid-Silk. Purl 1 row from the wrong side. Then work as follows from the right side: 4 edge stitches in garter stitch, knit 2, purl 2 *, work from *-* until there are 6 stitches left, knit 2 and 4 edge stitches in garter stitch. Continue this rib back and forth for 8 cm. Change to circular needle size 5.5 mm. Purl 1 row from the wrong side and decrease 30-34-36-36-42-46 stitches evenly spaced – do not decrease over the edge stitches = 76-84-90-98-108-116 stitches. Continue with stocking stitch and 4 edge stitches in garter stitch on each side. Work until the piece measures 25 cm, with the next row from the right side. Cast off 3-3-4-4-5-5 stitches for the armholes at the beginning of the next 2 rows = 70-78-82-90-98-106 stitches. Cut the strand. Lay the piece to one side. SLEEVES: The sleeves are worked in the round. Cast on 56-60-60-64-64-68 stitches with double pointed needles size 3.5 mm and 3 strands DROPS Kid-Silk. Work rib (knit 2, purl 2) for 8 cm. Knit 1 round and decrease 14-16-14-18-16-18 stitches evenly spaced = 42-44-46-46-48-50 stitches. Insert 1 marker-thread at the beginning of the round (= mid-under sleeve). Allow the thread to follow your work onwards, it is used when increasing under the sleeves. Change to needle size 5.5 mm and work stocking stitch. When the sleeve measures 11-10-11-11-12-11 cm, increase 1 stitch on each side of the marker-thread – read INCREASE TIP. Repeat this increase every 4½-4-2½-2-1½-1½ cm a total of 6-7-9-12-13-13 times = 54-58-64-70-74-76 stitches. Work until the sleeve measures 37-36-35-35-34-32 cm. There is approx. 25-27-29-30-32-34 cm to the neckline – try the sleeve on and work to desired length. Cast off 6-6-8-8-10-10 stitches under the sleeve (i.e., 3-3-4-4-5-5 stitches on each side of the marker-thread) = 48-52-56-62-64-66 stitches. Cut the strand. Lay the piece to one side. YOKE: All pieces are now placed on the same circular needle, stocking stitch is continued with the bands as before and 4 markers are inserted on the first row (between 2 stitches and which are used when working the saddle shoulders). Start from the right side on the right front piece, then work a sleeve, the back piece, the second sleeve and finally the left front piece as follows: Work 46-48-50-51-52-54 stitches (= right front piece), insert marker-1 here, work 40-48-52-64-72-78 stitches (= sleeve), insert marker-2 here, work 78-82-86-88-90-94 stitches (= back piece), insert marker-3 here, work 40-48-52-64-72-78 stitches (= sleeve), insert marker-4 here, work 46-48-50-51-52-54 stitches (= left front piece) = 250-274-290-318-338-358 stitches. Allow the 4 markers to follow your work onwards. Work 1-0-0-1-0-0 cm of stocking stitch back and forth, with 8 band stitches on each side. Now decrease for the sleeves as follows: SLEEVE DECREASES-1: Read the next section before continuing! NOTE! Do not work this section in size S, go straight to SLEEVE DECREASES-2. On the next row from the right side decrease 8 stitches on the sleeves as follows: Decrease 2 stitches AFTER markers 1 and 3 and decrease 2 stitches BEFORE markers 2 and 4 – read DECREASE TIP-1. Decrease only on the sleeves (the number of stitches on the front and back pieces remains the same). Decrease like this every 2nd row (each row from the right side) a total of 0-1-2-7-8-9 times = 250-266-274-262-274-286 stitches. SLEEVE DECREASES -2: On the next row from the right side, decrease 4 stitches on the sleeves as follows. Decrease 1 stitch AFTER markers 1 and 3 and decrease 1 stitch BEFORE markers 2 and 4 – read DECREASE TIP-2. Only decrease on the sleeves (the number of stitches on the front and back pieces remains the same). Decrease like this every 2nd row (each row from the right side) a total of 13-15-15-10-12-13 times = 198-206-214-222-226-234 stitches (there are 14-14-14-16-16-16 stitches left on each sleeve). The piece measures approx. 14-16-17-18-20-22 cm from where the pieces were joined. Now work the saddle shoulders. SADDLE SHOULDERS-1: On the next row from the right side decrease 8 stitches as follows: Decrease 2 stitches BEFORE markers 1 and 3 and decrease 2 stitches AFTER markers 2 and 4 – remember DECREASE TIP-1. Only decrease on the front and back pieces (the number of stitches on the sleeves remains the same). Decrease like this every 2nd row (each row from the right side) a total of 4-4-5-5-5-5 times = 166-174-174-182-186-194 stitches, with the last row worked from the wrong side. The piece measures approx. 44-46-47-48-50-52 cm from the cast-on edge. Cut the strand, place the 8 band stitches on each side on separate threads = 150-158-158-166-170-178 stitches. Now begin to decrease for the neckline, AT THE SAME TIME continue decreasing for the saddle shoulders. Read NECKLINE DECREASES and SADDLE SHOULDERS-2 before continuing! NECKLINE DECREASES: Start from the right side and cast off at the beginning of each row as follows: 8-10-10-11-12-14 stitches 1 time, 3 stitches 1 time, 2 stitches 1 time and 1 stitch 3 times on each side. SADDLE SHOULDERS -2: Continue decreasing 8 stitches for the saddle shoulders every 2nd row 7-7-7-7-7-7 more times (a total of 11-11-12-12-12-12 times), with the next row from the wrong side. AFTER LAST DECREASE: There are 62-66-66-72-74-78 stitches (14-14-14-16-16-16 stitches on each sleeve, zero stitches on the front pieces and 34-38-38-40-42-46 stitches on the back piece). The yoke measures approx. 25-27-29-30-32-34 cm from where the pieces were joined and the jacket measures approx. 54-56-58-60-62-64 cm from the shoulder. Cut the strand and continue from the right side on the right band. Work RIGHT BAND over the 8 band stitches from the first thread, knit up 16-18-18-19-20-22 stitches along the right neckline, knit to end of row, knit up 16-18-18-19-20-22 stitches along the left neckline, work LEFT BAND over the 8 band stitches from the second thread = 110-118-118-126-130-138 stitches. Purl 1 row from the wrong side (bands as before) and decrease 0-4-4-4-4-8 stitches evenly over the purled stitches = 110-114-114-122-126-130 stitches. DOUBLE NECK: Use circular needle size 3.5 mm and work rib from the right side as follows: 8 band stitches as before, rib (knit 2, purl 2) until there are 10 stitches left, knit 2 and 8 band stitches as before. Continue this rib back and forth for 5 cm. At the beginning of the next 2 rows, cast off the outermost 7 stitches on each side. Continue the rib with 1 edge stitch in garter stitch on each side. When the neck measures 10 cm, cast off a little loosely. Fold the neck double to the inside and fasten down. Sew the openings on the bands with small stitches. ASSEMBLY: Sew the side seams, starting by the armhole and sewing in the outermost loop of the outermost stitch so the seam is flat. Leave a split at the bottom on each side of desired length (you will have 8 garter stitches down each side seam). Sew together the openings under each sleeve. Sew the buttons onto the left band. |
|
|
|
|
Have you made this or any other of our designs? Tag your pictures in social media with #dropsdesign so we can see them! Do you need help with this pattern?You'll find tutorial videos, a Comments/Questions area and more by visiting the pattern on garnstudio.com. © 1982-2024 DROPS Design A/S. We reserve all rights. This document, including all its sub-sections, has copyrights. Read more about what you can do with our patterns at the bottom of each pattern on our site. |
|


With over 40 years in knitting and crochet design, DROPS Design offers one of the most extensive collections of free patterns on the internet - translated to 17 languages. As of today we count 304 catalogues and 11422 patterns - 11422 of which are translated into English (UK/cm).
We work hard to bring you the best knitting and crochet have to offer, inspiration and advice as well as great quality yarns at incredible prices! Would you like to use our patterns for other than personal use? You can read what you are allowed to do in the Copyright text at the bottom of all our patterns. Happy crafting!
Comments / Questions (7)
Ik wil het vest met met garen fabel breien, hoeveel garen heb ik dan nodig? Moet het dan ook met 3 draden worden gebreid?
22.05.2024 - 11:28Vil strikke en jakke i droppes air,en enkel jakke med raglandfelling
29.04.2024 - 14:47DROPS Design answered:
Hei Torgunn, Hvis du søker på "Drops Air, jakke, raglan" under Gratis oppskrifter, får du en liste over våre oppskrifter. God fornøyelse!
30.04.2024 - 06:37Bonjour combien me faut de laine pour le tricoter en daisy + kid silk? merci pour la réponse
10.03.2024 - 19:00DROPS Design answered:
Bonjour Valérie, calculez le métrage total nécessaire pour votre taille et divisez-le en 3, le tiers de ce métrage correspond à la quantité kid-Silk (= à rediviser par le métrage d'une pelote Kid-Silk pour avoir le nombre de pelotes), et divisez le métrage restant (les 2/3) par le métrage d'une pelote Daisy. Pensez ensuite à bien vérifier et à bien conserver la bonne tension. Bon tricot!
11.03.2024 - 09:39Cloud cardigan
20.01.2024 - 08:37Lekker fluffy
18.01.2024 - 21:51White summer
18.01.2024 - 21:15Nuage coton
18.01.2024 - 16:21