
Popular categories
Looking for a yarn?


|
|
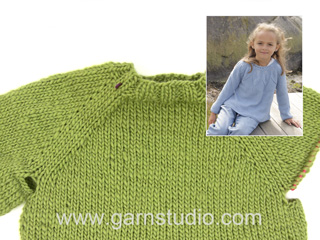
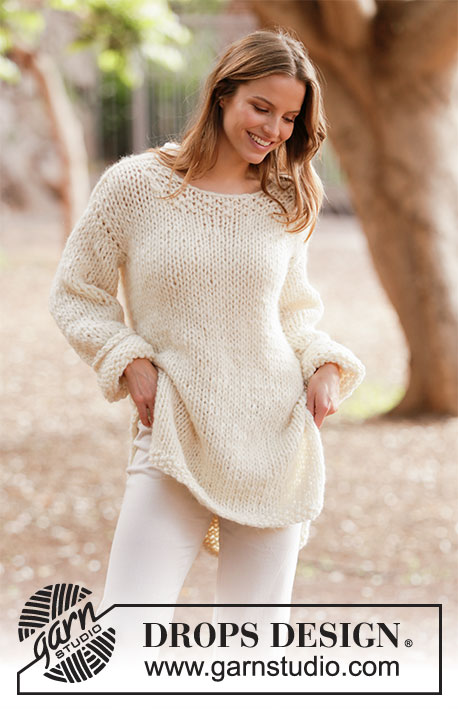
Sahara Rose Sweater |
|
 |
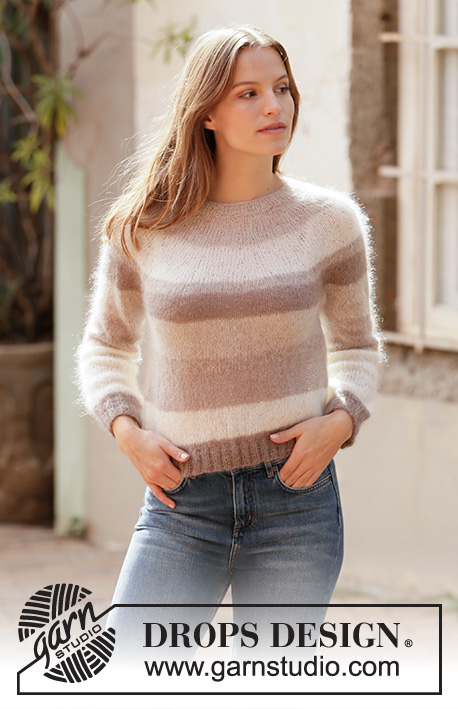 |
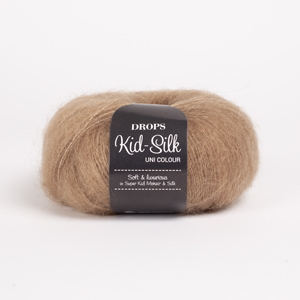
Knitted jumper in 2 strands DROPS Kid-Silk. The piece is worked top down with stripes and round yoke. Sizes S - XXXL.
DROPS 213-32 |
|
|
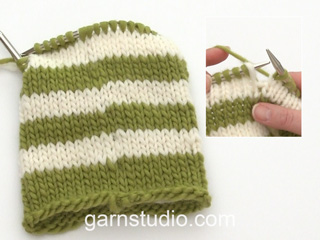
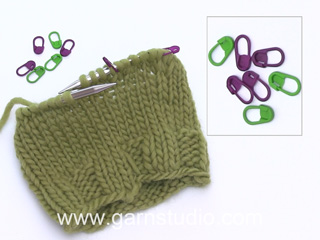
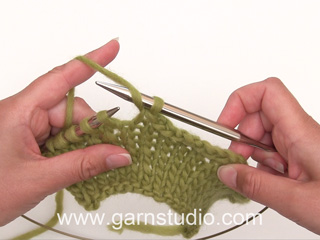
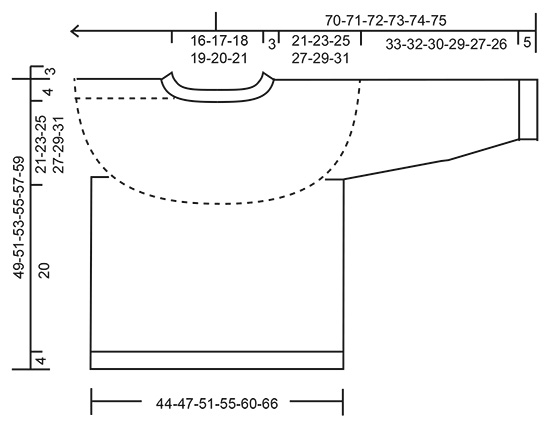
------------------------------------------------------- EXPLANATIONS FOR THE PATTERN: ------------------------------------------------------- STRIPES: NOTE: Stripes start on the yoke (after the rib). STRIPE 1: 5-5-5-5-6-6 cm with 1 strand light beige + 1 strand off white (+ 3 cm of rib = a total of 8-8-8-8-9-9 cm). STRIPE 2: 7-8-8-8-8-8 cm with 2 strands off white. STRIPE 3: 2-2-2-2-2-2 cm (i.e. 4 rows) with 1 strand off white + 1 strand beige. STRIPE 4: 5-5-5-6-6-7 cm with 2 strands beige. STRIPE 5: 7-8-8-8-8-8 cm with 1 strand light beige + 1 strand off white. STRIPE 6: 2-2-2-2-2-2 cm (i.e. 4 rows) with 1 strand beige + 1 strand off white. STRIPE 7: 7-7-8-8-8-8 cm with 2 strands light beige. STRIPE 8: 5-5-5-6-6-7 cm with 2 strands off white. STRIPE 9: Work with 2 strands beige to finished length (approx. 5-5-6-6-7-7 cm). STRIPES SLEEVE: Continue with stripes in the same way as on the body until stripe 7 has been completed in height. Then work with 2 strands off white until the sleeve measures 32-31-29-28-26-25 cm. Finally work with 2 strands beige to finished length. INCREASE/DECREASE TIP (evenly spaced): To work out how to increase/decrease evenly, count the total number of stitches on needle (e.g. 80 stitches) and divide by the number of increases/decreases to be made (e.g. 2) = 40. In this example, increase by making 1 yarn over after each 40th stitch. On the next round work the yarn overs twisted to avoid holes. When decreasing, knit together each 39th and 40th stitch. INCREASE TIP (for yoke): Increase alternately before and after the marker thread; i.e. first increase before all marker threads on the round, then increase after all marker threads, then increase before all marker threads and so-on. Increase before the marker thread as follows: Work until there is 1 stitch left before the marker thread and make 1 yarn over, knit 1, marker thread sits here. Increase after the marker thread as follows: Knit 2, make 1 yarn over. On the next round knit the yarn overs twisted to avoid holes. Then work the new stitches in stocking stitch. DECREASE TIP (for sleeves): Decrease 1 stitch on each side of the marker thread as follows: Work until there are 3 stitches left before the marker thread, knit 2 together, knit 2 (marker thread sits between these 2 stitches), slip 1 stitch as if to knit, knit 1 and pass the slipped stitch over the knitted stitch. CASTING-OFF TIP: To avoid the cast-off edge being tight you can cast off with a larger size needle. If the edge is still tight, make 1 yarn over after approx. each 4th stitch at the same time as casting off and the yarn overs are cast off as normal stitches. ------------------------------------------------------- START THE PIECE HERE: ------------------------------------------------------- JUMPER – SHORT OVERVIEW OF THE PIECE: The neck and yoke are worked in the round with circular needle, top down from mid back. The yoke is divided for body and sleeves and the body continued in the round with circular needle. The sleeves are worked in the round with short circular needle/double pointed needles, top down. NECK: Cast on 80-84-88-92-96-100 stitches with circular needle size 4 mm and 1 strand off-white + 1 strand light beige (= 2 strands). Knit 1 round. Then work rib (= knit 2 / purl 2) in the round for 3 cm. Knit 1 round where the number of stitches is adjusted to 78-84-90-96-102-108 stitches – read INCREASE/DECREASE TIP (i.e., in size S decrease 2 stitches, in size M the stitch-number stays the same and in sizes L, XL, XXL and XXXL increase 2-4-6-8 stitches). Insert a marker at the beginning of the round (= mid back). THE PIECE IS NOW MEASURED FROM HERE. YOKE: Change to circular needle size 5 mm. The first round on the yoke is worked as follows: * Knit 3, insert a marker thread here, knit 3 *, work from *-* to the end of the round = 13-14-15-16-17-18 marker threads in the piece. Allow the threads to follow your work onwards; they will be used when increasing on the yoke. Work stocking stitch and STRIPES – read description above. AT THE SAME TIME, on the first round, increase at each of the marker threads – read INCREASE TIP. Increase like this every 2nd round 3-3-6-5-4-3 times and every 4th-4th-6th-6th-6th-6th round 9-9-6-7-8-9 times = 234-252-270-288-306-324 stitches. REMEMBER THE KNITTING TENSION! When all the increases are finished knit 1 round where you increase 0-2-6-6-12-14 stitches evenly spaced = 234-254-276-294-318-338 stitches. Continue with stocking stitch until the piece measures 21-23-25-27-29-31 cm from the marker. The next round is worked as follows: Work the first 33-36-39-42-46-50 stitches (= half back piece), place the next 51-55-59-63-67-68 stitches on a thread and cast on 8-8-8-10-10-12 stitches on the needle (= in side under the sleeve), work the next 66-72-79-84-92-101 stitches (= front piece), place the next 51-55-59-63-67-68 stitches on a thread and cast on 8-8-8-10-10-12 stitches on the needle (= in side under the sleeve), work the last 33-36-40-42-46-51 stitches (= half back piece). Body and sleeves are finished separately. THE PIECE IS NOW MEASURED FROM HERE. BODY: = 148-160-174-188-204-226 stitches. Continue in the round with stocking stitch and stripes. When the piece measures 20 cm, knit 1 round where you increase 28-32-34-40-40-46 stitches = 176-192-208-228-244-272 stitches. Change to circular needle size 4 mm and work rib (= knit 2 / purl 2) for 4 cm. Cast off with knit over knit and purl over purl – read CASTING-OFF TIP. The jumper measures approx. 49-51-53-55-57-59 cm from the shoulder down. SLEEVE: Place the 51-55-59-63-67-68 stitches from the thread on the one side of the piece on short circular needle/double pointed needles size 5 mm and knit up 1 stitch in each of the 8-8-8-10-10-12 stitches cast on under the sleeve = 59-63-67-73-77-80 stitches. Insert a marker thread in the middle of the 8-8-8-10-10-12 stitches under the sleeve (= 4-4-4-5-5-6 new stitches on each side of the marker thread). Allow the thread to follow your work onwards; it will be used when decreasing under the sleeve. Work stocking stitch and STRIPES SLEEVE. When the sleeve measures 4-4-4-4-4-3 cm from the division begin to decrease – read DECREASE TIP. Decrease like this every 6½-4-3-2½-2-2 cm a total of 5-7-8-10-11-12 times = 49-49-51-53-55-56 stitches. Continue working until the sleeve measures 33-32-30-29-27-26 cm from the division. Knit 1 round where you decrease 9-9-7-5-7-8 stitches evenly spaced = 40-40-44-48-48-48 stitches. Change to double pointed needles size 4 mm and work rib (= knit 2 / purl 2) for 5 cm. Cast off with knit over knit and purl over purl – remember CASTING-OFF TIP. Work the other sleeve in the same way. |
|
|
|
|
Have you made this or any other of our designs? Tag your pictures in social media with #dropsdesign so we can see them! Do you need help with this pattern?You'll find tutorial videos, a Comments/Questions area and more by visiting the pattern on garnstudio.com. © 1982-2024 DROPS Design A/S. We reserve all rights. This document, including all its sub-sections, has copyrights. Read more about what you can do with our patterns at the bottom of each pattern on our site. |
|


With over 40 years in knitting and crochet design, DROPS Design offers one of the most extensive collections of free patterns on the internet - translated to 17 languages. As of today we count 304 catalogues and 11422 patterns - 11422 of which are translated into English (UK/cm).
We work hard to bring you the best knitting and crochet have to offer, inspiration and advice as well as great quality yarns at incredible prices! Would you like to use our patterns for other than personal use? You can read what you are allowed to do in the Copyright text at the bottom of all our patterns. Happy crafting!
Comments / Questions (37)
De vorige vraag heb ik via translate opgelost. Nu ben ik bij; brei de eerste 33 (maat S) zet 51 op de hulpdraad en 8 op de naald. Brei 66 steken, 51 op de draad en 8 op de naald, brei 33 steken. 33+51+66+51+33= 234. Ik heb 234 steken. Waar moeten die 2x8 vandaan komen, van de 51 die op de hulpdraad zijn of van de 66 van het voorpand.
07.09.2020 - 14:06DROPS Design answered:
Dag Marga,
Dat zijn 8 nieuwe steken die je opzet. Deze komen als het ware onder de oksel.
13.09.2020 - 11:12Ik maak maat S, hals 80 steken. Dan de pas *3 recht - markeerdraad 3 recht - markeerdraad 3 recht enzovoort. Maar dan kom ik niet tot13 markeerdraden maar 26. Wat doe ik fout?
05.09.2020 - 22:10DROPS Design answered:
Dag Marga,
Er horen steeds 6 steken tussen de markeerdraden te zitten. Eerst brei je 3 steken dan een markeerdraad, dan steeds 6 steken er tussen. Op het eind houd je nog 3 steken over (+ de 3 steken van het begin van de toer.).
11.09.2020 - 13:45Spørsmål i fht økning. Det står at jeg skal sette merketråd etter hver 3.maske og deretter øke rundt disse. Det står videre at jeg da har 17 merketråder i min str. Dette blir selvsagt feil, da 17x3 = 51, ettersom det er 102 masker rundt vil det bli 34 merkestråder. Jeg antar det likevel blir riktig i fht uttak, men spør likevel ettersom det blir dobbelt så mange økninger som det ville blitt med 17 merker?
04.08.2020 - 09:31DROPS Design answered:
Hei Siri. Du skal ikke øke etter hver 3. maske. men etter hver 6. maske MEN du starter med å strikke 3 masker før 1. merketråd skal settes. Slik står det i oppskriften: Strikk * 3 masker rett, sett en merketråd her, strikk 3 masker rett *, strikk fra *-* rundt omgangen = 13-14-15-16-17-18 merketråder i arbeide. Når du gjentar det som står mellom stjernene blir det 6 masker mellom hver merketråd. Du får da 17 merketråder i str XXL med 6 masker mellom = 102 masker på pinnen. God Fornøyelse!
10.08.2020 - 14:35Bonjour, je rencontre un problème dans l'ouvrage, je suis à l'empiècement. J'ai 252 mailles pour le taille M alors que je n'ai augmenté que 3 fois tous les 4 tours, il y a encore 6 fois tous les 4 tours, donc je ne comprend pas. Pouvez vous me venir en aide svp. Merci d'avance
17.07.2020 - 23:41DROPS Design answered:
Bonjour Na Sourya, vous avez 14 fils marqueurs et devez augmenter 14 mailles à chaque fois alternativement avant et après le fil marqueur (cf AUGMENTATIONS), vous avez 84 m + (14 augm x 12) = 252 m. Bon tricot!
20.07.2020 - 09:01Hi I am going to knit this for my daughter but with different colours and don't want to mix the colours only knit in 2 strands of same colours, could you confirm the amount I would need of 3 colts working this was. Much appreciated as I want to buy adequate amount as your wool is not available in /Australia. regards Belinda
04.07.2020 - 01:32DROPS Design answered:
Dear Belinda, we are unfortunately not able to adjust every pattern to every single request - please contact your DROPS store - even per mail or telephone, they should be able to help you - you can also get inspiration from patterns with same tension and stripes. Happy knitting!
06.07.2020 - 08:13I oppskriften 213-32 står det at jeg skal øke masker før vrangborden. Kan det være riktig ?
15.06.2020 - 16:52DROPS Design answered:
Hej Kirsten, ja det stemmer, det gør du fordi du skifter pinde til et nummer mindre og fordi at ribben trækker arbejdet sammen. God fornøjelse!
16.06.2020 - 07:40Hi I have increased for the yoke...3 times and then 9 times. but now I have ended up with 390 for size s
10.06.2020 - 21:51DROPS Design answered:
Dear Selam, did you increase 13 stitches (1 stitch at each marker) on each increase round? You should have 78 sts + 13 inc x 3 (39 inc) + 13 inc x 9 (117 inc) = 234 sts. Happy knitting!
11.06.2020 - 08:31Har kommet så langt i mønster og ferdig med øking. Så står d strikk glsttstrikk til arbeidet måler 25cm fra merket. Hvor måler jeg fra?
18.05.2020 - 09:37DROPS Design answered:
Hei Lena. Siste linje under HALSKANT står det: ..... Sett et merke på begynnelsen av omgangen (= midt bak). HERFRA MÅLES ARBEIDET VIDERE. God Fornøyelse!
18.05.2020 - 12:00Hej! Jag skulle vilja sticka denna fina tröja enfärgad. Finns det någon översikt för garnåtgång/storlek i enfärgad version?
22.04.2020 - 11:39DROPS Design answered:
Hei Lotta. Om du ønsker å strikke denne genseren ensfarget, trenger du denne garnmengden: S (150g) - M (175 g) - L (200 g)- XL (200 g) - XXL (225 g) - XXXL (250 g). God Fornøyelse!
28.04.2020 - 11:34Milk & coffee
07.04.2020 - 13:59