
Popular categories
Looking for a yarn?


|
|||||||||||||||||||
Moroccan Market Muse |
|||||||||||||||||||
 |
 |
||||||||||||||||||
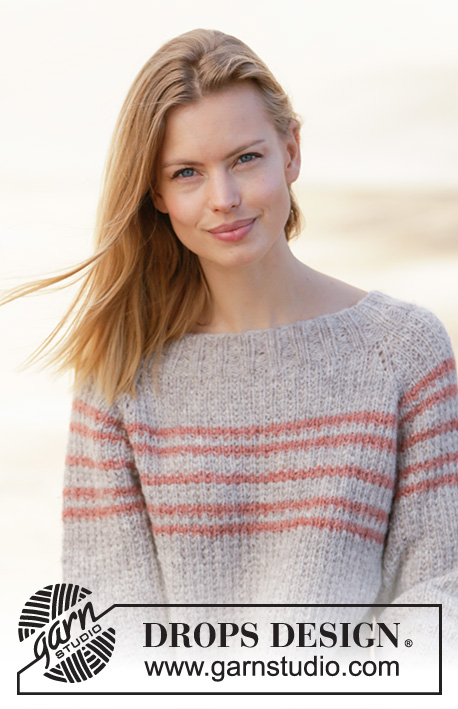
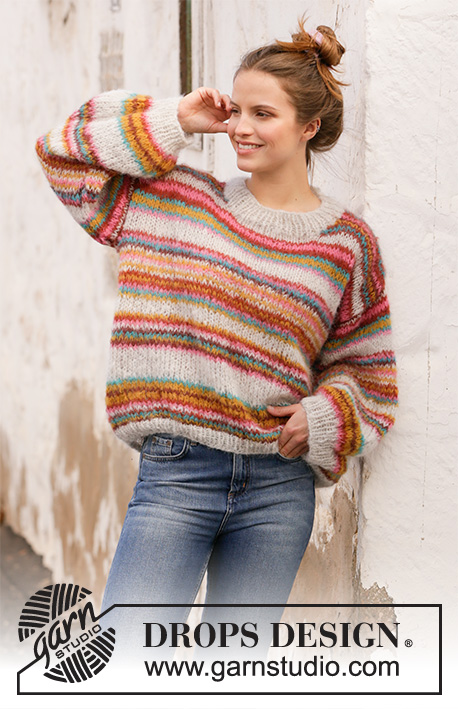
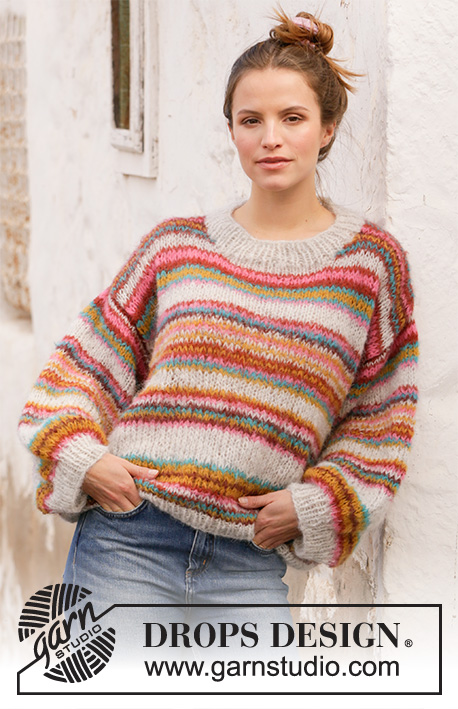
Knitted jumper with stripes in DROPS Melody. Sizes XS - XXL.
DROPS 212-20 |
|||||||||||||||||||
|
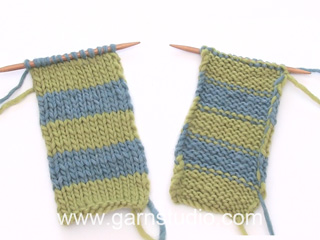
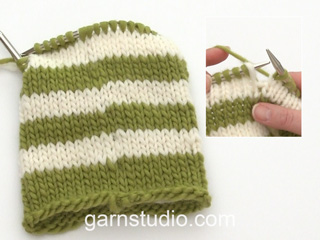
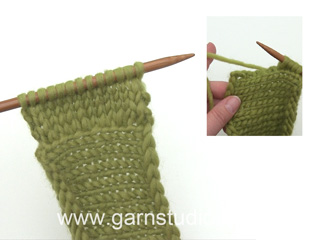
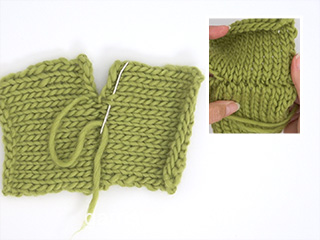
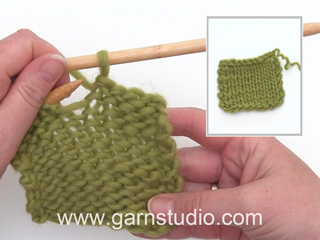
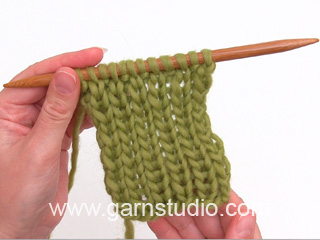
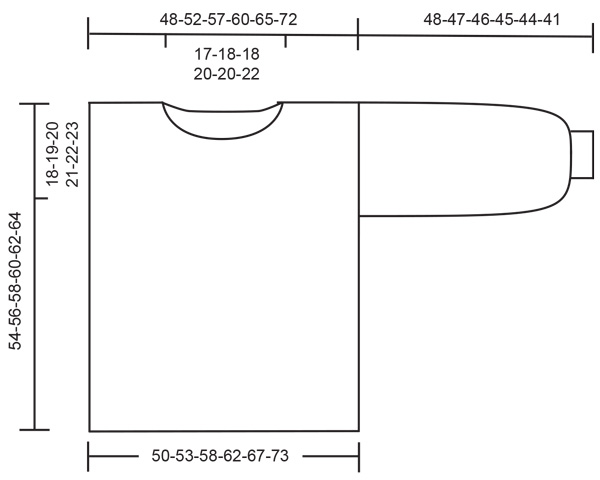
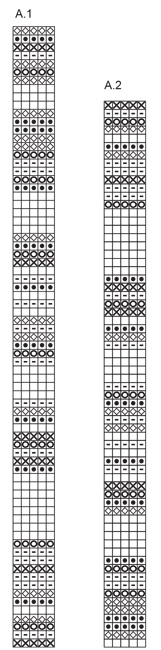
------------------------------------------------------- EXPLANATIONS FOR THE PATTERN: ------------------------------------------------------- PATTERN: See diagrams A.1 and A.2. Repeat A.1 in height to finished length. INCREASE TIP: Increase by making 1 yarn over on each side of the marker thread + 1 stitch on each side. On the next round work the yarn overs twisted to avoid holes. DECREASE TIP (evenly spaced): To work out how to increase evenly, count the total number of stitches on the needle (e.g. 50 stitches) and divide by the number of increases to be made (e.g. 20) = 2.5. In this example, knit alternately each 1st and 2nd and each 2nd and 3rd stitch together. ------------------------------------------------------- START THE PIECE HERE: ------------------------------------------------------- JUMPER – SHORT OVERVIEW OF THE PIECE: The body is worked in the round with circular needle, bottom up. The piece is divided for the sleeves and finished back and forth on the needle. The sleeves are worked in the round with double pointed needles/short circular needle, top down. BODY: Cast on 120-128-140-148-160-176 stitches with circular needle size 8 mm and pearl grey. Knit 1 round, then work rib as follows: * knit 1 / purl 1 *, repeat from *-*. Work rib for 4 cm, then change to circular needle size 9 mm. Continue with stocking stitch and stripes according to A.1 to finished length. REMEMBER THE KNITTING TENSION! When the piece measures 36-37-38-39-40-41 cm, work the next round as follows: Cast off 1 stitch, work 58-62-68-72-78-86 stitches, cast off 2 stitches, work 58-62-68-72-78-86 stitches and cast off 1 stitch. Each piece is now finished separately, back and forth on the needle. Place the first 58-62-68-72-78-86 stitches on a thread and continue working the last 58-62-68-72-78-86 stitches for the back piece. BACK PIECE: = 58-62-68-72-78-86 stitches. Continue with stocking stitch and stripes. When the piece measures 52-54-56-58-60-62 cm, cast off the middle 18-20-20-22-22-24 stitches for the neck and each shoulder is finished separately. Continue by casting off 1 stitch on the next row from the neck = 19-20-23-24-27-30 stitches. Continue with stocking stitch until the piece measures 54-56-58-60-62-64 cm (= 18-19-20-21-22-23 cm from where you cast off 1 stitch on each side for the armhole), cast off. Work the other shoulder in the same way. FRONT PIECE: = 58-62-68-72-78-86 stitches. Continue with stocking stitch and stripes. When the piece measures 47-49-51-53-55-57 cm, place the middle 12-14-14-16-16-18 stitches on a thread for the neck and each shoulder is finished separately. Then cast off stitches on each row from the neck as follows: Cast off 2 stitches 1 time and 1 stitch 2 times = 19-20-23-24-27-30 stitches on the shoulder. Continue with stocking stitch until the piece measures 54-56-58-60-62-64 cm (= 18-19-20-21-22-23 cm from where you cast off 1 stitch on each side for the armholes), cast off. Work the other shoulder in the same way. ASSEMBLY: Sew the shoulder seams. SLEEVES: The sleeves are worked with double pointed needles/short circular needle, top down. Pick up 44-46-48-50-52-54 stitches around the armhole in the outermost loop of the outermost stitches with circular needle size 9 mm and brick –start where the piece was divided for front and back pieces and pick up 22-23-24-25-26-27 stitches as far as the shoulder seam, pick up 22-23-24-25-26-27 stitches from the shoulder seam and down to the division again. Insert 1 marker thread mid under the sleeve. Work stocking stitch and A.2. When the piece measures 30-29-28-27-26-23 cm, increase 1 stitch on each side of the marker thread – read INCREASE TIP. Increase like this every 5 cm a total of 3 times in all sizes = 50-52-54-56-58-60 stitches. Continue with stocking stitch and A.2 until the piece measures 44-43-42-41-40-37 cm. Now finish the sleeve with pearl grey. Knit 1 round where you decrease 20-22-20-22-20-22 stitches evenly spaced = 30-30-34-34-38-38 stitches. Change to double pointed needles size 8 mm and work rib (knit 1 / purl 1) for 4 cm. Cast off with knit over knit and purl over purl when the sleeve measures 48-47-46-45-44-41 cm. Work the other sleeve in the same way. NECK: Start from the right side with pearl grey and short circular needle size 8 mm. Knit up 60-80 stitches (including the stitches on the thread – the number should be divisible by 2). Work rib (knit 1 / purl 1) for 4 cm. Cast off with knit over knit and purl over purl. |
|||||||||||||||||||
Diagram explanations |
|||||||||||||||||||
|
|||||||||||||||||||
|
|||||||||||||||||||
|
|||||||||||||||||||
|
Have you made this or any other of our designs? Tag your pictures in social media with #dropsdesign so we can see them! Do you need help with this pattern?You'll find tutorial videos, a Comments/Questions area and more by visiting the pattern on garnstudio.com. © 1982-2024 DROPS Design A/S. We reserve all rights. This document, including all its sub-sections, has copyrights. Read more about what you can do with our patterns at the bottom of each pattern on our site. |
|||||||||||||||||||


With over 40 years in knitting and crochet design, DROPS Design offers one of the most extensive collections of free patterns on the internet - translated to 17 languages. As of today we count 304 catalogues and 11422 patterns - 11422 of which are translated into English (UK/cm).
We work hard to bring you the best knitting and crochet have to offer, inspiration and advice as well as great quality yarns at incredible prices! Would you like to use our patterns for other than personal use? You can read what you are allowed to do in the Copyright text at the bottom of all our patterns. Happy crafting!
Comments / Questions (75)
Hoi Drops! Hoeveel garen zou ik nodig hebben als ik deze trui in één kleur wil breien (in XXL, als dat helpt)?
06.07.2022 - 17:02DROPS Design answered:
Dag Ket,
Je zou op onze site kunnen kijken bij vergelijkbare truien die in 1 kleur zijn gebreid. Het hangt ook van je maat af.
08.07.2022 - 08:22Hej, jeg forstår ikke helt hvad der menes, i afsnittet om forstykket, med dette “Videre lukkes der af på hver pind fra halsen således: Luk 2 masker af 1 gang og 1 maske 2 gange = 19-20-23-24-27-30 masker tilbage på skulderen.” Håber i kan hjælpe mig
26.05.2022 - 21:30DROPS Design answered:
Hej Lærke. På första pinde lukker du 2 masker mot halsen, på neste pinde lukker du 1 maske mot halsen och på neste pinde lukker du 1 maske mot halsen. Mvh DROPS Design
27.05.2022 - 12:53Super flot bluse 👌… jeg er dog ikke så vild med de vige ærmer. Hvis jeg ønsker alm. ærmer, hvor mange masker, jeg skal så slå op…? PFT Pia
24.04.2022 - 08:01DROPS Design answered:
Hei Pia. Kommer litt an på hvilken str du strikker, men ta en titt på andre gensere som er strikket i Melody (som har samme strikkefasthet) og som har en erme vidde som du syns vi passe deg. Du kan da tilpasse den til Moroccan Market Muse genseren i den str. du strikker. Husk å se målene på målskissen. mvh DROPS Design
25.04.2022 - 11:33Hej, er sweateren strikket i enkelttråd eller dobbelttråd? Vh
22.04.2022 - 10:59DROPS Design answered:
Hej Lærke, sweateren er strikket (lidt løst) med enkelt tråd DROPS Melody :)
22.04.2022 - 11:51Are the measurements on a picture a finished garment measurements? Thank you Pavla
19.04.2022 - 11:39DROPS Design answered:
Dear Pavla, the measurements in the chart are for the finished garment and are taken flat from side to side. Read more here. Happy knitting!
19.04.2022 - 13:08Hei, lurer på hvilken str genseren er i bildet? Vil gjerne ha lik størrelse som på bildet, så hadde vært fint å bli opplyst dette!
16.02.2022 - 17:16DROPS Design answered:
Hei Nina, Du finner mål til alle størrelsene i en skisse på bunnen av oppskriften. God fornøyelse!
17.02.2022 - 06:51Gør det noget at man har læst diagrammet A1 fra den forkerte ende? Altså oppefra og ned, i forhold til garnmængde???
28.01.2022 - 20:51DROPS Design answered:
Hei Tanja. Ikke i forhold til garnmengden nei. mvh DROPS Design
31.01.2022 - 13:49Ik heb deze trui gebreid, Prachtig geworden en heel veel werk aan gehad. Met name om de draadjes netjes af te werken. Het garen pluist enorm dus ik heb het in de wasmachine op hele lage temperatuur gespoeld. Het is nu volkomen vervilt en een kindertrui geworden. Zo jammer. Geen idee wat ik dan had moeten doen om het pluizen te verminderen. Dit garen zal ik in ieder geval niet meer kopen.
25.01.2022 - 22:35Bonjour, Je tricote en rond et je change de couleur à chaque tour comme demandé dans le modèle, je tricote donc de la première à la dernière maille du rang d'une couleur puis recommence avec une autre. Comme je change de pelote à chaque début de rang la première et dernière maille ne sont pas relié comme habituellement pour un tricot avec aiguille circulaire. Comment faire ?
25.11.2021 - 19:05DROPS Design answered:
Bonjour Eva, quand on tricote des rayures en rond, on peut utiliser cette technique pour estomper la différence de changement de tours sur des rayures de quelques tours - pour les autres, on ne peut éviter un décalage. Bon tricot!
26.11.2021 - 07:30I opskriften står der: "Ærmerne strikkes rundt på lille rundpind / strømpepinde, ovenfra og ned. Strik 44-46-48-50-52-54 masker op rundt om ærmegabet i yderste led af yderste maske på rundpind 9 med mursten....." Hvad betyder 'mursten i denne forbindelse?? Mvh Mette
15.11.2021 - 13:55DROPS Design answered:
Hej Mette. Det är namnet på farve nr. 19 som det ska stickas med. Mvh DROPS Design
16.11.2021 - 08:47