
Popular categories
Looking for a yarn?


|
||||||||||
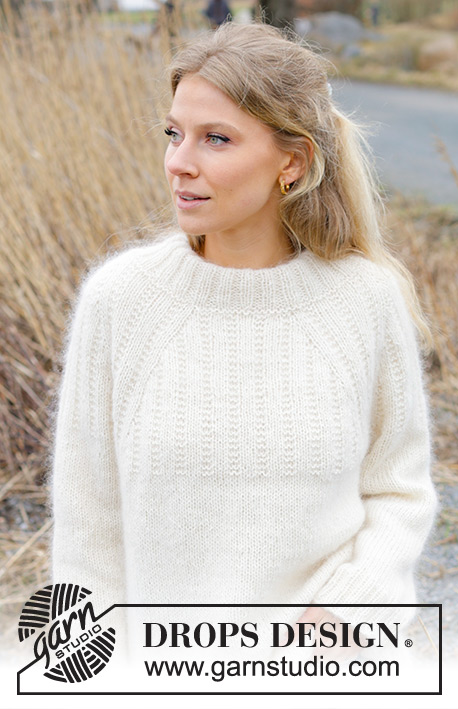
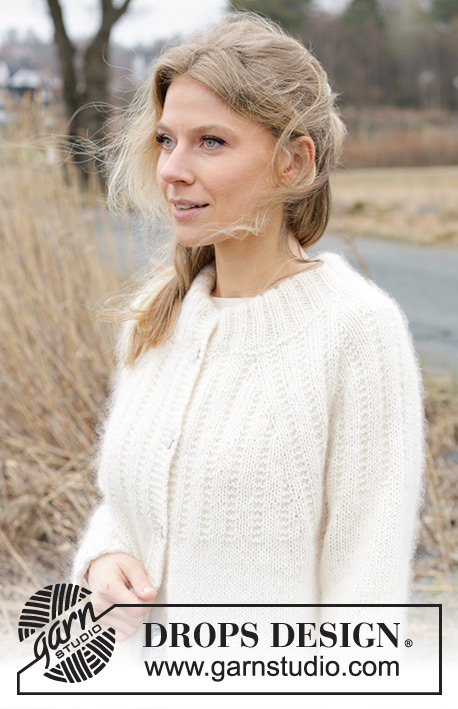
Winter Owl Cardigan |
||||||||||
 |
 |
|||||||||
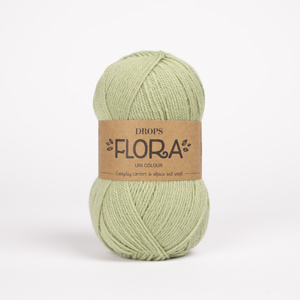
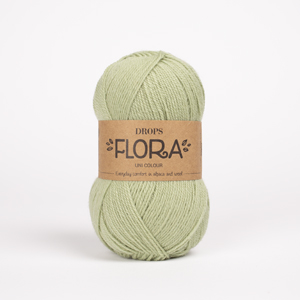
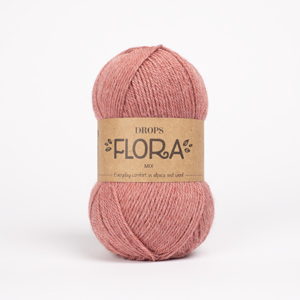
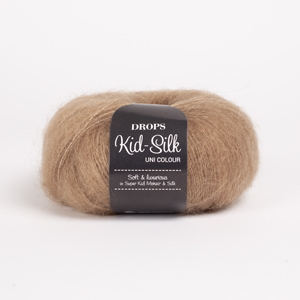
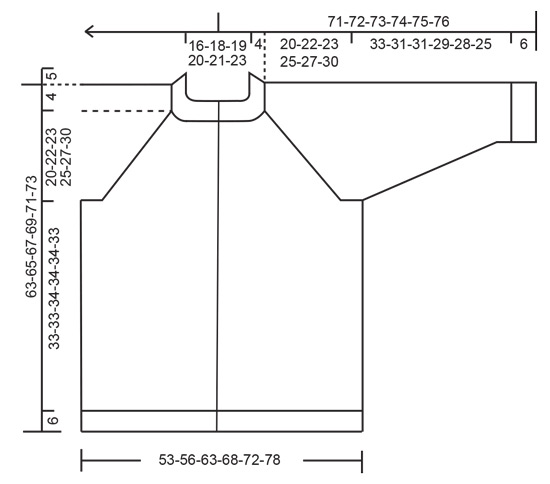
Knitted jacket in DROPS Flora and DROPS Kid-Silk. The piece is worked top down with double neck, raglan and relief-pattern. Sizes S - XXXL.
DROPS 243-2 |
||||||||||
|
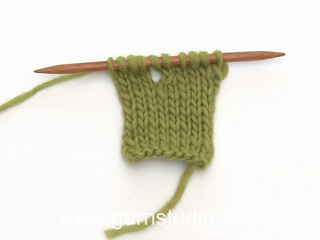
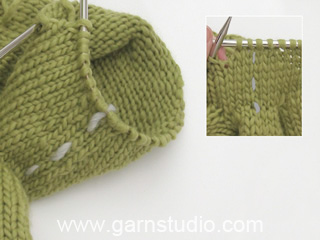
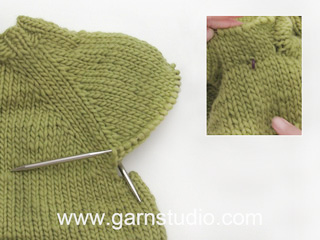
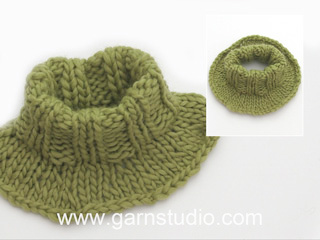
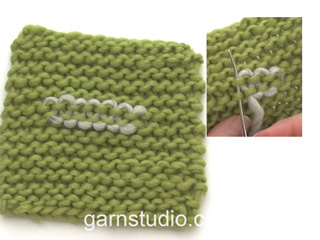
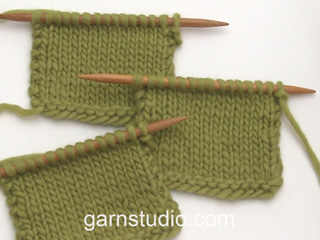
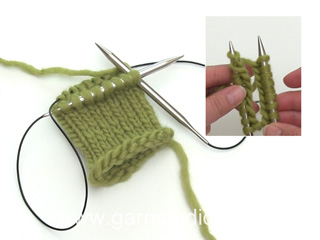
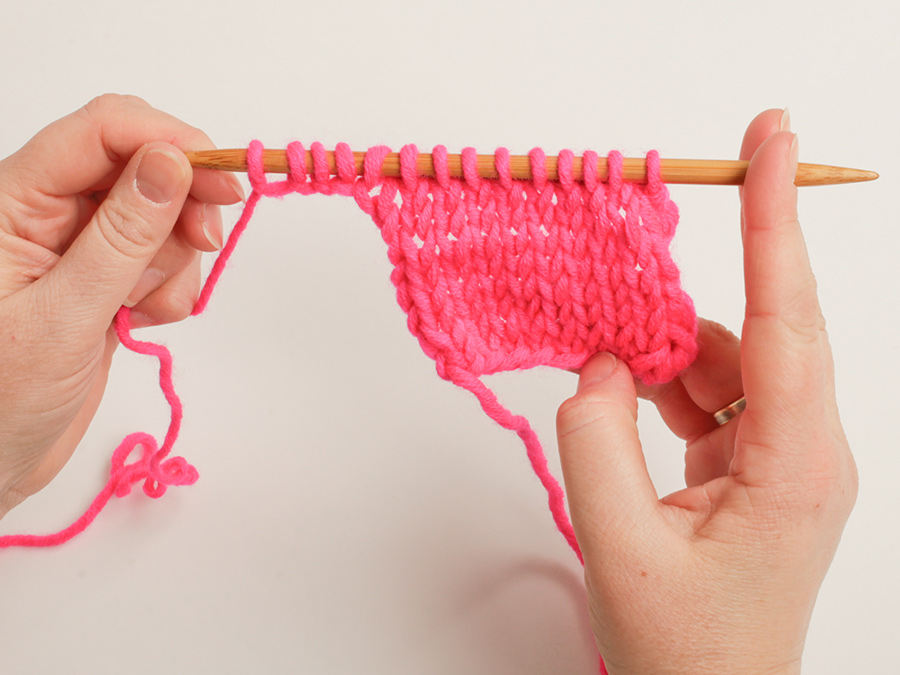
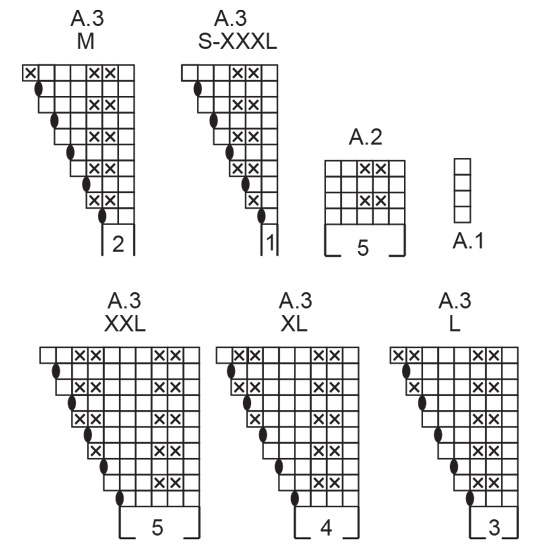
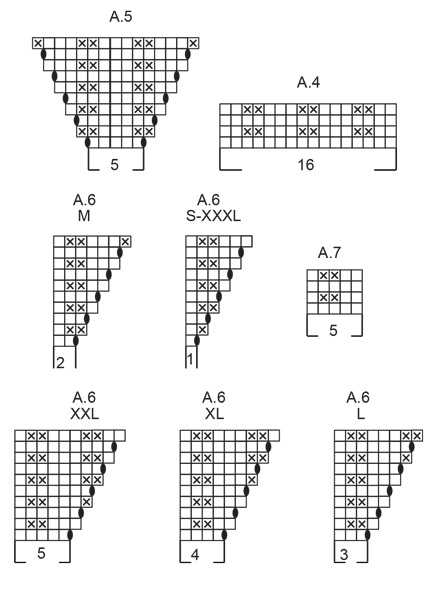
------------------------------------------------------- EXPLANATIONS FOR THE PATTERN: ------------------------------------------------------- GARTER STITCH (worked back and forth): Knit all rows. 1 ridge = knit 2 rows. PATTERN: See diagrams A.1 to A.7. Choose diagram for your size (applies to A.3 and A.6). The diagrams show all rows in the pattern from the right side. DECREASE TIP (for sleeves): Decrease 1 stitch on either side of the marker-thread as follows: Work until there are 3 stitches left before the marker-thread, slip 1 stitch knit-wise, knit 1 and pass the slipped stitch over the knitted stitch, knit 2 (marker-thread sits between these 2 stitches), knit 2 together (2 stitches decreased). BUTTONHOLES: Work buttonholes on the right band (when the garment is worn). Work from the right side when there are 3 stitches left on the row as follows: Make 1 yarn over, knit 2 together and knit 1. On the next row (wrong side), knit the yarn over to leave a hole. The first buttonhole is worked on the first row on the yoke. Then work the other 5-5-6-6-7-7 buttonholes with approx. 10-10-9-9-8-8½ cm between each one. ------------------------------------------------------- START THE PIECE HERE: ------------------------------------------------------- JACKET – SHORT OVERVIEW OF THE PIECE. The neck and yoke are worked back and forth with circular needle, from mid front and top down. The yoke is divided for body and sleeves and the body continued back and forth with circular needle. The sleeves are worked in the round with double pointed needles/short circular needle. DOUBLE NECK: Cast on 78-82-86-90-94-98 stitches with circular needle size 5.5 mm, 1 strand DROPS Flora and 2 strands DROPS Kid-Silk. Change to circular needle size 4.5 mm. Work rib (knit 2, purl 2) until there are 2 stitches left, knit 2. Work this rib back and forth for 5 cm. On the next 2 rows cast on 6 stitches at the end of each row – the new stitches are worked in GARTER STITCH – read description above (bands) = 90-94-98-102-106-110 stitches. Continue the rib with the bands in garter stitch until the neck measures 10 cm (neck edge will be folded down afterwards and will be 5 cm). Knit 1 row from the right side and increase 23 stitches (do not increase the bands) = = 113-117-121-125-129-133 stitches. Knit 1 row from the wrong side. Insert 1 marker after the band; the yoke is measured from here. YOKE: Change to circular needle size 5.5 mm and work from the right side as follows: 6 band stitches in garter stitch, A.1, A.2 (5-5-5-5-5-10 stitches), A.3 (left front piece). Work A.4, A.5 and A.4 (left sleeve), A.6, A.7 (11-11-11-11-11-21 stitches) and A.3 (back piece), A.4, A.5 and A.4 (right sleeve), A.6, A.7 (5-5-5-5-5-10 stitches), A.1 and 6 band stitches in garter stitch (right front piece) – on this row start to work the BUTTONHOLES – read description above. Continue the pattern and increase as shown in A.3, A.5 and A.6 (increase towards each A.4, and a total of 8 stitches increased on each row from the right side). The increased stitches are worked twisted into the pattern – no holes. The bands are worked in garter stitch throughout. REMEMBER THE KNITTING TENSION! Diagram A.1, A.2, A.4 and A.7 are repeated in height. When diagrams A.3, A.5 and A.6 are finished in height, continue to increase as before until you have increased a total of 17-19-23-25-27-30 times (including the increases in A.3, A.5 and A.6) = 249-269-305-325-345-373 stitches. Then continue with garter stitch and stocking stitch until the yoke measures 20-22-23-25-27-30 cm from the marker. Now divide for the body and sleeves from the right side as follows: 6 band stitches in garter stitch, 37-39-44-48-51-57 stitches in stocking stitch (left front piece), place the next 43-49-57-59-63-65 stitches on a thread (sleeve) cast on 8-10-10-10-10-8 stitches under the sleeve, work 76-80-90-98-104-116 stitches in stocking stitch (back piece), place the next 43-49-57-59-63-65 stitches on a thread (sleeve) cast on 8-10-10-10-10-8 stitches under the sleeve, work 38-40-45-49-52-58 stitches in stocking stitch and 6 band stitches in garter stitch. The body and sleeves are finished separately. BODY: = 179-191-211-227-239-259 stitches. Continue with stocking stitch and 6 band stitches in garter stitch on each side until the body measures 33-33-34-34-34-33 cm from the division. Knit 1 row from the right side and increase 23-27-27-31-31-35 stitches evenly spaced (do not increase over the bands) = 202-218-238-258-270-294 stitches. Work back from the wrong side, then work rib as follows from the right side: 6 band stitches in garter stitch, * knit 2, purl 2 *, work from *-* until there are 8 stitches left, knit 2 and 6 band stitches in garter stitch. Continue this rib for 6 cm. Cast off with knit over knit and purl over purl. The piece measures approx. 63-65-67-69-71-73 cm from the neck. SLEEVES: Place the 43-49-57-59-63-65 stitches from the thread on the one side of the piece on short circular needle/double pointed needles size 5.5 mm and knit up 1 stitch in each of the 8-10-10-10-10-8 stitches cast on under the sleeve = 51-59-67-69-73-73 stitches. Insert a marker-thread in the middle of the new stitches under the sleeve. Continue stocking stitch in the round. When the sleeve measures 3 cm, decrease 1 stitch on each side of the marker-thread – read DECREASE TIP. Decrease like this every 6-4-2½-2-1½-1½ cm a total of 5-7-11-11-13-12 times = 41-45-45-47-47-49 stitches. When the sleeve measures 33-31-31-29-28-25 cm, knit 1 round and increase 7-7-7-9-9-11 stitches evenly spaced = 48-52-52-56-56-60 stitches. Change to double pointed needles size 4.5 mm and work rib (knit 2, purl 2) for 6 cm. Cast off with knit over knit and purl over purl. The sleeve measures approx. 39-37-37-35-34-31 cm from the division. Work the other sleeve in the same way. ASSEMBLY: Sew the buttons onto the left band. Fold the neck double to the inside and sew down. To avoid the neck being tight and rolling outwards, it is important that the seam is elastic. Sew the openings on the bands with small stitches. |
||||||||||
Diagram explanations |
||||||||||
|
||||||||||
|
||||||||||
|
||||||||||
|
||||||||||
|
Have you made this or any other of our designs? Tag your pictures in social media with #dropsdesign so we can see them! Do you need help with this pattern?You'll find tutorial videos, a Comments/Questions area and more by visiting the pattern on garnstudio.com. © 1982-2024 DROPS Design A/S. We reserve all rights. This document, including all its sub-sections, has copyrights. Read more about what you can do with our patterns at the bottom of each pattern on our site. |
||||||||||


With over 40 years in knitting and crochet design, DROPS Design offers one of the most extensive collections of free patterns on the internet - translated to 17 languages. As of today we count 304 catalogues and 11422 patterns - 11422 of which are translated into English (UK/cm).
We work hard to bring you the best knitting and crochet have to offer, inspiration and advice as well as great quality yarns at incredible prices! Would you like to use our patterns for other than personal use? You can read what you are allowed to do in the Copyright text at the bottom of all our patterns. Happy crafting!
Comments / Questions (25)
Pour ce modèle il est indiqué au début, pour l'empiècement, de tricoter A1, A2 (5-5-5-5-5-10 mailles), A3 Quelle est la signification des mailles entre parenthèses ? Sont-elles tricotées en plus (en fonction de la taille) entre les diagrammes A2 et A3 ? Merci d'avance pour votre réponse.
07.12.2023 - 17:10DROPS Design answered:
Bonjour Mme Thery, c'est effectivement le nombre de mailles pour chaque taille, autrement dit: en taille XXXL on tricotera ici 10 mailles de A.2, et seulement 5 dans les autres tailles. Bon tricot!
08.12.2023 - 08:18I would like to find a raglan sweater or cardigan that is knit in flat pieces. I do not want to knit in the round. Can you tell me what to enter in the search field to find patterns knit in flat pieces and then seamed? Thank you so much.
19.11.2023 - 14:22DROPS Design answered:
Dear Ramona, this pattern is worked back and forth on circular needle to get enough room for all stitches, this means you can use here straight needles for yoke (adjust the sleeves thanks to this lesson). You can find more using our search engine, but we have no tags still for this kind of projects as you can adjust to your own way to work. Happy knitting!
20.11.2023 - 10:44Bonjour, je viens de finir les diagrammes A3,A5 et A6, en taille L je suis donc a 163 m. Le patron dit de continuer à augmenter comme avant 23 fois au total (y compris augmentation de A3, A6 et A5) pour arriver à 307 m ! Je ne comprends pas comment augmenter ? Merci d’avance Cordialement Andrea
17.11.2023 - 12:21DROPS Design answered:
Bonjour Mme Le Tertre, augmentez simplement tout comme vous l'avez fait auparavant: avant et après chaque A.4 pour augmenter 8 mailles tous les rangs sur l'endroit (tous les 2 rangs); vous aviez 123 mailles avant de commencer les diagrammes + 8 mailles augmentées pour le raglan x 23 fois = 307 mailles. Bon tricot!
17.11.2023 - 14:57Jeg kan ikke få maskerne til at passe i første p efter hals strikke xxxl
02.11.2023 - 13:03DROPS Design answered:
Hei Charlotte. Hva er det som ikke stemmer? Bruk maskemarkører mellom hvert diagram, da har du en bedre oversikt. I str. XXXL skal det være 135 masker etter halskanten. Venstre forstykket: 6 stolpemasker + A.1 (1 maske) + A.2 (over 10 masker) + A.3 (1 maske) = 18 masker + 1 kast. Venstre erme: A.4 (16 masker), A.5 (5 masker) og A.4 (16 masker) = 37 masker + 2 kast. Bakstykket: A.6 (2 masker) + A.7 (over 21 masker) + A.3 (1 maske) = 24 masker + 2 kast. Høyre erme: A.4 (16 masker), A.5 (5 masker) og A.4 (16 masker) = 37 masker + 2 kast. Høyre forstykke: A.6 (2 masker) + A.7 (10 masker) + A.1 (1 maske) + 6 stolpemasker = 135 masker. mvh DROPS Design
06.11.2023 - 13:24Liebes Drops Tem, Ich stricke anscheinend eher eng und aus diesem Grund muss ich immer grössere Nadeln nehmen. Nun habe ich beim Strickmuster für dieses Model Nadelgrösse 8 anstatg 5.5 nehmen müssen um bei der Maschenprobe auf 10cm Breite zu kommen. Heisst das nun, dass ich dadurch auch mehr Wolle bestellen muss? Liebe Grüsse Anita
29.10.2023 - 12:31DROPS Design answered:
Liebe Anita, beachten Sie, daß Sie richtig mit 4 Fäden (2 Fäden Kid-Silk + 1 Faden Flora) stricken - sollte Ihre Maschenprobe dann in der Breite sowie in der Höhe richtig sein, dann brauchen Sie nicht mehr Wolle - hier lesen Sie mehr. Viel Spaß beim stricken!
30.10.2023 - 16:26Garn für mehr als 100 Euro bestellt, da ich diese Jacke für mich und eine mir sehr wichtige Person stricken möchte! Ab Reihe 10 des Mustersatzes ist es leider nicht mehr logisch für mich. Die Probleme beginnen schon mit den 11 Maschen für A7: Was genau soll ich da stricken? Ich nehme an, dass es l-r-r-l-l-l-r-r-l-l-l ist. Aber ich komme ab Reihe 11 insgesamt nicht mehr weiter! Warum so kompliziert? Ich bin eine erfahrene Strickerin, aber mit dieser Anleitung komme ich nicht zurecht! Danke
20.10.2023 - 19:54DROPS Design answered:
Liebe Tanja, wenn man A.7 über 11 Maschen stricken soll, wird es so gestrickt: wiederholen Sie die 5 Maschen A.7 2 Mal (= 10 Maschen) dann stricken Sie die 1. Masche A.7 (= 11 Maschen), so wird das Muster symmetrisch. Für die andere Diagramme sollen Sie die Zunahmen im Muster wie zuvor stricken, dh abwechslungsweise 4 Maschen glatt rechts, 2 Maschen Krausrechts (mit 2 M glatt rechts anfangen und 2 M glatt rechts enden wird das Muster symmetrisch). Viel Spaß beim stricken!
23.10.2023 - 10:30Leider verstehe ich in der Anleitung die Aufteilung der Passe überhaupt nicht.
10.10.2023 - 23:14DROPS Design answered:
Liebe Claudia, in dieser Lektion zeigen wir, wie man einen Pullover von oben nach unten strickt; ab 9. Bild zeigen wir, wie die Maschen für die Ärmel stillgelegt werden und wie die neuen Maschen unter die Ärmel angeschlagen werden - folgen Sie die Maschenanzahl für Ihre Größe (nicht wie bei der Lektion). Viel Spaß beim stricken!
11.10.2023 - 08:35Jatkona edelliseen kysymykseeni. Miten koon XXL 131s täsmää annettuihin kuvioihin ensimmäisellä kuviokerroksella? Ohje on sekava vaikka tähän on monta päivää käyttänyt, että ymmärtäisi ja pääsisi alkuun :(
16.09.2023 - 20:06Ensimmäisellä kuviokerroksella koossa XXL pitäisi olla 16s mutta ohjeen mukaan saan vain 11s. A6+A7+A3=11s :( Miten ratkaisen ongelman?
12.09.2023 - 18:00Pour XL : nbr de m au premier rang de l'empiècement selon diagramme= 109 m +12 m de bordures (123m au total) pour XL 127 m après aug des 25 m après col. que faire des 4 mailles de trop ? Merci de me répondre car je me calcule recalcule....et je veux faire ce beau gilet
08.09.2023 - 21:03DROPS Design answered:
Bonjour Mme Gliozzi, en taille L, vous aurez bien 123 mailles. mais en taille XL vous devez avoir 127mailles que vous allez tricoter ainsi: 6 m point mousse, A.1 (=1 m), A.2(= 5m ), A.3 (=4 m) pour le devant gauche, puis A.4 (16 m), A.5 (5 m), A.4 (16 m) pour la manche, puis: A.6 (5 m), A.7 (11 m) et A.3 (4 m) pour le dos, A.4 (16 m), A.5 (5 m), A.4 (16 m) pour l'autre manche et A.6 (5 m), A.7 (5 m), A.1 (1 m) et 6 m point mousse soit pour le devant droit, soit: 6+1+5+4+16+5+16+5+11+4+16+5+16+5+5+1+6= 127 mailles. Bon tricot!
11.09.2023 - 08:27